Instructions for reinstalling Windows 8.1 on the Surface Pro tablet

If you upgrade your Surface Pro tablet to Windows 10 preview and the operating system fails, or simply you want to completely reinstall everything. In the article below, Network Administrator will guide you how to reinstall Windows operating system on the Surface Pro tablet using USB Recovery.

Note: If there is any important data on the tablet you want to keep, then you will have to back up this data. Because the installation of the operating system will wipe all data.

Instructions for reinstalling Windows 8.1 on the Surface Pro tablet Picture 1

1. How to create a USB Recovery drive for the Surface tablet?

To create a recovery USB drive for the Surface tablet, first visit the Microsoft homepage and download Recovery Image for USB. You will have to enter the Serial Number on the back of the Surface tablet.

Instructions for reinstalling Windows 8.1 on the Surface Pro tablet Picture 2

During the download of Recovery Image, plug in your USB drive and format the USB drive to FAT32 (right-click the USB drive name then select Format).

Instructions for reinstalling Windows 8.1 on the Surface Pro tablet Picture 3

After downloading the Recovery Image, the next step is to extract the Zip file you just downloaded.

Instructions for reinstalling Windows 8.1 on the Surface Pro tablet Picture 4

Copy all the items in the folder you extracted from the Zip file to the USB drive.

Instructions for reinstalling Windows 8.1 on the Surface Pro tablet Picture 5

2. Use USB Recovery to downgrade the Surface tablet to Windows 8.1

After having a USB Recovery drive, proceed to plug this USB drive into the USB port on your Surface tablet computer.

Instructions for reinstalling Windows 8.1 on the Surface Pro tablet Picture 6

Press and hold the Volume down button + Power button , then continue to press and hold the Volume down button until the Surface logo appears.

Instructions for reinstalling Windows 8.1 on the Surface Pro tablet Picture 7

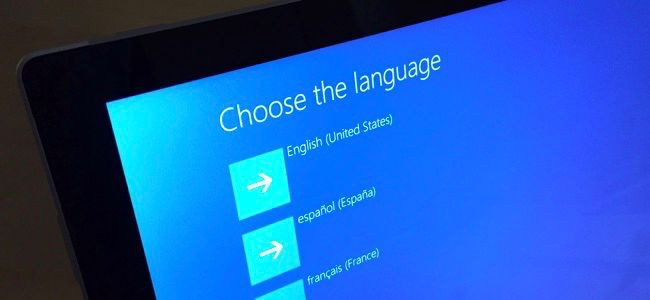
You will now be prompted to select a language before opening the Recovery menu.Choose any language you want.

Instructions for reinstalling Windows 8.1 on the Surface Pro tablet Picture 8

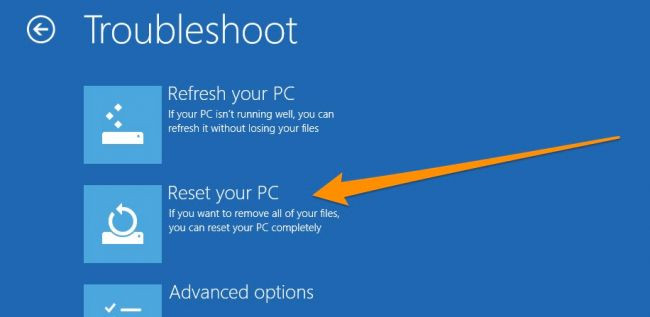
In the Choose an options window, select Troubleshooot .

Instructions for reinstalling Windows 8.1 on the Surface Pro tablet Picture 9

Next on the Troubleshoot window, select Reset your PC .

Instructions for reinstalling Windows 8.1 on the Surface Pro tablet Picture 10

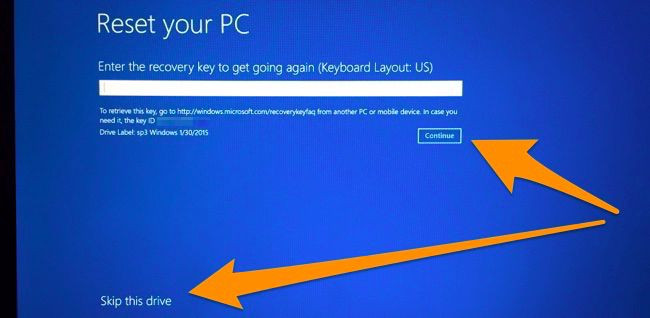
On the Reset your PC screen, follow the steps below:

  1. Click Continue, even if the Continue button is not activated.
  2. When the link Skip this drive appears, click the link .

Instructions for reinstalling Windows 8.1 on the Surface Pro tablet Picture 11

You will now be asked to select the "destination" operating system. Your task is to select an operating system.

Instructions for reinstalling Windows 8.1 on the Surface Pro tablet Picture 12

You will be notified if you want to repartition the drives. If you want to completely clean the old operating system or want to change the partition, select Yes .

Instructions for reinstalling Windows 8.1 on the Surface Pro tablet Picture 13

Note: You will have to back up everything before proceeding with the process because all data will be wiped clean.

After booting, you will probably receive a message to reset TMP . Just press F12 (or you will have to press and hold the Fn key simultaneously).

Instructions for reinstalling Windows 8.1 on the Surface Pro tablet Picture 14

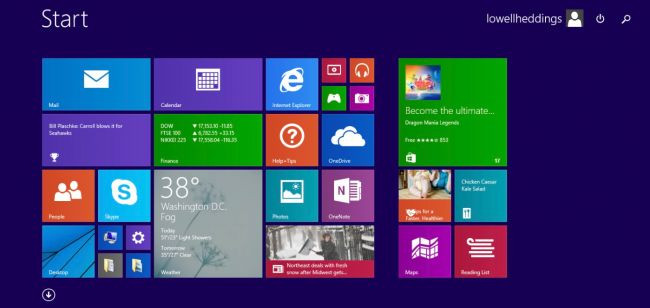
At the end of the process, everything will be "cleaned up" just like in the beginning.

Instructions for reinstalling Windows 8.1 on the Surface Pro tablet Picture 15

Refer to some of the following articles:

  1. Tutorial 4 simple steps to upgrade Windows XP to Windows 7
  1. This is how to backup, restore Windows 7/8 / 8.1 and Windows Vista licenses
  1. Here are some tips to help your old Windows 7 computer run as fast as it was when you first bought it

Good luck!

4.5 ★ | 2 Vote

May be interested

  • How to add Control Panel to Power User Menu (Windows + X) on Windows 10Photo of How to add Control Panel to Power User Menu (Windows + X) on Windows 10
    power user menu, also known as win + x menu, was first introduced on windows 8 version, allowing users to easily access system tools such as disk management, control panel and command prompt.
  • Fix the Unmountable Boot Volume error on Windows 10Photo of Fix the Unmountable Boot Volume error on Windows 10
    unmountable boot volume error occurs because some installation software conflicts with the operating system or because the computer suddenly shuts down, etc. in the article below, network administrator will show you some ways to fix this error.
  • Do you want to see the details of how much apps use the battery on Windows 10?Photo of Do you want to see the details of how much apps use the battery on Windows 10?
    windows 10 allows users to create a specific report showing the battery usage details on a computer without having to install any 3rd party application. to do this, all you need is to use the built-in powercfg tool on the system.
  • Privacy control on Windows 10 computers with the following 5 tipsPhoto of Privacy control on Windows 10 computers with the following 5 tips
    each microsoft account has a promotional id that allows microsoft to collect information about you and provide ads based on your interests. if you sign in to windows 10 with a microsoft account, your personal ads will 'follow you', accessing your computer - you'll see these ads on the app and possibly on the operating system (such as on the start menu).
  • Correct the 'The default gateway is not available' error on Windows 10Photo of Correct the 'The default gateway is not available' error on Windows 10
    after upgrading to windows 10 and using it, many users reflect that they often encounter the error 'the default gateway is not available' and cannot access the internet. as for the cause of the error, there are many reasons. in the following article, network administrator will introduce and guide you to some solutions to overcome this error.
  • Fix the Webcam Error on Windows 10 Anniversary Update is suspendedPhoto of Fix the Webcam Error on Windows 10 Anniversary Update is suspended
    on windows 10 anniversary update, microsoft only allows usb webcam to use the yuy2 encoding code and does not allow the use of mjpeg codes and h264 streams to compress videos. this means that when you perform any action, simply activating hd video on skype will cause the webcam to hang, freeze ....