Table of Contents
Instructions for Creating Double Exposure Images in Photoshop covers the essential facts behind the topic, including what changed, why it mattered, and how it affected users.
This tutorial will show you how to create your own double exposure image. This article will use Photoshop, but you can do the same in any other image editor. Just use the same tools and shortcuts.

Step One: Choose Your Image
The images you choose at the beginning can help to successfully implement or fail this technique. If the images you choose are too complex, making things look good is impossible.
For a portrait photo, you should choose something simple, put on a white background and then convert to a black and white photo. Chris Marchant's self-portrait is a perfect example. That is the image the article will use.

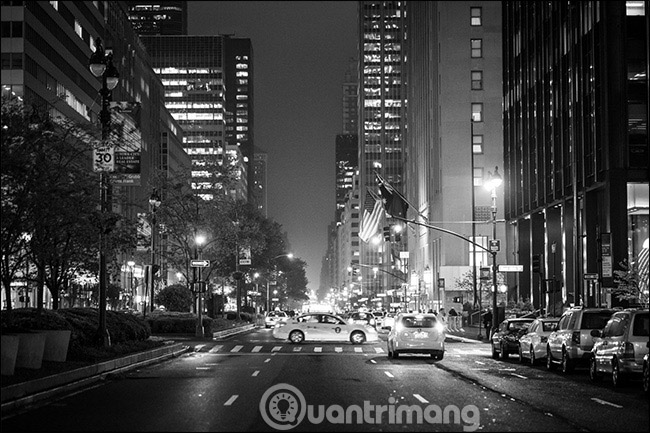
For landscape shots, you can be much more flexible. Just choose something to complement the portrait photo. Black and white images may be a little easier, but color images will still work. The article will use Luca Sartoni's photo of New York City night view.

Step Two: Mask Portrait Photos
Open portraits in Photoshop or the image editor of your choice. The first thing you need to do is create a good layer mask.
Because the article is working with portraits on white background, it is relatively easy to delete Photoshop's automated tools. Duplicate the background into a new layer (shortcut is Control + J, or Command + J on Mac) and select Quick Selection Tool (you can press W on the keyboard).
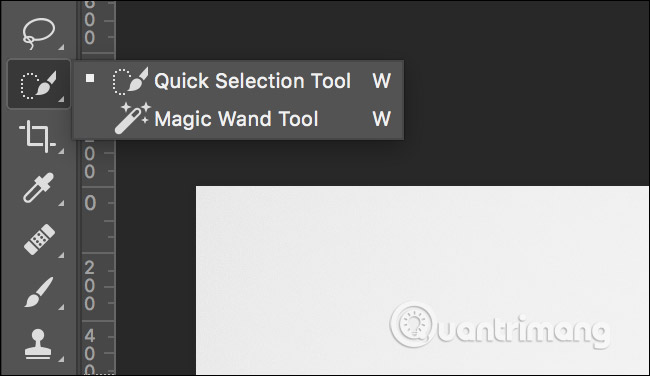
Drag the cursor around the white areas of the background and Photoshop will automatically select everything.
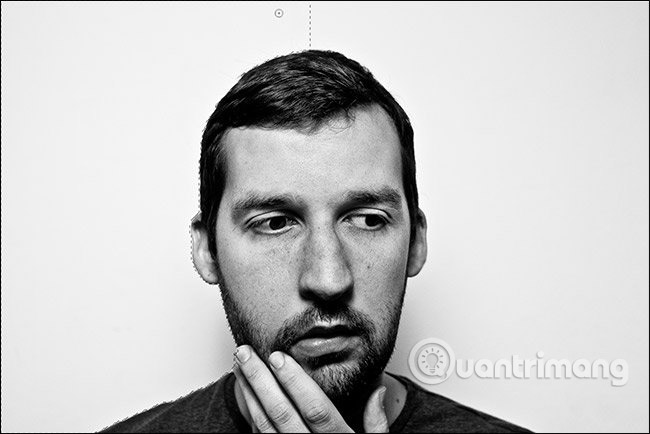
If you want to skip some areas, hold down the Alt or Option keys and drag over the areas you don't want to select. If you want to add more areas, hold down the Shift key.
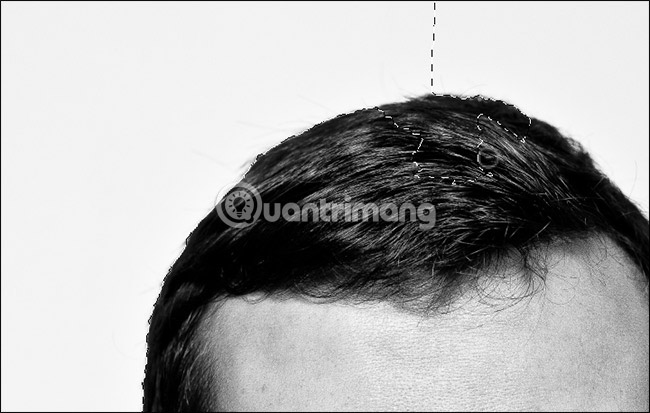
Once you've selected everything, go to Select> Inverse or use the shortcut Control + Shift + I ( Command + Shift + I on the Mac) to switch. Next, go to Select> Modify> Smooth and set the value to about 5 pixels.
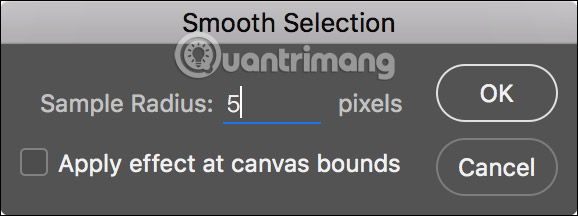
This will be useful for any rough edge.
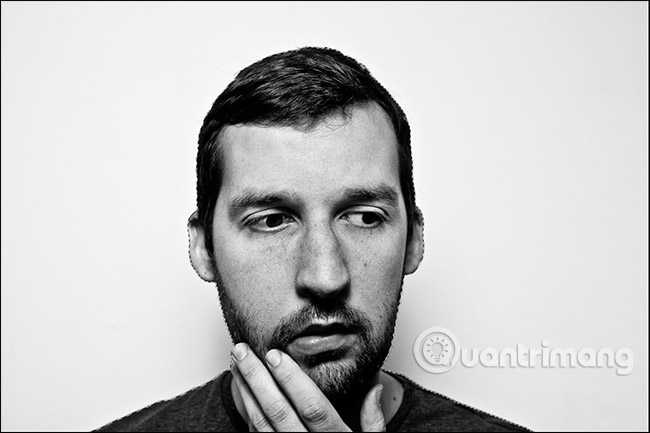
Finally, click the New mask layer button to turn the selection into a layer mask.
Step Three: Add Scenery
Go to File> Place Embedded, select the landscape image you will use and click Embed. This will load the landscape image into the same place as the portrait picture above. Press Enter or Return to set it.
Hold down Control ( Command on a Mac) and click on the mask on the portrait layer.
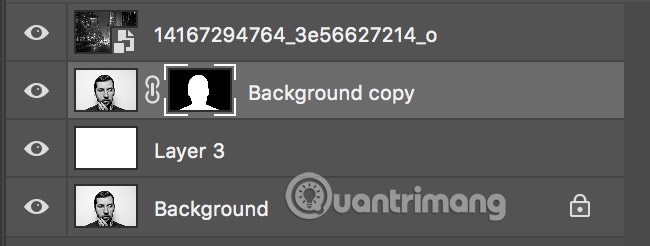
This will load it as an option.
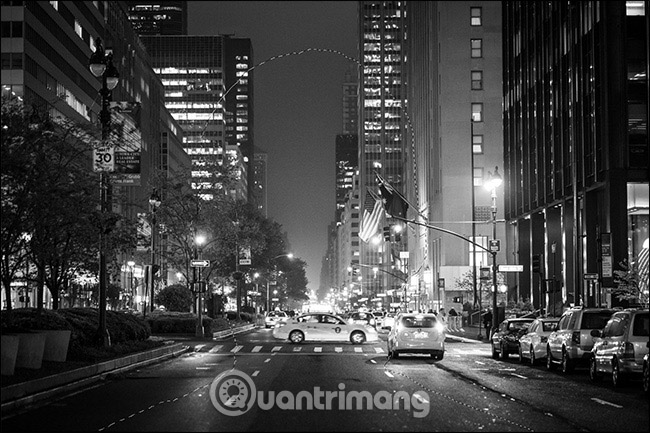
Click the New layer mask button to mask the landscape image into the shadow of the portrait.

Now things are starting to form.

Step Four: Edit the Background
Before continuing, go back and arrange the background. Although it is pure white in the original image, there will be some dark spots from the shadow of the landscape image. Of course we don't want them to appear in the final image.
Create a new layer with the shortcut Control + Shift + N or Command + Shift + N. Fill it with white by going to Edit> Fill and selecting White.

Drag this new layer below the copy background layer, but it must be above the original background layer.
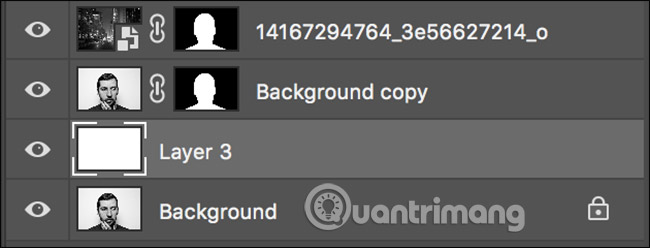
While moving layers, reposition the portrait layer to the top. Drag the copy background layer above the landscape layer because it needs to be in the top position in the next step.
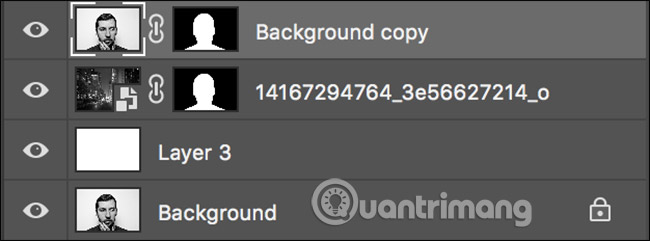
Now uncomfortable dark spots on the background have disappeared and it's time to create the final effect.
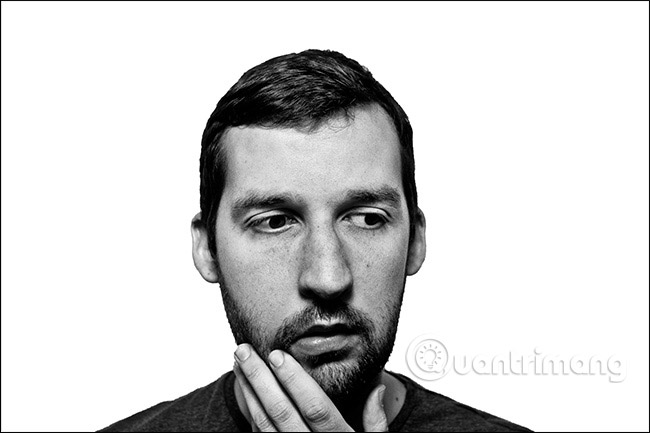
Step 5: Create a Double Exposure Effect
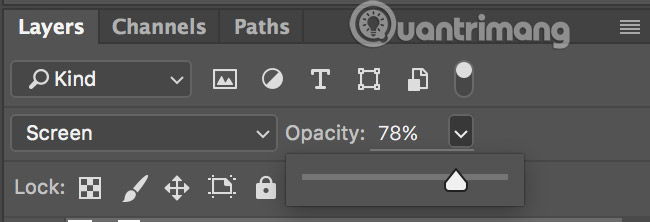
Select the copy background layer and from the Blend Mode menu (by default set to Normal ), choose Multiply or Screen.

- With Multiply , the portrait layer will darken everything in the landscape layer.

- With Screen , the portrait layer will brighten everything in the landscape layer.

Choosing which option will depend on your two images. Many people think that Screen works better so that is the option that the article will use. Try both options and make your own decisions.
Dual exposure effects have now been implemented quite a lot. It's just a matter of tweaking everything to create the final image.
Step 6: Complete Everything
None of these steps is really necessary. Some steps will benefit your image, while others will not. Try and pick out the ones you feel best for your image.
The first thing to consider is repositioning the landscape. Since it is already available, just place it wherever Photoshop wants. Select the Move tool (shortcut V ) and click the small link icon between the landscape layer and the mask. This will unlink the layer and mask so you can manipulate them independently.
Select the landscape layer and move it around the position and see where it appears to be the best place. Pay special attention to the lips and eyes in the portrait layer because they are what most people will look at first. The position below will fit in this example.
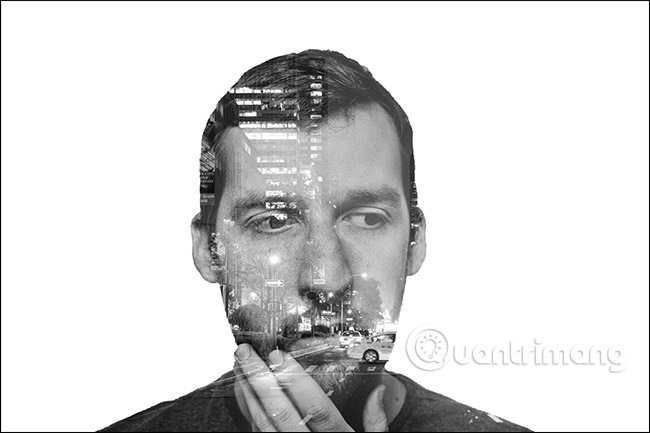
Second, try different opacity of the portrait layer.
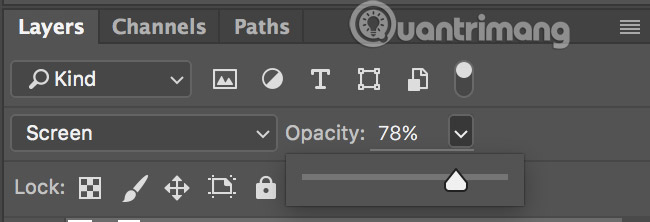
With lower opacity, you can have a more pleasant effect. Many opinions suggest that the image looks better at an opacity of 78%.
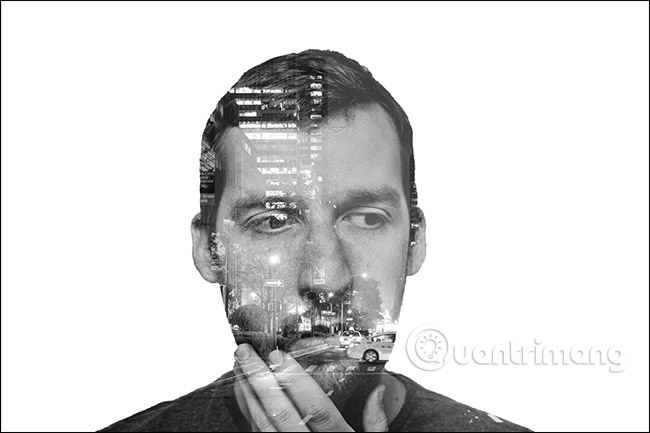
When done this step, the dual effect will be completed. You can save your image now or continue experimenting with it. It's an interesting effect and you can create some cool stuff, if you're willing to experiment.
Good luck!
- How to combine photos in Photoshop from 2 different images
- How to sharpen images in Photoshop in 2 ways
- 10 common problems in Photoshop and basic remedies
FAQ
What does Instructions for Creating Double Exposure Images in Photoshop explain?
Instructions for Creating Double Exposure Images in Photoshop covers the essential facts behind the topic, including what changed, why it mattered, and how it affected users.
Who is most affected by Double exposure image?
This tutorial will show you how to create your own double exposure image.
What are the key takeaways from this topic?
This article will use Photoshop, but you can do the same in any other image editor.
Related Articles
 6 Mobile Apps to Help Create Double Exposure Effects8 minutes read
 How to Create a Double Exposure Effect Using Snapseed5 minutes read
 How to Use Photoshop CS6 (Part 3) - Create Manipulation Artwork with15 minutes read
 Instructions for Creating Animated GIF Images in Adobe Photoshop12 minutes read
 minutes read
 What Is Exposure and Exposure Triangle in Photography?11 minutes read
Reader Comments 0
Sign in with email or Google to join the discussion.