Table of Contents
Overview
This guide covers instructions for clearing Microsoft edge browser cache in clear, practical terms. It covers the key concepts, recommended steps, common limitations, and useful checks so you can make a better-informed decision.
When browsing the web on Microsoft Edge, users will encounter some problems such as slow web browsing, unable to load web pages,. One of the ways to fix browser errors is to delete the Edge browser cache as well as other junk data that slows down the browser. This guide explains in detail on how to delete the Microsoft Edge browser cache.
Instructions for clearing cache on Edge computer
Step 1:
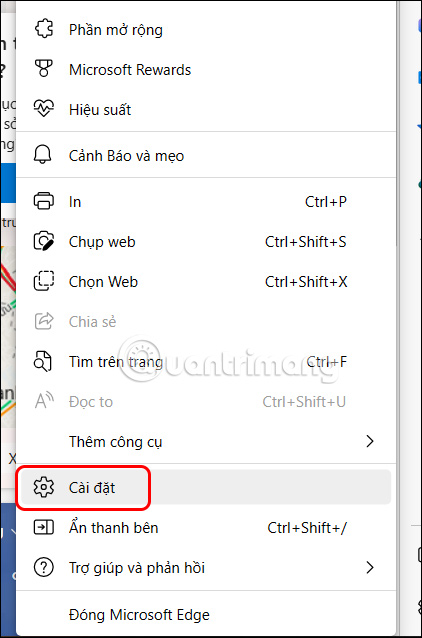
To clear cache on Edge browser, users click on the 3-dot icon on the browser and select Settings in the displayed list.
Step 2:
Switch to the new interface, users click on Privacy, search and services.

Then you look to the right, find the Delete browsing data item and click on Select content to delete.

Step 3:
A dialog box appears, you will select the time you want to delete the cache, then scroll down and click on the data we want to delete. By default, the cache data has been selected to delete data, which is the item Images and files stored in the cache.
Click on the Delete Now button.

How to clear cache on Edge automatically
In addition to manually clearing the Microsoft Edge browser cache, users can clear the cache automatically with the settings on the browser. This setting will clear web browser data, or cache data if you choose completely automatically right after we close the browser. You follow This guide to clear the cache on Edge.

How to clear Edge browser cache on phone
Step 1:
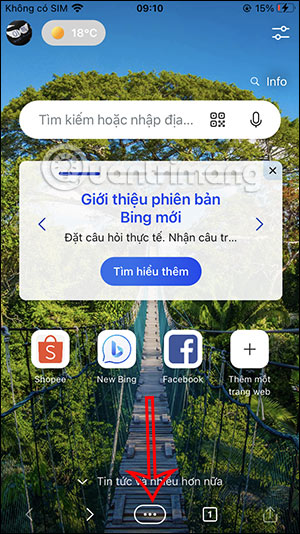
On the Edge browser interface, click on the 3-dot icon and select Settings in the displayed list.

Step 2:
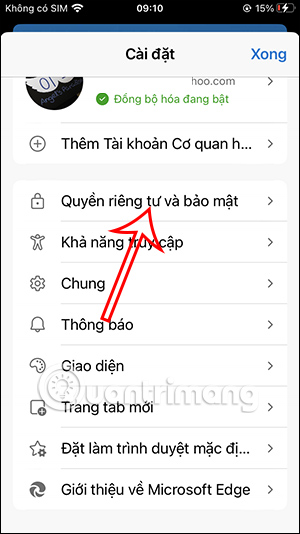
Switch to the new interface, the user clicks on Privacy and Security. Next, we click on Clear browsing data.

Step 3:
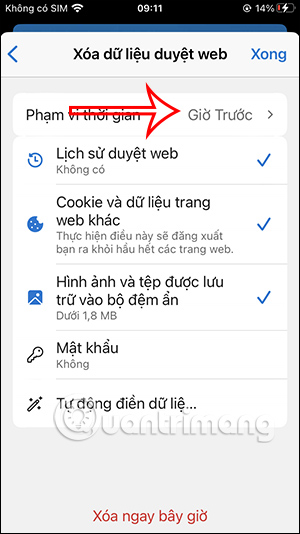
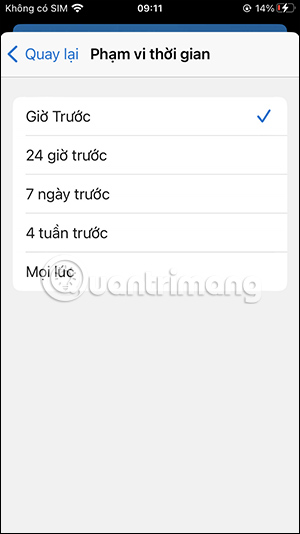
As a result, we also see the browsing data to delete options. First, you select the time to delete, then select the cache data to delete and then click Delete now.
How to automatically clear cache on Edge Android
Step 1:
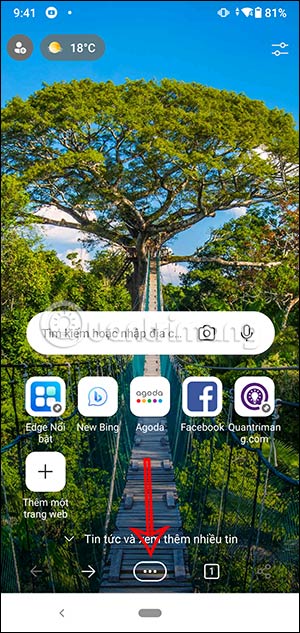
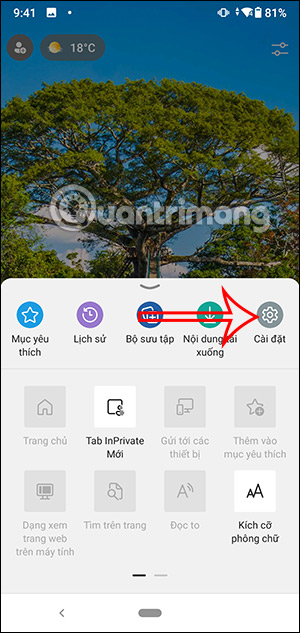
On the Edge Android browser, users click on the 3-dot icon and then click on Settings to adjust.
Step 2:
At this point, the user will continue to click on Privacy and Security, then continue to click on Clear browsing data.

Step 3:
Next, you will click on Clear browsing data when exiting. Here, users will activate this mode to be able to automatically clear the Edge browser cache after closing the browser.


Key Takeaways
Use the guidance above as a practical reference for instructions for clearing Microsoft edge browser cache. Check compatibility, follow the steps carefully, and verify important details with official documentation when software, security, accounts, health, or purchases are involved.
FAQ
What is the main point of this article?
This article explains instructions for clearing Microsoft edge browser cache, including the central facts, context, practical implications, and details needed to understand the topic.
Why does this topic matter?
It may affect performance, cost, safety, convenience, purchasing decisions, or how people understand a broader development.
Could the information change over time?
Yes. Product details, software features, prices, policies, codes, and news developments can change, so verify time-sensitive information with official sources.






Reader Comments 0
Sign in with email or Google to join the discussion.