How to use Track Changes in Word
When you share a text document, it is difficult to see the change if you use it with your normal eyes to control the change in your text. The following article helps you control the change in text by using Track Changes.
First session, general document editor
Suppose you are a text recipient from a colleague and a colleague is waiting for your contribution.
Step 1: Open a shared document, activate Tracks Changes by going to Review -> Tracking -> click Track Changes:
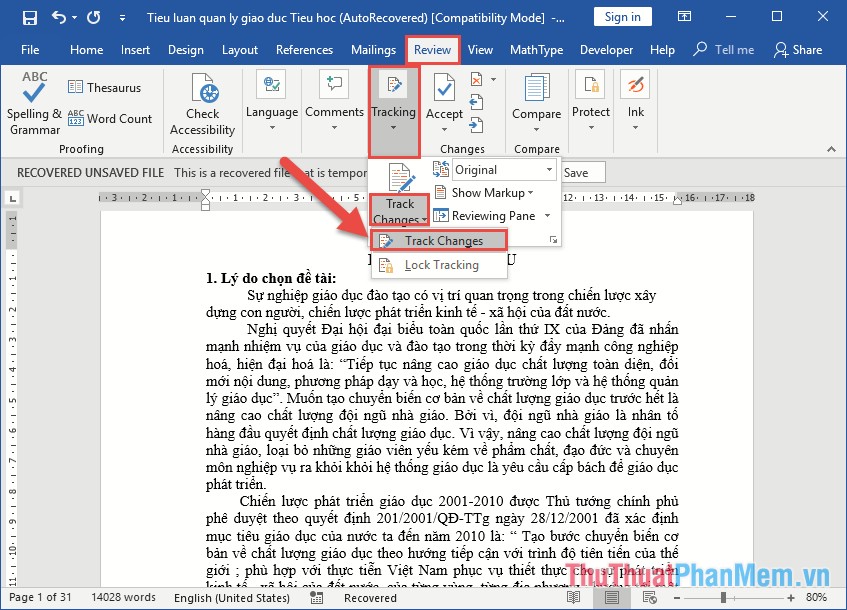
When Track Changes is enabled it is highlighted as shown:

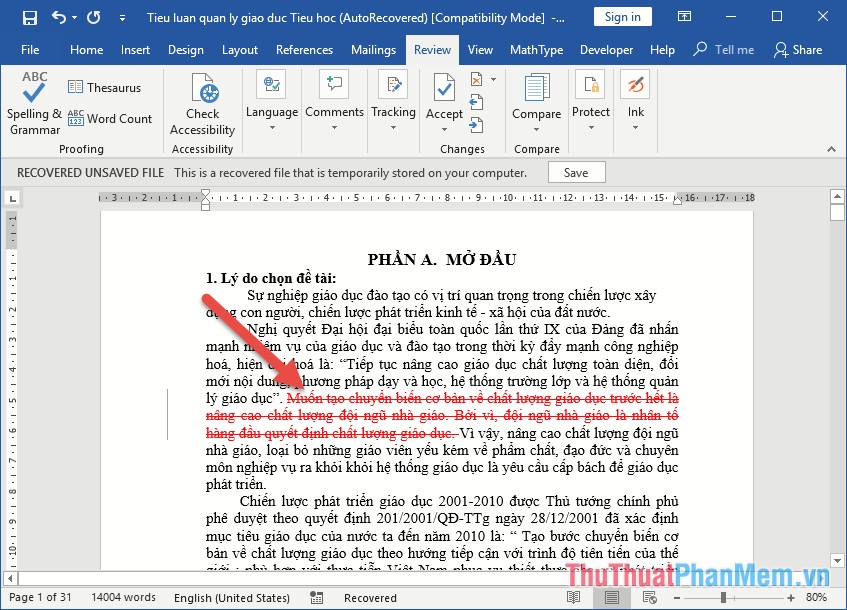
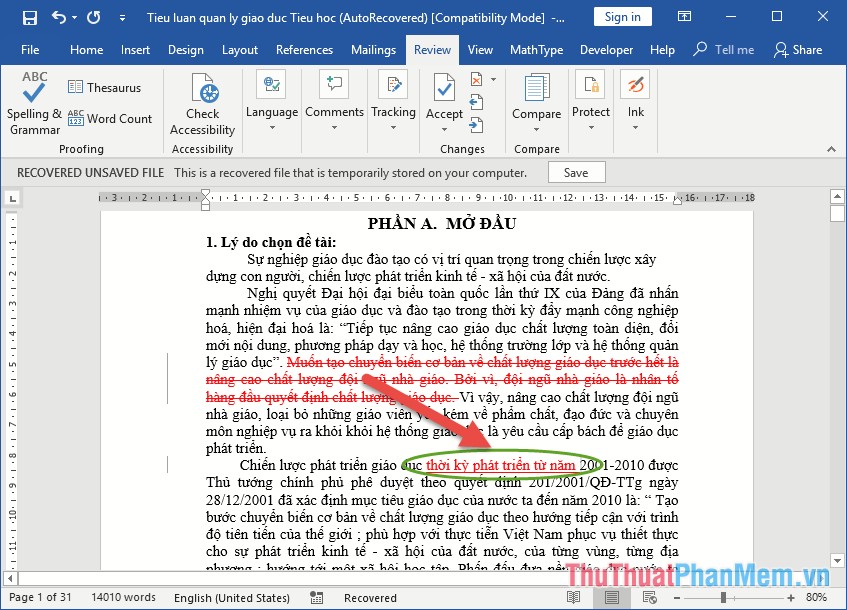
Step 2: After activating Track Change mode, users can edit the content. For example, if you want to delete a paragraph in a shared document -> the content will not be deleted but will be highlighted in red and the text will be crossed out as shown:
At the same time, the left margin automatically creates a red dash to mark the edited position, click on this mark to display the text that has been edited or hide it as you like, noting your edit. created on the right of the document:
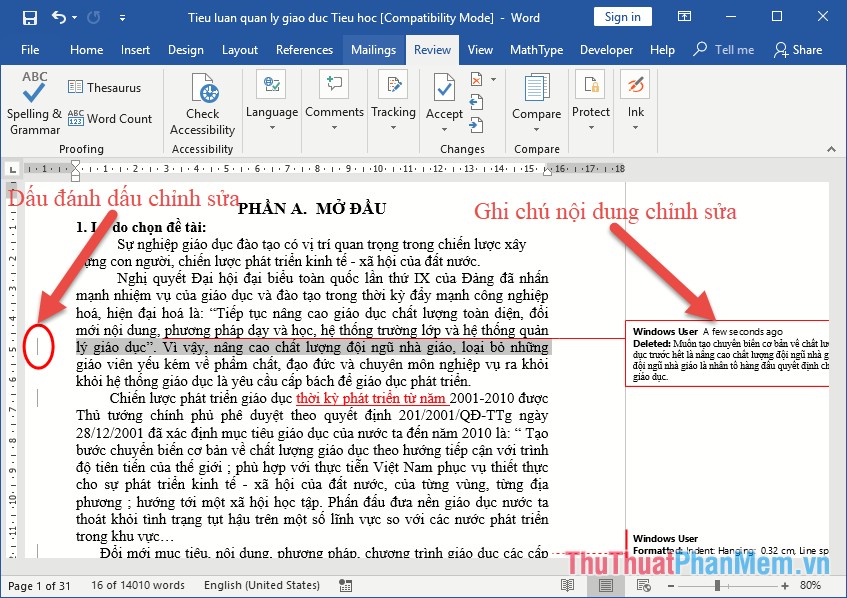
In case you want to add content, all the added content will be red text and underlined text:
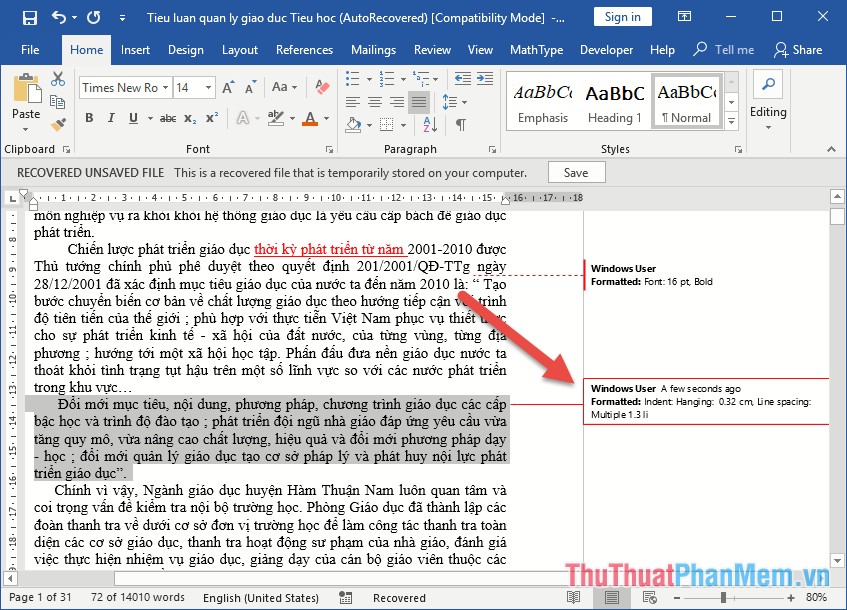
When you edit the font and font size, line spacing . will display the note and parameters you have edited:
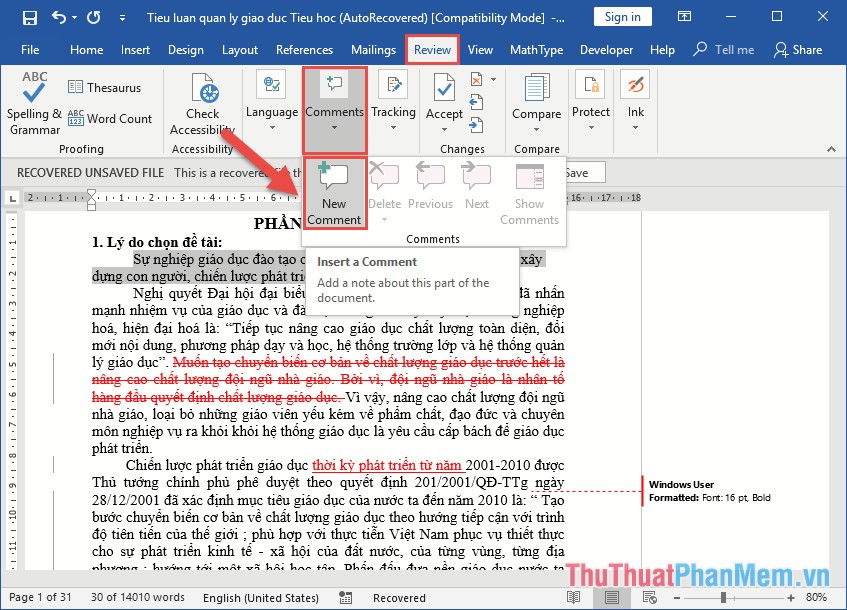
In addition, if you do not want to edit the content, you want to create a note for the document owner to manually click New Comment:
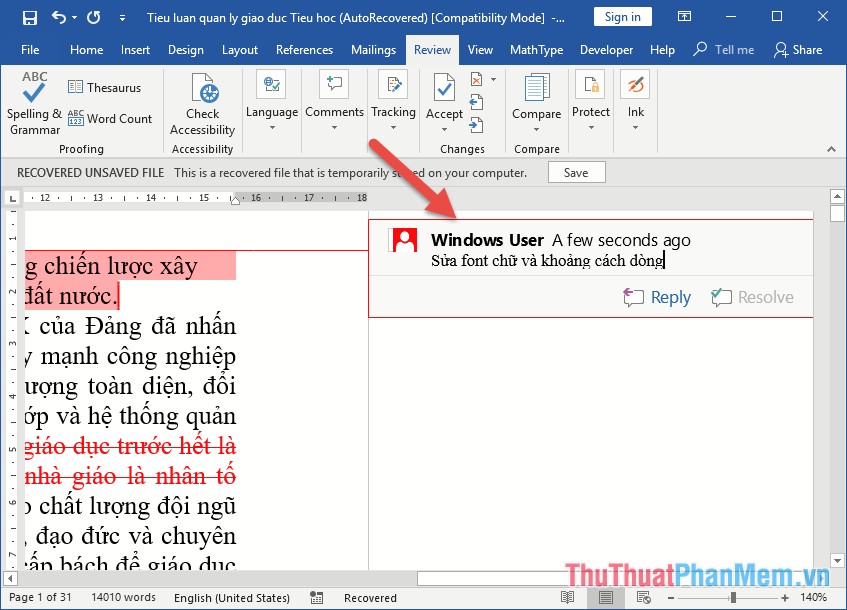
Enter the content to be edited for document owner to self-correct:
After you have finished editing you save the document and send to the next party to confirm the content you have edited.
In the second session, users accept or not accept the edited content
After you receive the document that your colleague edited, you open the document:
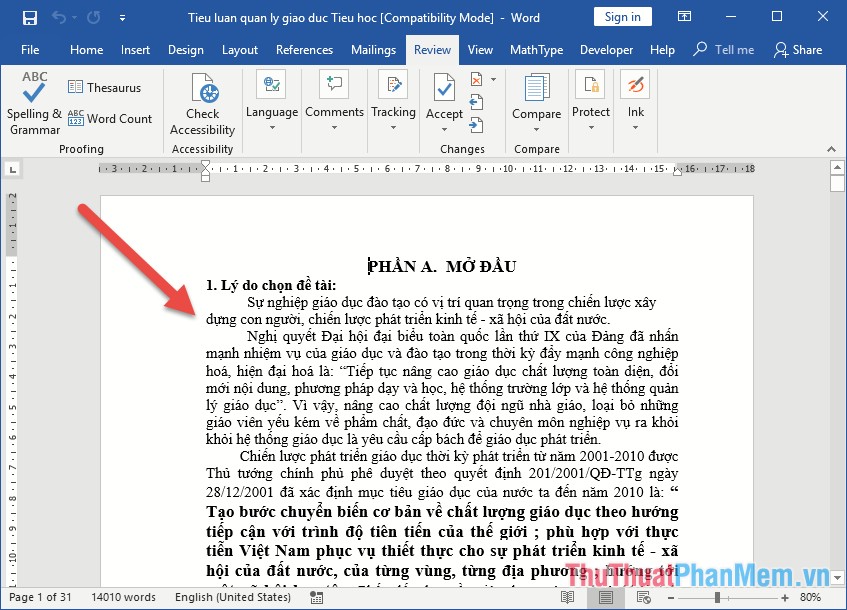
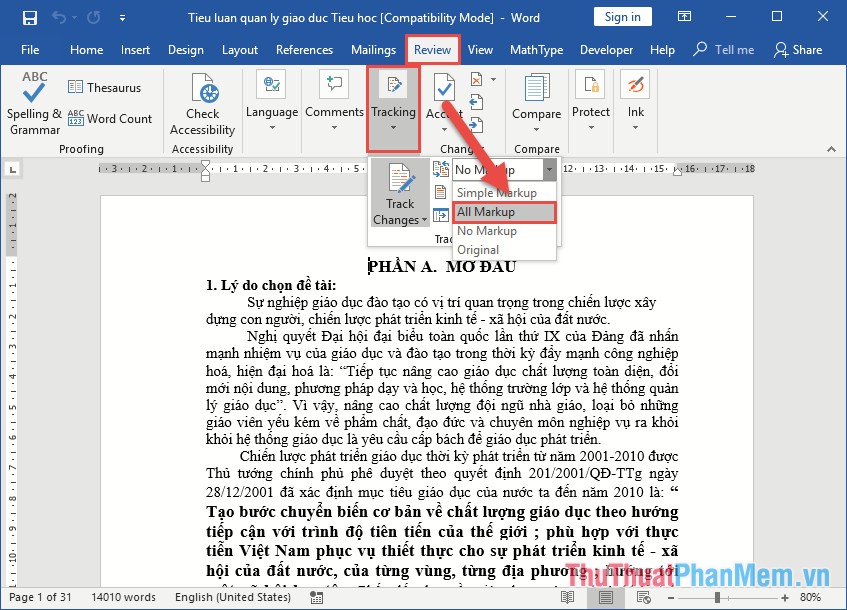
In case the document does not display the content that colleagues have edited you to the Review tab -> Tracking -> All mark:
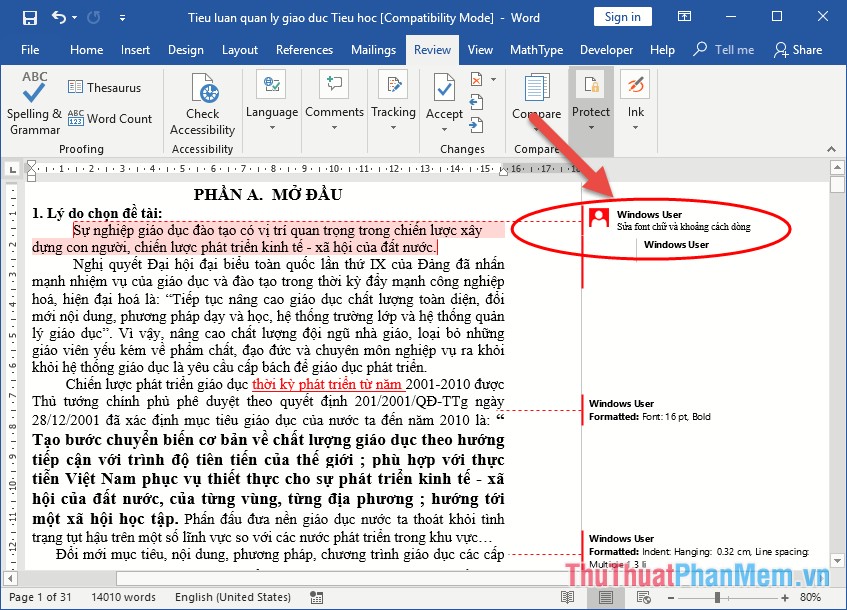
The results of all colleagues' edits are displayed in detail with the corresponding notes. With the comment comment of your colleague you can edit it or not,
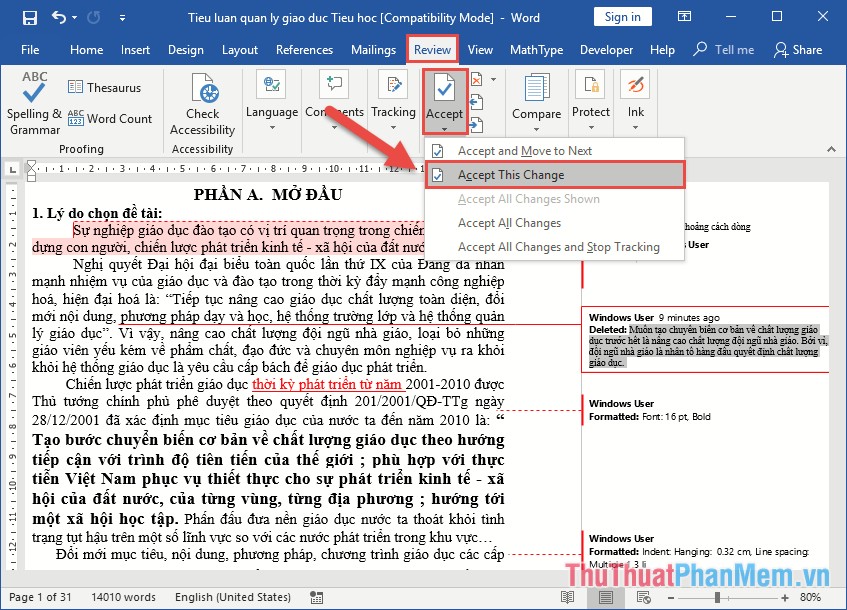
With the content colleagues have edited if you agree on the Review tab -> Accept -> Accept This Change:
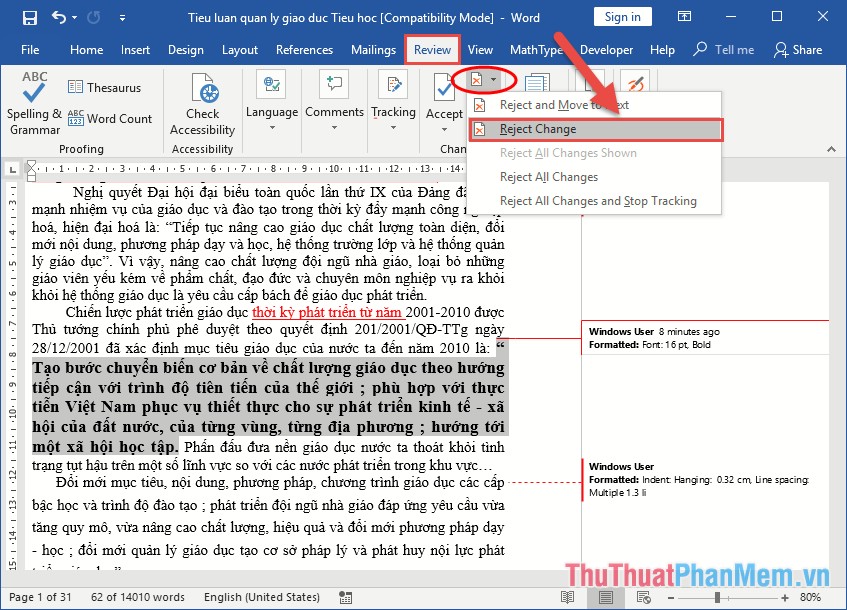
If you don't agree, click Reject -> Reject Change:
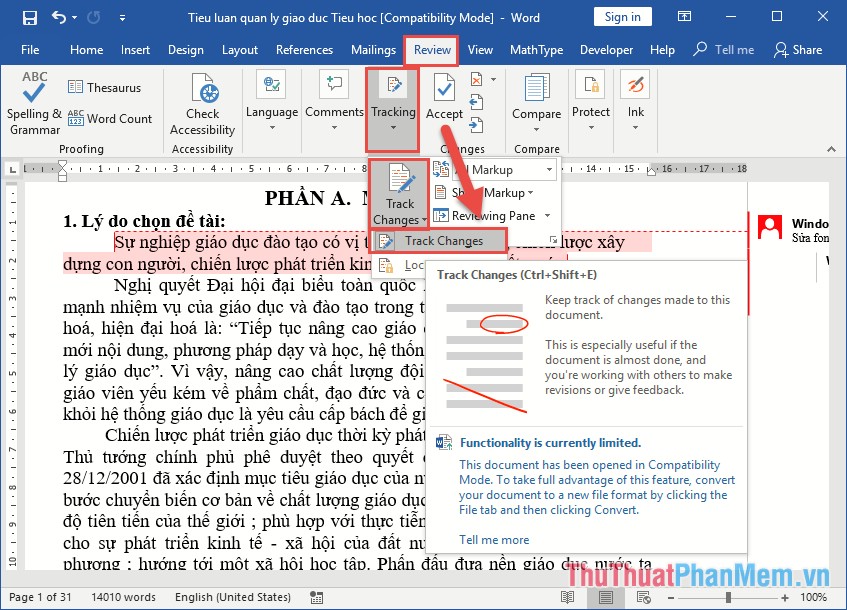
Similarly you confirm all content colleagues have edited. After confirming all, the shared documents have been completed, turn off Track Changes mode by selecting Review -> Tracking -> Track Changes:
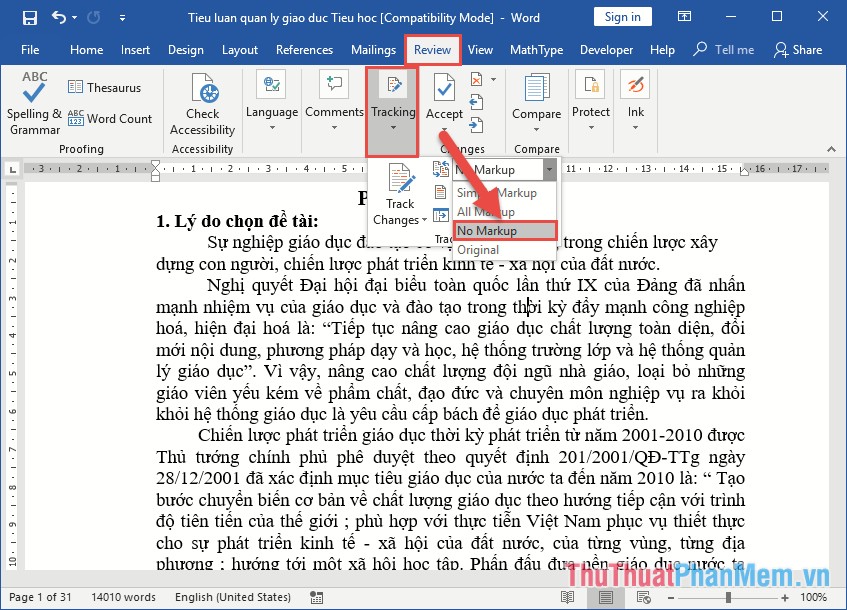
Your text only notes with the message content does not contain editing documents -> select No Markup to remove notes to be complete text:
So you can use the same document without worrying about what the colleague can fix. Good luck!