How to Use Tabs in macOS
Method 1 of 2:
Using Tabs
-
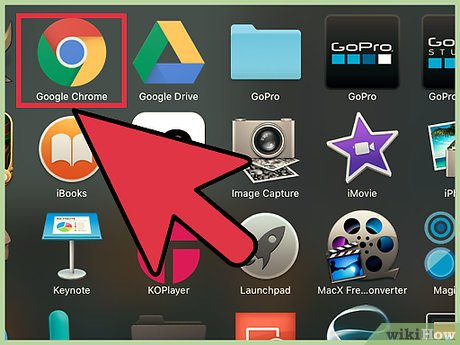
 Open an application on your Mac. Tabs in macOS Sierra work on all web browsers (Safari, Google Chrome, Mozilla Firefox, Microsoft Edge), but they now also work in several other Apple and third-party apps. Some apps that you can open to use tabs on macOS Sierra include:
- Maps
- TextEdit
- Keynote
- Numbers
- Pages
- Microsoft Word
-
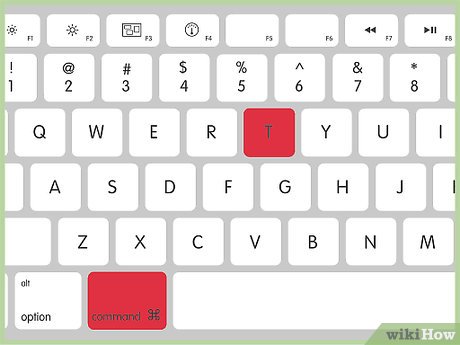
 Press ⌘ Command+T to open a new tab. The tab will open to the right of your first tab, just underneath the window's options.
- On a web browser, you can also click on the "+" button in the upper-right corner of the window.
-
 Press ⌘ Command+N to open a new window. This time, a new window will open on top of the current one you're working in.
 -
 Press ⌘ Command+W to close a window. The window you currently have open at the front of your screen will close.
 -
 Click on a tab at the top of the window. The slightly brighter tab indicates your current tab. To navigate between tabs, click on a tab that displays as darker.
 -
 Drag a tab out of its current window to create a new one. If you would like to separate your tabs by having different windows to work in, you can click and hold your mouse over a particular tab and drag it off onto your desktop to create a new window.
 -
 Merge all of your windows. If you have separate windows that you'd like to combine, you can merge them into one window with multiple tabs:
- Click on Window at the top of your computer screen.
- Click "Merge All Windows" in the menu that drops down.
-
 Bring all of the application's windows to the front of the screen. If you have multiple applications open and you'd like to see all of your work stations for the current application, you can bring them to the front of your screen:
- Click on "Window" at the top of your screen. Do this with the application in question open.
- Click "Bring all to Front". Each window will appear in front of any other apps you have open.
Method 2 of 2:
Installing macOS Sierra
-
 Go to http://beta.apple.com/sp/betaprogram/. As of August, 2016, macOS Sierra is only available to the public in its beta version. You can download that version from the Apple website.
 -
 Click "Sign Up". You'll be brought to a login page.
 -
 Log in with your Apple ID. Enter your Apple ID and Password. Then, click "Sign In."
 -
 Accept the terms of agreement. Read the licensing agreement that appears on your screen, scroll to the bottom of the page, and click "Accept."
 -
 Copy your redeem code. Although the download will begin automatically, you'll also be shown a code that you can use as proof of your entitlement to the beta software. Copy this code so that it's safe, just in case.
- To copy the code, click and drag your mouse over it so it highlights blue. Then, press command+c.
-
 Click "Download the macOS Sierra Public Beta." The App Store will launch on your Mac.
 -
 Open the App Store. On your Mac, click on the magnifying glass in the top-right corner of your screen to open Spotlight's search function. Type "App Store" into the search bar, and click on the "App Store" result.
 -
 Click on the "Featured" tab at the top of the window.
 -
 Click "Redeem" in the sidebar on the right.
 -
 Enter your Redeem code. Hit Enter when you are done, and the download will begin automatically.
- Given that macOS Sierra is a large program, it may take a number of hours to download. You can check the progress of the download by opening the application "Launchpad" in your Finder.
-
 Open Launchpad. When the download is complete, use Spotlight to search for and open the application called "Launchpad". In your Launchpad, you'll now see an icon labelled macOS Sierra.
 -
 Click "Install" to launch the macOS Sierra Public Beta app. Then, click "Continue" on the window that appears.
 -
 Back up your computer. If you haven't backed up your computer recently, click Continue in the dropdown menu that appears. If you have recently backed up your computer or don't care to, click Cancel.
 -
 Accept the licensing terms. Click "Accept" at the bottom of the window that appears to do so. Click "Agree" again to confirm the download.
 -
 Click Install. The installation will default to your Macintosh hard drive.
 -
 Enter your administrator password and click OK.
 -
 Restart your computer. The update will occur while the computer is restarting.
4 ★ | 1 Vote


 How to Set a Keyboard Shortcut to Open Spotlight
 How to Change the Time Format on a Mac
 How to Use Apple Pay on a Mac
 How to Change How Long Until a Mac Asks for Your Password
 How to Buy RAM for Your iMac
 How to Add an Application to the Dashboard on an Apple Computer