How to Take Screenshots with OneNote
This wikiHow teaches you how to take a screenshot using OneNote 2016 which is a part of Microsoft Office for Windows. You cannot take screenshots directly in OneNote for Mac or the free version of OneNote included with Windows 10; however,....
Method 1 of 3:
Using the Menu Bar
-
 Go to the screen you want to take a screenshot of. It should be the only visible thing on your screen before you open OneNote.
- For example, if you want to screenshot your whole desktop, make sure all other windows are minimized before continuing.
-
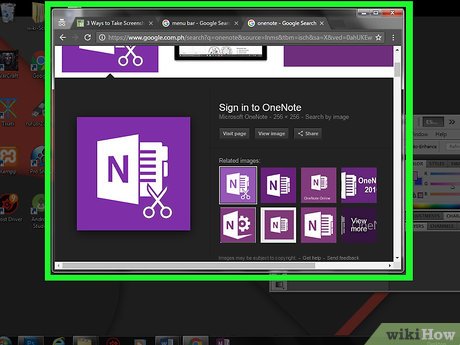
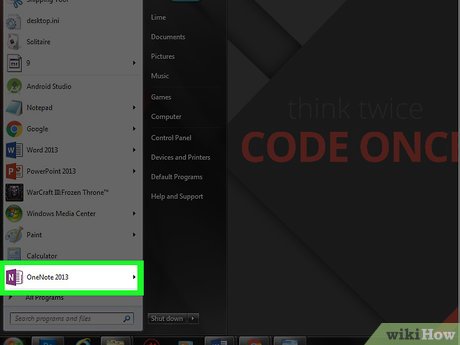 Open OneNote. It's a purple app with a white "N" on it. OneNote will open to the last note page you had open.
- This only applies to OneNote for Microsoft Office (e.g., OneNote 2016) and not the built-in Windows 10 OneNote app.
- If you want to use a different note page than the one OneNote opened to, click your preferred page's tab before continuing.
-
 Click Insert. This tab is in the upper-left side of the OneNote window.
 -
 Click Screen Clipping. It's in the "Images" section of the gray Insert menu bar, which is near the top of the OneNote window.
 -
 Select a section of your screen to screenshot. Click and drag your mouse diagonally across the area you want to screenshot. You'll see a box appear as you do so; anything in the box will be saved as a screenshot.
- Press Esc to cancel the screenshot.
-
 Release the mouse button. Doing so saves the screenshot to your currently open OneNote page.
- You can click and drag the screenshot to reposition it as needed.
Method 2 of 3:
Using the Taskbar Shortcut
-
 Open OneNote. It resembles a purple app with a white "N" on it. You don't need to keep the OneNote window open, since simply opening OneNote once will place the taskbar shortcut in the notification area until you manually remove it.
- This must be OneNote from Office 365 (e.g., OneNote 2016) and not the built-in Windows OneNote app.
- This won't work if the taskbar shortcut isn't enabled. To enable the taskbar shortcut: click File in the OneNote window, click Options, click the Display tab, and check the "Place OneNote icon in the notification area of the taskbar" box.
-
 Go to the screen you want to take a screenshot of. It should be the only visible thing on your screen before you open OneNote.
- For example, if you want to screenshot your whole desktop, make sure all other windows are minimized before continuing.
-
 Right-click the purple OneNote icon. It's in the notification area, which is the section of icons on the far-right side of the taskbar. Doing so brings up a pop-up menu.
- If you're using a computer with a trackpad instead of a traditional mouse, use two fingers to tap the trackpad instead of right-clicking.
- You may first have to click to the left of the system tray to view this option.

-
 Click Take screen clipping. It's in the middle of the pop-up menu.
 -
 Select a section of your screen to screenshot. Click and drag your mouse diagonally across the area you want to screenshot. You'll see a box appear as you do so; anything in the box will be saved as a screenshot.
- Press Esc to cancel the screenshot.
-
 Release the mouse button. Doing so copies the screenshot and opens a window.
 -
 Select a notebook. If you have more than one OneNote notebook, you can select the notebook you'd like to save the screenshot in here.
- You can also click + on the left side of the notebook's icon to view and select a specific notebook page.
-
 Click Send to Selected Location. This will open your specified page in OneNote and paste the screenshot there.
- You can also just click Copy to Clipboard to save the screenshot to your clipboard so that you can paste it elsewhere.
Method 3 of 3:
Using the Shortcut Key
-
 Open OneNote. It resembles a purple app with a white "N" on it.
- This must be OneNote from Office 365 (e.g., OneNote 2016) and not the built-in Windows OneNote app.
-
 Go to the screen you want to take a screenshot of. It should be the only visible thing on your screen.
- For example, if you want to screenshot your whole desktop, make sure all other windows are minimized before continuing.
-
 Press ⊞ Win+⇧ Shift+S. This key combination sets up your screen for a screenshot.
- If the OneNote window is open, pressing the key combination won't minimize it.
-
 Select a section of your screen to screenshot. Click and drag your mouse diagonally across the area you want to screenshot. You'll see a box appear as you do so; anything in the box will be saved as a screenshot.
- Press Esc to cancel the screenshot.
-
 Release the mouse button. Doing so copies the screenshot to your clipboard. You can paste it into another document from here.
 -
 Select a notebook. If you have more than one OneNote notebook, you can select the notebook you'd like to save the screenshot in here.
- You can also click + on the left side of the notebook's icon to view and select a specific notebook page.
-
 Click Send to Selected Location. This will open your specified page in OneNote and paste the screenshot there.
- You can also just click Copy to Clipboard to save the screenshot to your clipboard so that you can paste it elsewhere.
- In some versions of OneNote, using the keyboard shortcut automatically saves the screenshot to your clipboard and doesn't open a window.