How to use Photoshop CS5 - Part 26: Create a lightning effect
In the next article of the Photoshop tutorial series, we will show you the basic steps to create lightning or lightning effects.
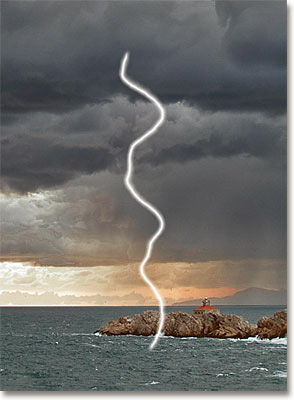
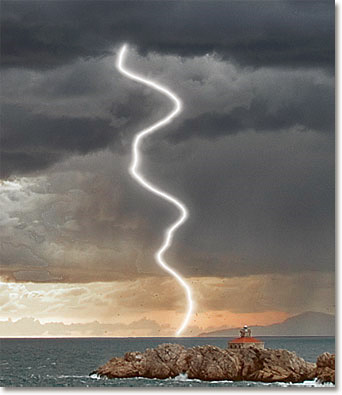
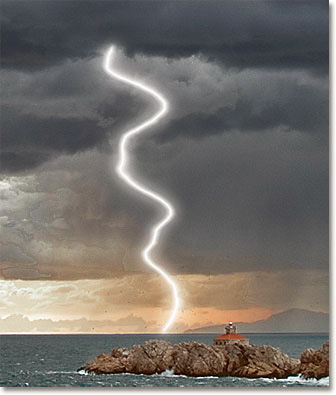
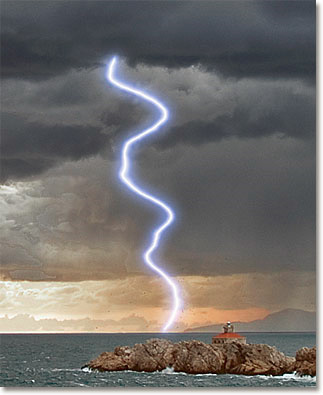
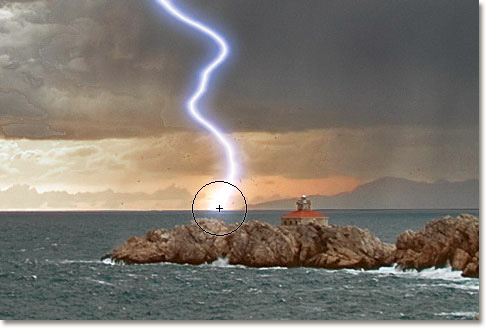
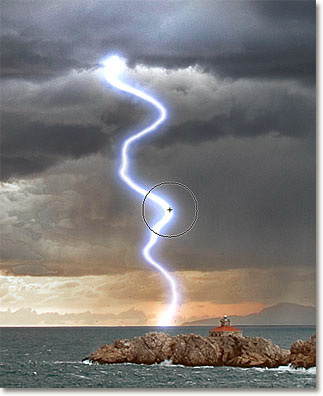
TipsMake.com - In the next article of the tutorial series on Photoshop tips, we will present the basic steps to create lightning or lightning effects. The article is arranged in the basic order, first creating the original image, followed by changing the brightness, color and adding necessary effects. And after completing this lesson, we will get the following result:

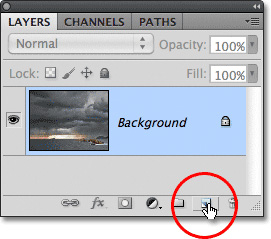
In the following test, we proceed on Adobe Photoshop CS5 version (for previous versions, the basic method is not different). First, we need a sample photo with the same scene as above. Open Photoshop, and create a new layer from the background image layer:
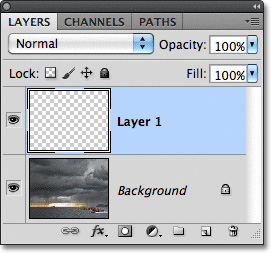
New Layer 1 layer just created
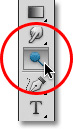
Then, select the Lasso Tool from the bar menu (or press the L key):

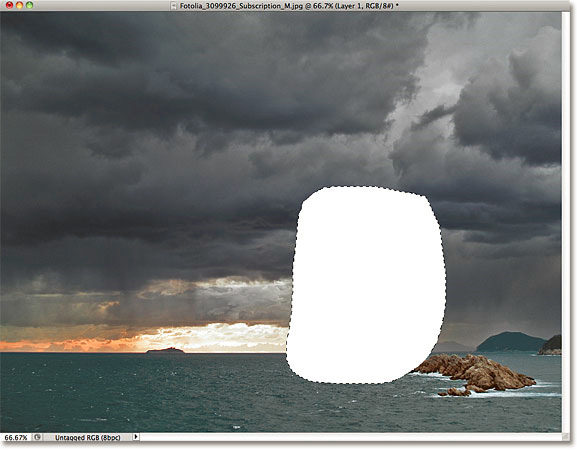
And draw a selection in the image, this is the entire part of the lightning display:

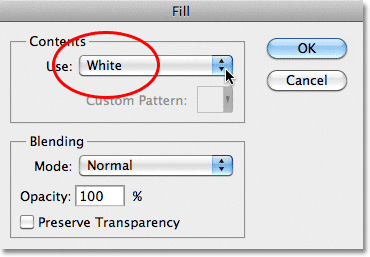
Select Edit> Fill menu to fill this selection:

In the Use section in the Contents section, switch to the White option:
Click OK, and our image will look like this:
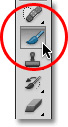
Continue, select the Brush Tool (or press B):
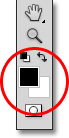
Press D on the keyboard to change the Foreground and Background colors to default:
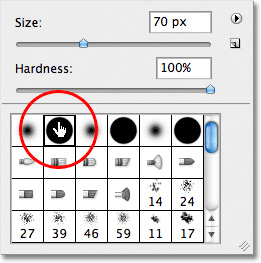
With the brush tool selected, right-click (Windows) or Control + click (Mac) anywhere on the image to open the Brush Picker panel, where we need to select a full, circular pattern. border. Then press Enter (Win) or Return (Mac) to apply:
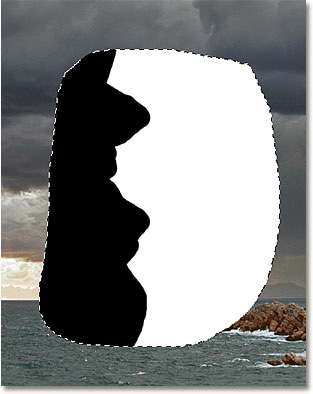
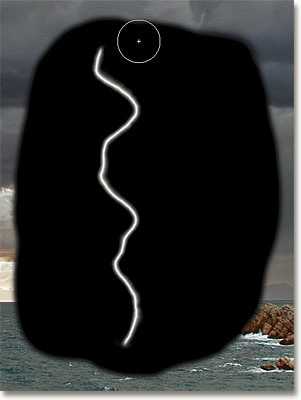
Then, draw any zigzag line based on the position you want the lightning to appear, you can change the size of the brush quickly with the [ or ] key. For example, here we will draw a line as shown below:
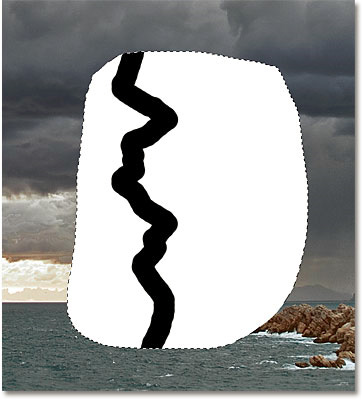
Then, fill the whole left or right part with black to continue doing the following steps:
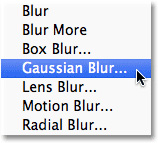
The next thing to do is to blur the area between the black and white areas. Select Filter> Blur> Gaussian Blur:
The main control panel of Gaussian Blur displays, notice how the effect on the image changes when we move the Radius slider. As in this example, we select the Radius value equal to 9.1:
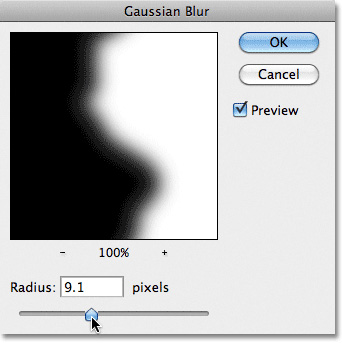
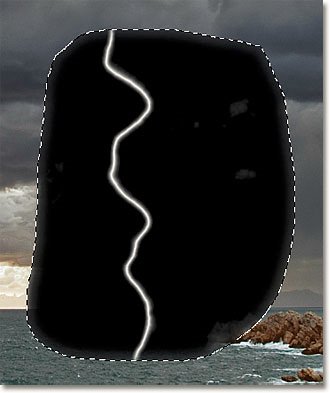
The contact area between the black and white part when applying the above effect will become a lightning bolt
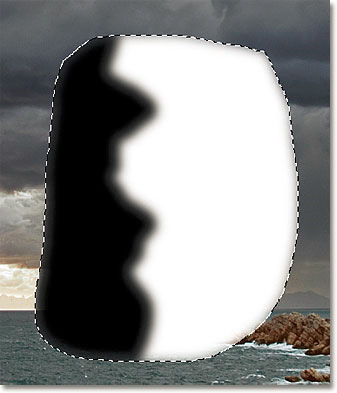
Click OK, and we will get the following result:
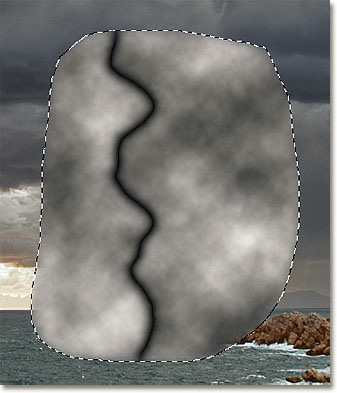
Select the Filter> Render> Difference Clouds menu :
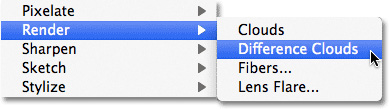
Unlike some other effects, there is no control panel that Photoshop will automatically apply according to random parameters:
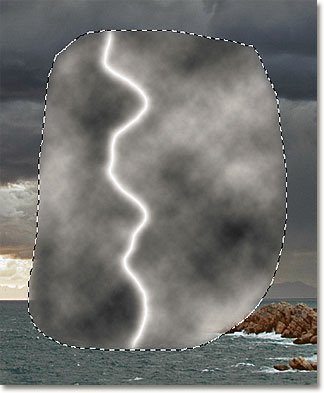
Select Image> Adjustments> Invert menu :
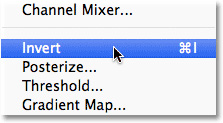
This process will reverse the brightness in the selection, making the light turn dark and vice versa:
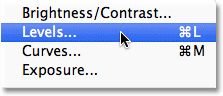
Then select Image> Adjustments> Levels menu :
The main Levels control panel is displayed, where we will use the Level to darken the color part of the clouds in the image. First, select the black slider button (as shown below) and start dragging to the right, you adjust until the dark clouds turn 'disappear' from the picture:
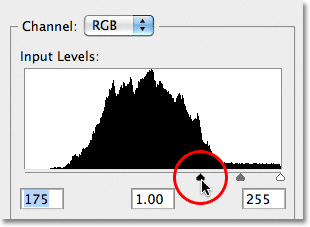
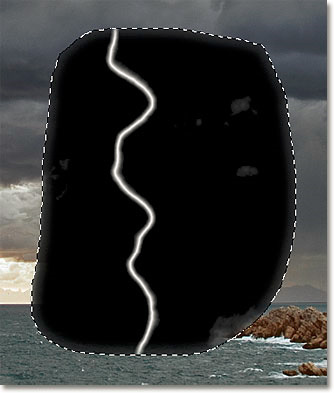
Most of the parts in the selection become black, while the remaining parts are light gray:
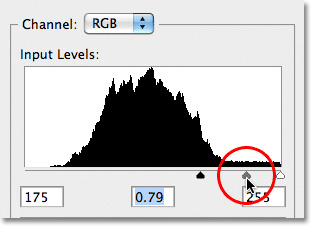
Select the gray sliding button next to it and start dragging to the right, this process will continue to blur the remaining gray parts and turn into a darker color. But you need to pay attention not to change the color too bold, will make the later lightning lose the natural look:
Click OK to apply the changes and close the Levels window. Our photo in this step will look like this:
Select Select> Deselect menu to delete the part outside the selection, or use the shortcut Ctrl + D (Win) or Command + D (Mac):
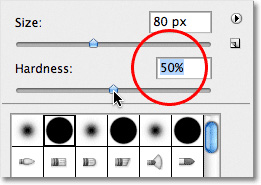
Select the Brush tool, right-click (Windows) or Control + click (Mac) anywhere in the text to display the Brush Picker panel , keep the selection, change the Hardness parameter to 50%. Then press Enter (Windows) or Return (Mac) to apply:
Keep the same Background and Foreground modes as before, draw over the gray parts to 'clean' this color area:
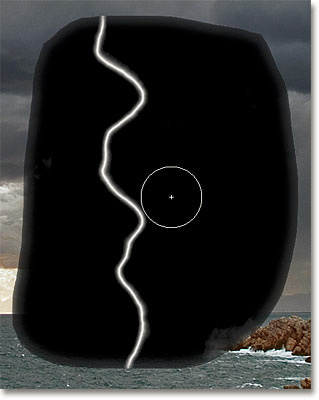
Besides, if you pay close attention to the outer parts of the black area, we will see the result of applying the Gaussian Blur effect earlier. If your model doesn't look like the following, don't worry too much because we can change it:
Then, change the Normal Blend Mode to Screen :
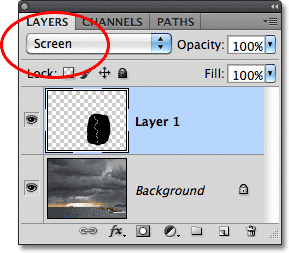
After applying, the entire dark part of the selection will be hidden, and we will get the following result:
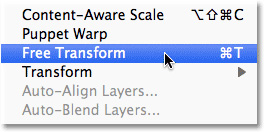
Continue, select the menu Edit> Free Transform, or press the shortcut Ctrl + T (Win) / Command + T (Mac) to open the Free Transform panel :
Photoshop will display an area around the currently selected Layer, you can change the position and size of this lightning, move to any other location in the image (switch to Distord mode for free. change the coordinates of the corners of the selection). When you are satisfied with the selection, press Enter (Wins) or Return (Mac) to apply the change:

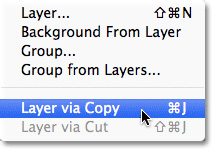
Then, select the Layer menu > New> Layer via Copy or press the shortcut Ctrl + J (Win) / Command + J (Mac) to create a new layer from the layer in use:
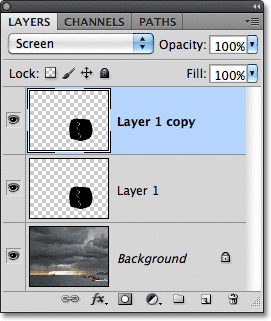
The newly created layer will automatically set Screen mode:
To continue, we will create a light area around the lightning, simply blurring the Copy just created above. Open Filter> Blur> Gaussian Blur similar to the above. Change the Radius parameter to match the size of each photo (here we set it to 9):
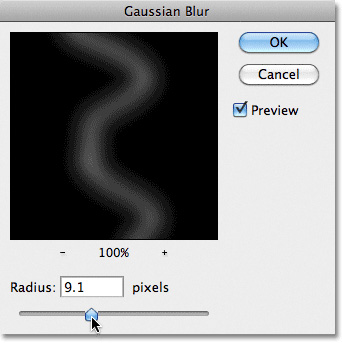
Click OK, and our results will look like the following:
We can easily realize that the effect above is not 'strong' enough to bring the necessary liveliness to the photo. Press Ctrl + J (Win) / Command + J (Mac) to duplicate this effect layer. For some cases the effect is a bit too 'redundant' after doing so, please adjust the Opacity parameter accordingly:

Here, we still keep 100% Opacity
And this is the result after implementation:
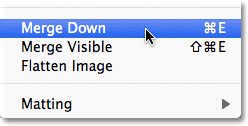
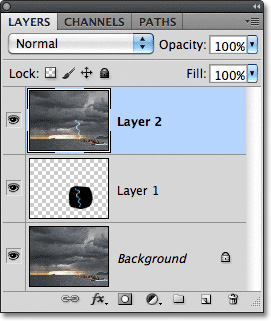
Select Layer> Merge Down menu or press Ctrl + E (Win) / Command + E (Mac) to merge nearby layers into a single Layer:
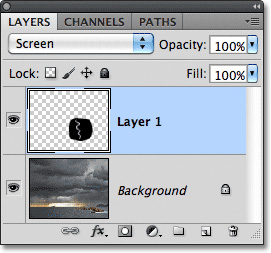
After that, we will only have 1 Background image and Layer 1 layer (just merge the layers above):
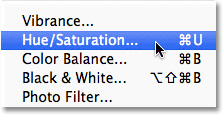
If you want to change the color of the lightning, use Image> Adjustments> Hue / Saturation:
The main control panel of Hue / Saturation is displayed, tick the two options to choose Colorize and Preview . Change the color parameters here to match the photo. For example, we set Hue to 232 and Saturation to 50%:
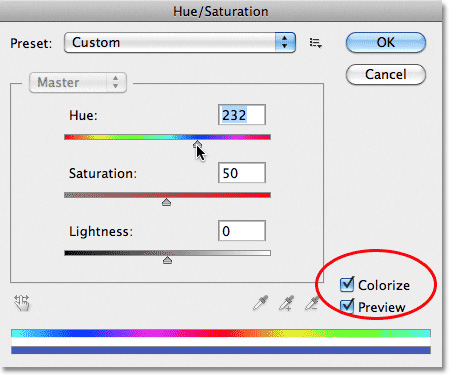
Click OK:
Hold Alt (Windows) or Option (Mac) then select Layer> Merge Visible menu :
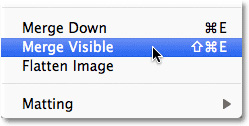
This process will continue to include the available layers into a new layer above:
Select the Dodge Tool:
Change the settings of Range to Highlights , Exposure to 50% and uncheck the Protect Tones box :

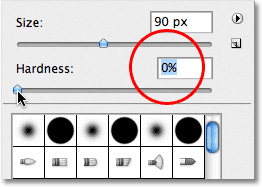
This Dodge Tool is similar to another type of brush in Photoshop , and we can resize it similar to the Brush Tool. Right- click (Windows) or Control + Click (Mac) to open the Brush Picker panel, change the Hardness to 0% , then press Enter (Windows) or Return (Mac) to apply the change:
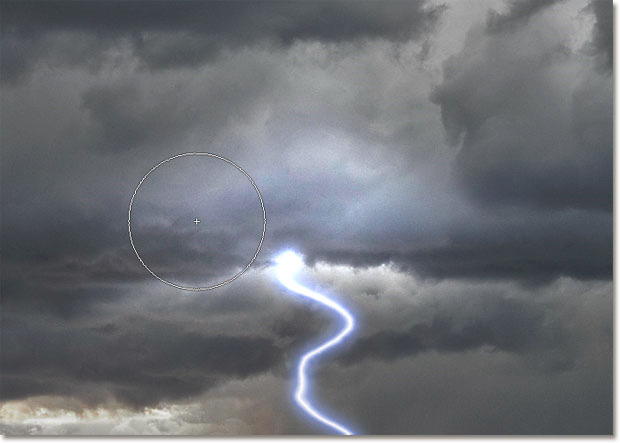
Finally, use the Dodge Tool to lighten overly dark areas and add some light effects around the lightning:
Press [or] to change the size
Perform several times to highlight the bright spots around the lightning
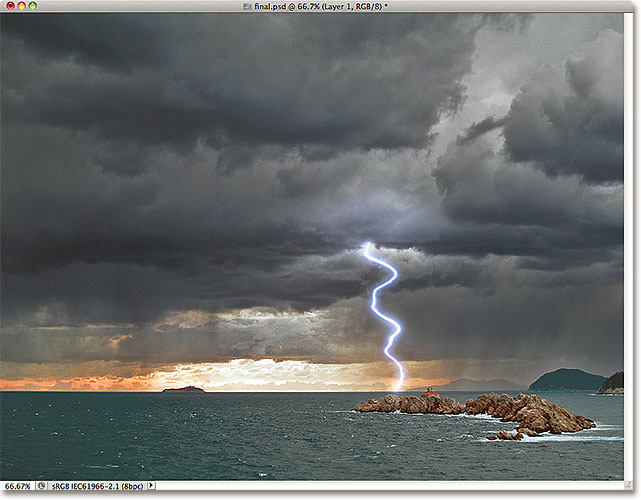
Our results after repeated implementation:
If you feel the brightness here is too high and you lose the natural look, change the Opacity level accordingly:
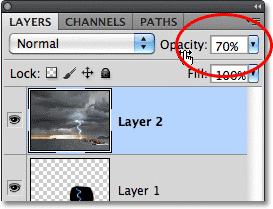
The Opacity level here is changed to 70%.
And finally, our work is also complete:
Good luck!
Was this article helpful?
Your feedback helps us improve.
Related Articles
 How to use Photoshop CS6 (Part 4): Create a fading effect9 minutes read
 How to create whirlpool effect on Photoshop4 minutes read
 How to use Photoshop CS5 - Part 21: Create water ripple effect in photos6 minutes read
 Learn how to create a fade effect with Photoshop CS69 minutes read
 How to Create an Orton Effect in Photoshop3 minutes read
 How to use Photoshop CS5 - Part 29: Create a zoom effect in a photo5 minutes read
Reader Comments 0
Sign in with email or Google to join the discussion.