How to use Photoshop CS5 - Part 13: Create a reflection effect from the water
In the next part of the tutorial series on Photoshop CS5, we will cover the basic steps to create reflection effects from the water for any photo.
In fact, this process is quite simple, just need to know the basics and cleverly mix, along with a bit of sophistication, you will create works no different from real photos.

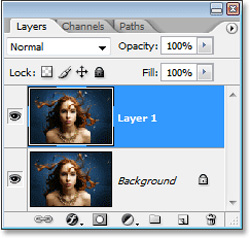
To start, we need to duplicate the original layer of the original image by pressing Ctrl + J (Windows) or Command + J (Mac):
Our goal is to create a reflection effect from the water surface, ie the top-down direction. So it is necessary to add 'wrinkles' to the end of the image, to make room for reflective details. Select menu Image> Canvas Size , set the specifications as shown below:
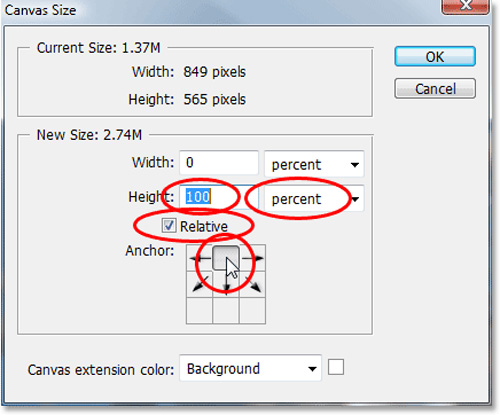
Click OK, and Photoshop will add space below the image as follows:

Next, we need to turn the image upside down. Select the layer above in the control panel, select the menu Edit> Transform> Flip Vertical :

Then we will use the Move Tool from the Tools panel or press the V button:
Hold Shift and drag slowly the rotated image part to match the limit:
Now that we have the object's reflection layer, the next thing is to create water ripples to look like the real thing. Create a new layer by selecting the New Layer icon in the control panel:
After that, fill this new layer with white. Use the D shortcut to switch the Foreground to white and Background to black, press Ctrl + Backspace (Windows) or Command + Delete (Macs) to fill the Background color with the selected layer:
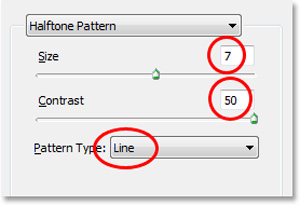
Continue, press Filter> Sketch> Halftone Pattern , Photoshop's Filter Gallery window will display. Here, you select the Halftone Pattern filter on the right. The purpose of this is to create interlaced black and white lines, the higher the number of lines, the thicker the ripple density. Use Pattern Type, set Lines and parameters as shown below:
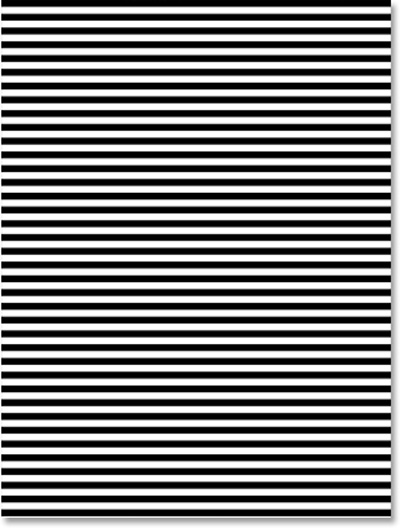
Click OK and Photoshop will apply the effect:
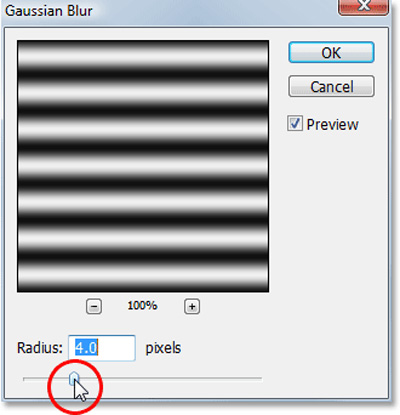
Before turning black and white into water waves, we need to smooth and create more motion effects. Select Filter> Blur> Gaussian Blur , Gaussian Blur window is displayed. Here, you change the value of the Radius parameter and see how the effect on the image changes:
Next, we'll create a whole new layer of images outside of the old layers. Select Layer containing horizontal lines and use Duplicate Layer feature:
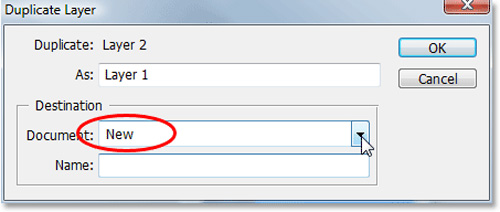
Click OK to close this window. Save this template class for use in later cases, for example, here we save it as a water-ripples.psd file.
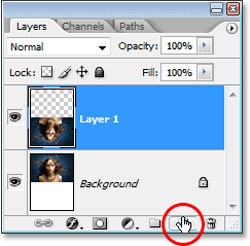
When we reach this step, we will no longer need to use the horizontal drawing layer, so we can delete this layer, just drag and drop this layer into the Trash Bin icon below:
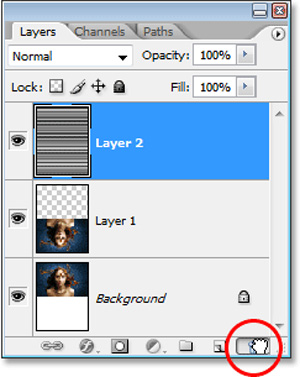
Before adding an alternative layer, you need to include two layers of images together. Select Layer 1 and press Shift + Ctrl + Alt + E (Windows) or Shift + Command + Option + E (Mac). The result will look like the image below:

Layer 2 is created after we proceed to merge 2 layers
Next, we are ready to create a wavy water effect based on the newly created replacement layer. Select the merged Layer in the previous step, click Filter> Distort> Displace , the next window displays, set the following parameters: Horizontal Scale 4, Vertical Scale 0, Stretch To Fit and Repeat Edge Pixels :
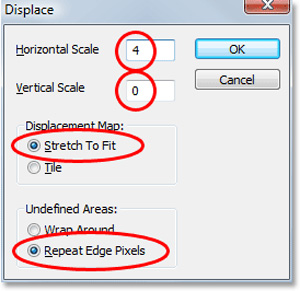
Click OK, the system will ask you to choose which file to apply, select water-ripples.PSD created above and Open, their results will look like this:
It is easy to recognize that we have a little more problem, need to cover the amount of ripple waves in the upper half of the image. To do this you need to use Layer Mask, press Ctrl + click (Windows) or Command + click (Macs) on Layer 1:

You'll see the entire selected area appear in the bottom half of the image, then select the Layer Mask icon at the bottom:
Photoshop will add a Layer Mask layer above, and since we have selected the entire lower half of the image, when adding a Layer Mask, the rest will be hidden:

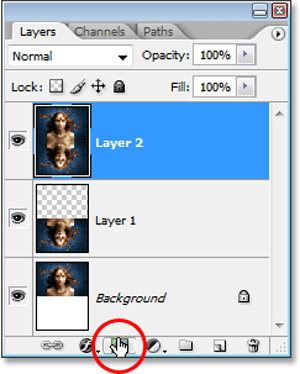
Basically, all technical steps are nearly complete, the need to do now is to color the reflections below to bring out the natural look. The details at the bottom of the water still look unreal, because the details are still too similar to the upper part, for example here is the hair. To do this, you need to apply the Gaussian Blur filter, select the Layer Mask layer in the control panel:
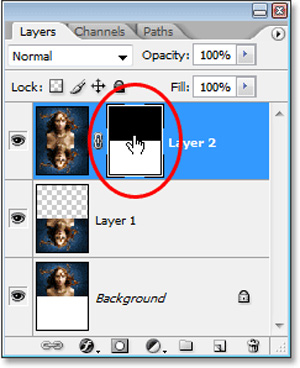
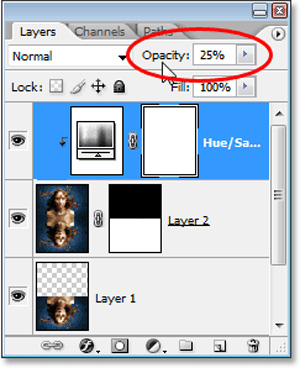
Click Filter> Blur> Gaussian Blur to apply the Gaussian Blur effect on this layer (you can keep the specifications). The last thing now is to create a natural color for the water by adjusting Hue / Saturation. Hold Alt (Windows) or Option (Macs), click the New Adjustment Layer icon at the bottom and select Hue / Saturation :

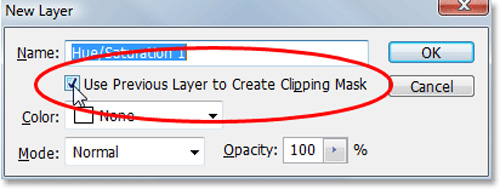
The New Layer window is displayed, check the Use Previous Layer To Create Clipping Mask box and OK:
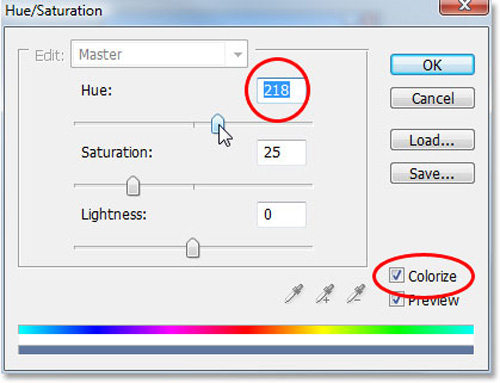
Check the Colorize box and adjust the color parameters Hue, Saturation and Lightness accordingly
Adjust the opacity to about 25% to bring a natural look to the newly created color layer:
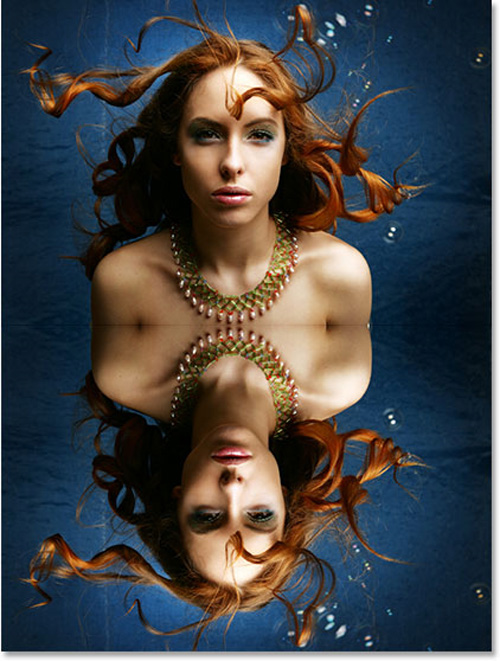
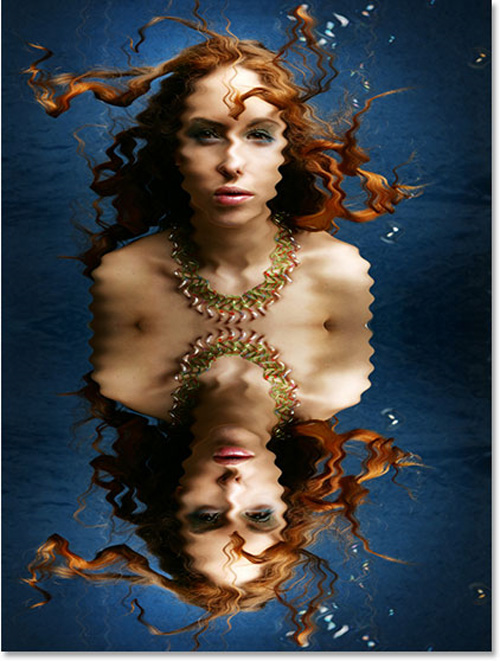
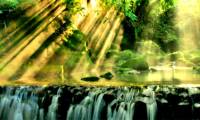
Proceed to compare our original photos and achievements:
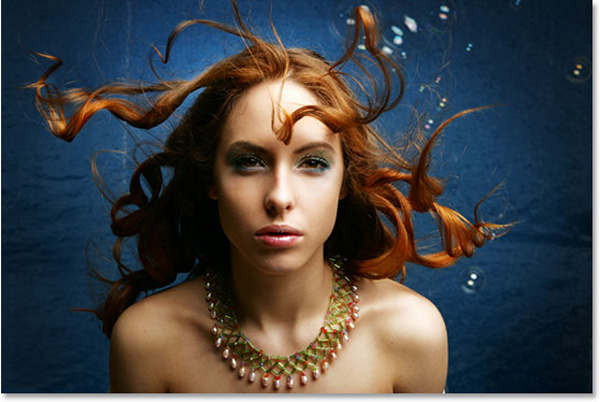
Before processing
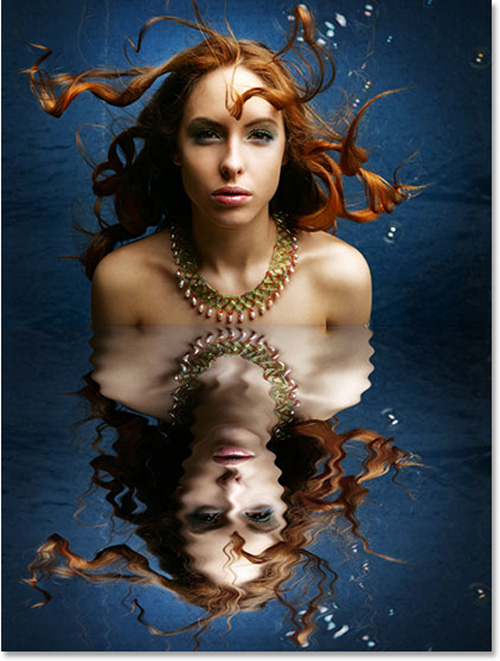
After processing
As you can see, the results are much different from the original, with only basic operations and meticulousness, ingenuity in details and processing. In addition, you can refer to the following video tutorial:
Good luck!
Was this article helpful?
Your feedback helps us improve.
Related Articles
 How to use Photoshop CS5 - Part 21: Create water ripple effect in photos6 minutes read
 How to use Photoshop CS6 (Part 4): Create a fading effect9 minutes read
 How to create whirlpool effect on Photoshop4 minutes read
 Learn how to create a fade effect with Photoshop CS69 minutes read
 How to Create an Orton Effect in Photoshop3 minutes read
 How to use Photoshop CS5 - Part 29: Create a zoom effect in a photo5 minutes read
Reader Comments 0
Sign in with email or Google to join the discussion.