Make photos as beautiful as hotgirl with Lightroom
When surfing Facebook, you catch a lot of photos of hot girls and wonder why so beautiful people. However, with the current technology development, it is very simple to turn a normal beauty girl into a hot girl. Let's learn about swan technology on photos.
When surfing Facebook, you come across many pictures of hot girls and wonder how beautiful "beautiful people" are. However, with the technology developed so fast, turning a "normal beauty girl" into a hot girl is extremely simple. Let's learn about "swan" technology on photos.
First, download and install Adobe Photoshop Lightroom software to your computer.
Whiten skin
Please select the Develope menu located in the upper right corner. In the tool column on the right, pull down a bit and you'll see the HSL section. Here we don't need to care about the Hue section but just fine-tune it in Saturation and Luminance . Skin color is usually mixed with orange and yellow (2 bars of Orange and Yellow), sometimes with a little red color (Red bar) so we will refine these two parameters.
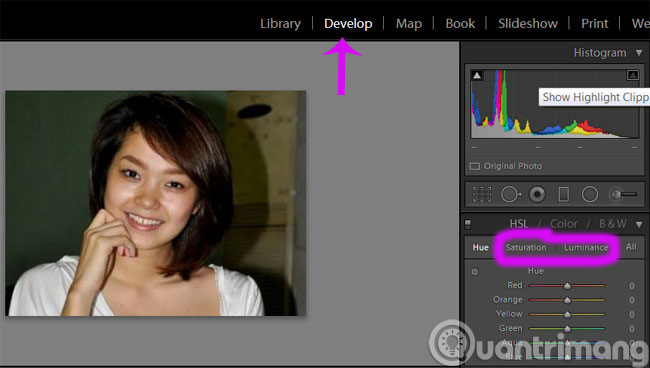
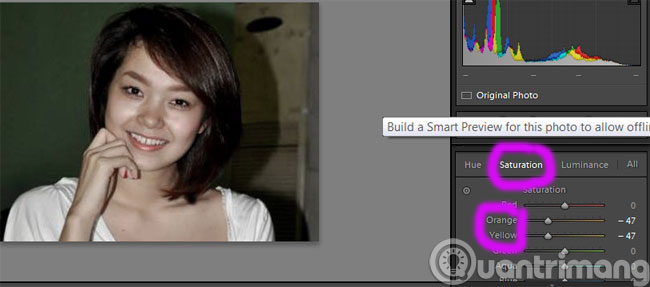
Starting with the Saturation card, drag the Orange and Yellow bars to the left to reduce the number of colors down, pay attention to the right pull and notice, if the skin is too white, it will look "fake".
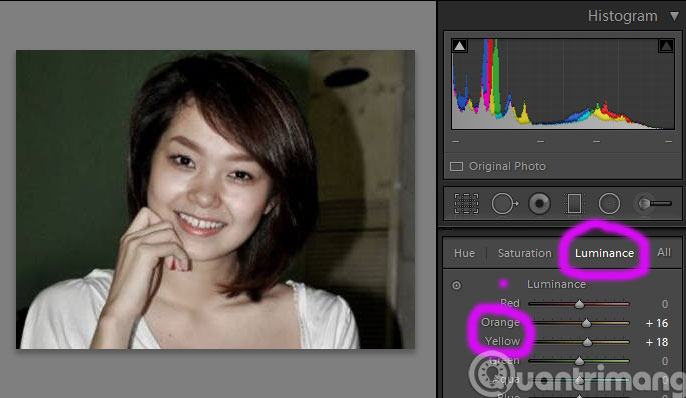
With the Luminance card, do the opposite, pull the Orange and Yellow bars to the right (increase in value) - the goal is to make the skin look brighter, so increase in the range of 10 -> 30 or less so that the skin color is natural .
In case the color of the skin is much different, mixed with many colors, not just normal yellow, orange and red, then use the color measuring tool in the left corner, click the left mouse button on the dot and hover over the area The skin wants to adjust, hold down the left mouse button and move up to increase the value, scroll down to reduce the value.
Pink lips
Similar to skin whitening, it makes the lips look more beautiful. But this time with red (according to the color of lipstick the girls use).
With the Saturation tab, drag the red color up, the Luminance card pulls the red bar and the Magenta bar is at the bottom, but not too much. The goal is to look for lips that are shiny and light
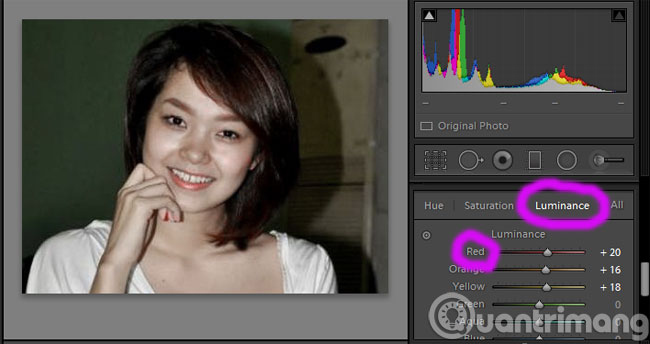
Correct eyes look more glittery
This time we need to use the Brush tool. Click on the palm tree icon as shown in the picture.
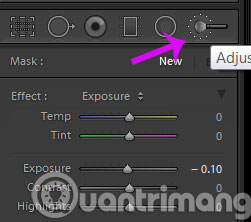
Use the scroll button on the mouse to adjust the size of the brush, so that it is sufficient to fill the eye area without getting out of the skin.
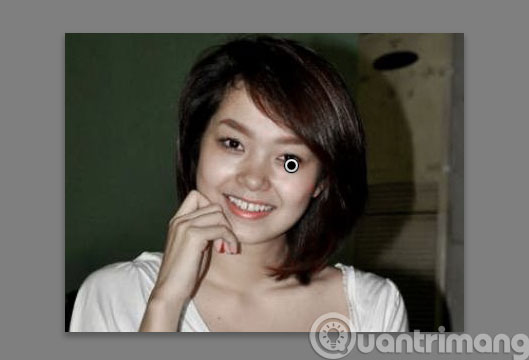
Teeth whitening
Also in the Brush tool, we need to select Effect Teeth tab.
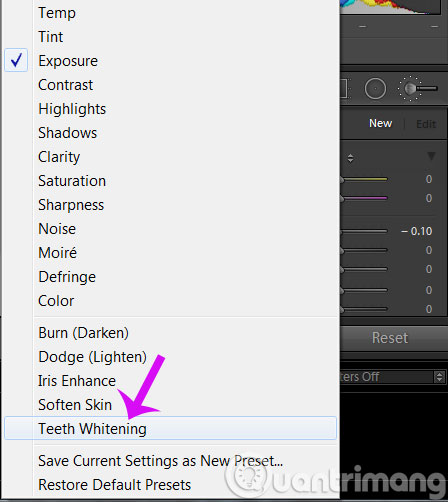
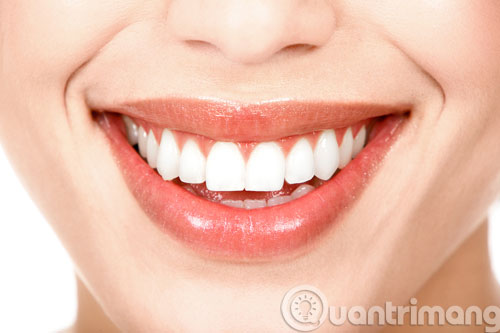
Next, roll your mouse to resize the brush, the smaller you fill the area the more precise the tooth.
- How to use Proshow Producer to make photo slides
- Instructions to reduce the volume of photos in Photoshop
- Collage photos into frames with PhotoShine
Good luck!
Discover more
Adobe Photoshop Lightroom photo editingShare by
Samuel DanielYou should read it
- Instructions on how to pair HDR photos on Lightroom
- Instructions on how to improve and speed up Lightroom
- Lightroom - Download Lightroom here
- Photo editing software for Lightroom alternative
- What is lightroom? What is Lightroom software used for? How is it different from Photoshop?
- The Quiet Details That Make a Sports Betting Platform Feel Reliable
- Instructions on creating toy set images with ChatGPT AI
- How are AI agents changing the journalism industry?
- 'Transform' a picture into an animated picture or picture using Adobe Photoshop
- How to distort a photo in Photoshop
- Tutorial for creating 3D photo effects in Photoshop (Part 1)