How to use Photoshop CS5 - Part 23: Create artwork
In the tutorial below, we will present some basic steps to create a picture with the space sky with stars, inside there are 2 main characters, be it dancers or singles simpler, a couple dancing together ....
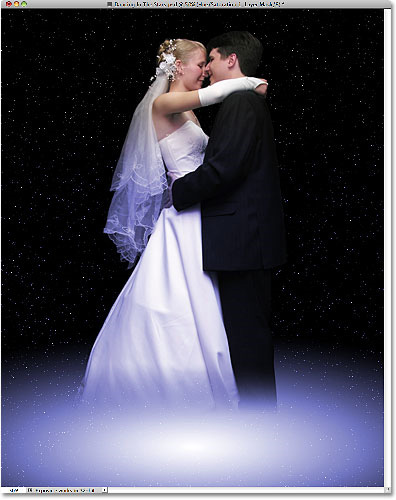
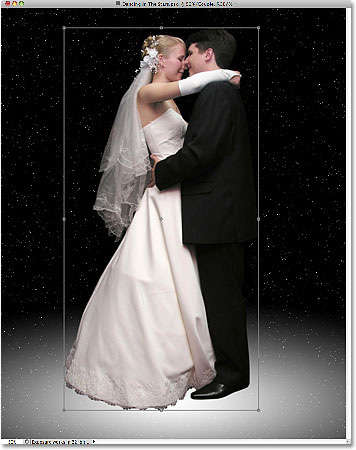
In the tutorial below, we will present some basic steps to create a picture with the universe of the sky along with the stars, inside there are 2 main characters, maybe dancers Or more simply, a couple dancing together. However, the above factors are not mandatory, you can choose from. Our results after the end of this article are:
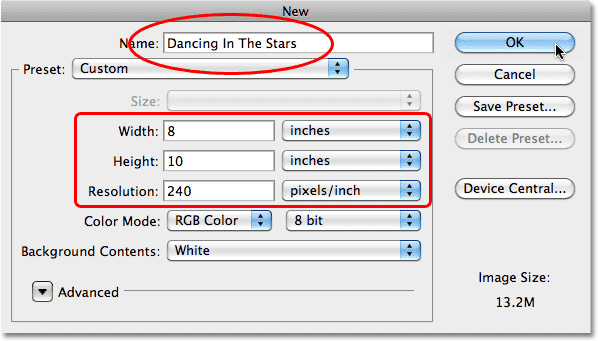
First, create a completely new image file of 8 x 10 inch size, resolution of 240 pixels / inch , named Dancing In The Stars :
Press D to switch the Foreground and Background to default mode (black), then press Alt + Backspace (Windows) or Option + Delete (Mac) to fill the color:

Try to imagine simple, this is the sky and the next thing to do is create stars with Noise effects. Select menu Filter> Noise> Add Noise:

The Add Noise control panel displays, adjust the Amount parameter to 120% , select Gaussian and Monochromatic below:

Click OK, and our image will look like this:

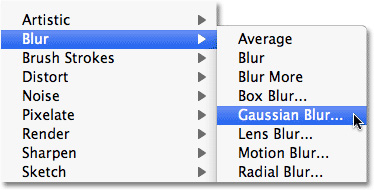
Continue, we will apply
Filter> Blur> Gaussian Blur:
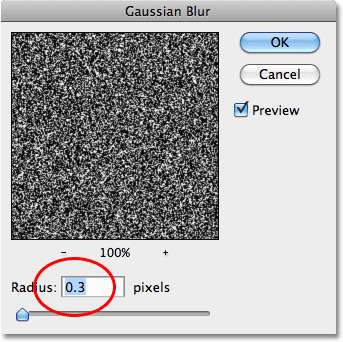
Here, change Radius parameters to 0.3 pixels enough to "gather" Noise particles together:
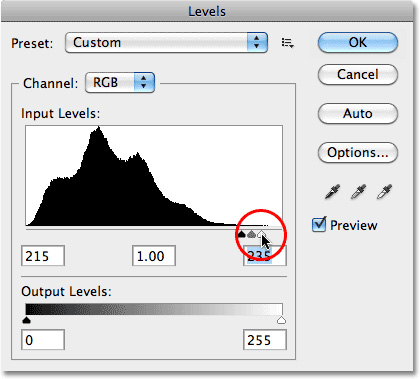
Next, select Image> Adjustments> Levels menu or press Ctrl + L (Windows) / Command + L (Mac) to access the Levels control panel:
Here, you can change the brightness and contrast of the image through the specifications by moving the black slider as shown below:

To increase the brightness of stars, use the white slider and drag to the left:
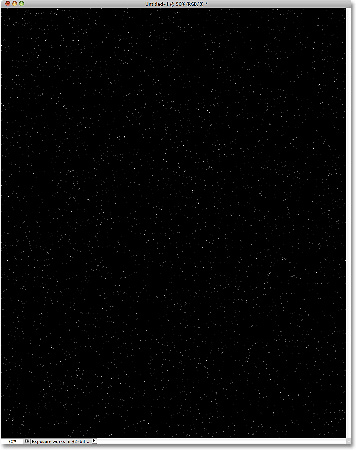
Click OK when you are satisfied, our image will look like the image below:
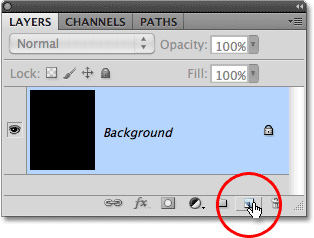
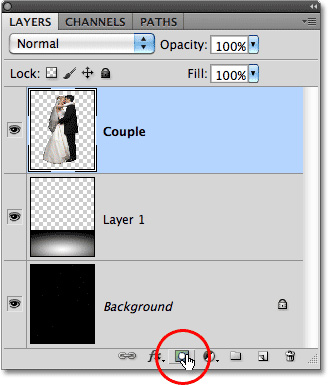
Then, add a new layer by clicking the New Layer icon button at the bottom of the control panel:
Select the Gradient Tool again:
Here, we will change Photoshop 's default Foreground and Background colors by pressing the D button:
Then you will see the color part
Gradient
of the
Photoshop
as follows:

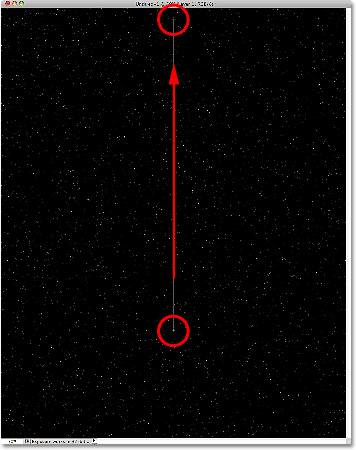
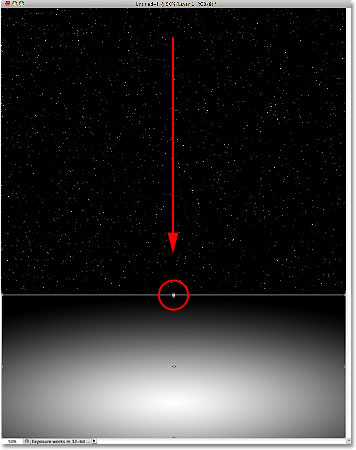
Here, we will use the Radial Gradient function at the Options Bar:

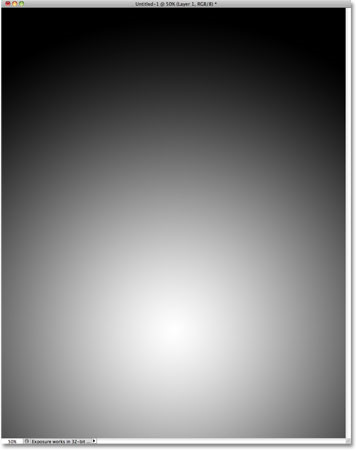
And draw a straight line from the bottom up as shown below:
Our photo will change as follows:
Select the Edit> Free Transform menu or press Ctrl + T (Windows) / Command + T (Mac) to use the Free Transform function :

A selection will appear around the entire gradient , dragging the top part of this part downwards as shown below:
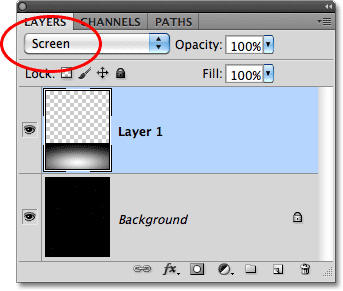
Continue, change this layer's mode from Normal to Screen to make it look like the galaxy and the stars are shining:
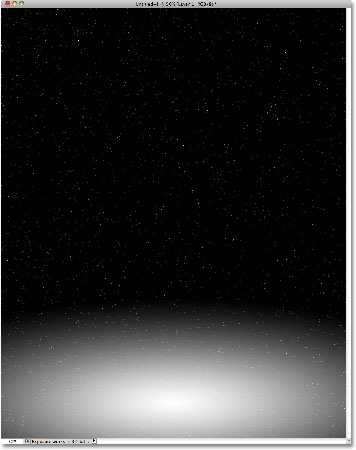
Our results in this process:
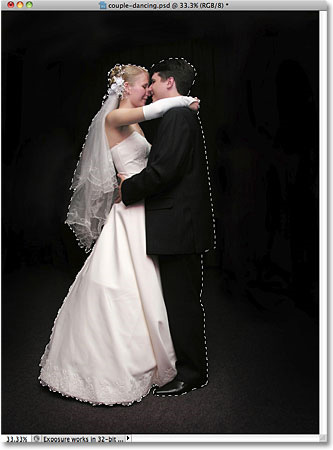
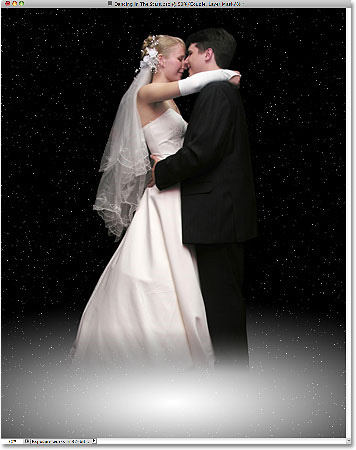
Thus, it can be considered that the background of the background has been completed, followed by the main characters of the photo. Here, we choose a picture of a couple dancing:

Draw a selection around these two main characters using your optional tool ( Lasso Tool, Magnetic Lasso Tool, Pen Tool .):
Then press Ctrl + J (Windows) or Command + J (Mac) to duplicate this selection:
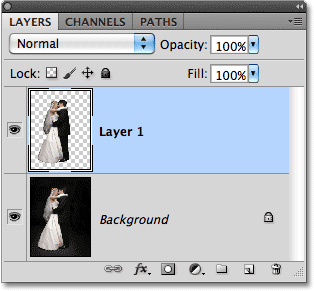
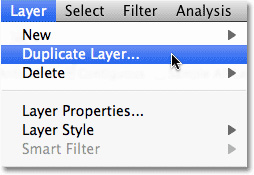
Still selecting the couple's original photo layer, click menu Layer> Duplicate Layer:
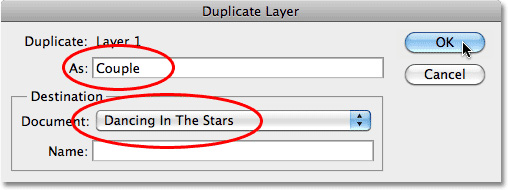
Name this new Layer Couple and choose Dancing In The Stars in the Destination section, then click OK :
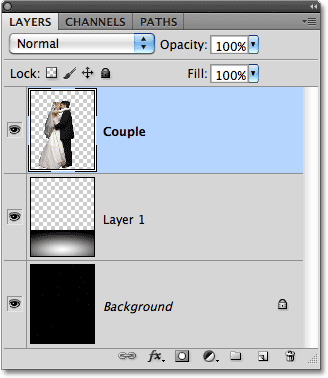
On our background photo, a couple's photo will appear:

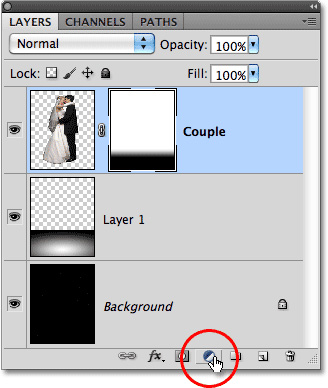
In the Layer panel, the order of the layers is sorted and classified as follows:
Change the aspect ratio of the new image to match the frame:
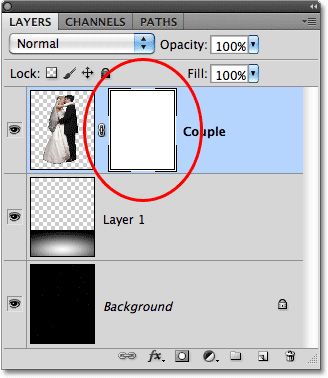
Select the Layer Mask icon at the bottom:
A mask layer of this layer will display on the right:
To continue, we need to blur the bottom part of the couple. Select the Gradient Tool on the Tool bar and Linear gradient:

As the example here, we start manipulating from the knee, hold down Shift and drag the mouse down below a paragraph:
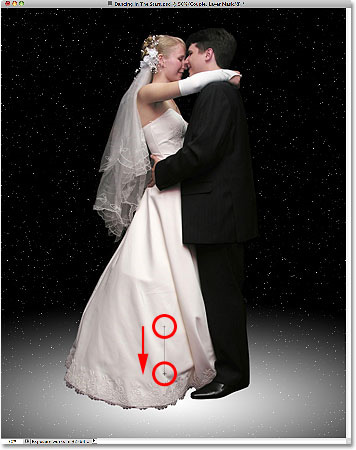
Results of the above operation:
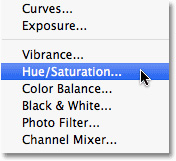
Here, we need to change the background color of the scene, select the New Adjustment Layer icon at the bottom of the control panel:
Select Hue / Saturation in the displayed list:
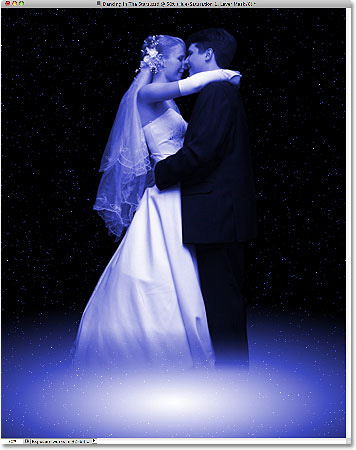
The window to adjust Adjustments is displayed, check the Colorize box and change the Hue parameter to 240 and Saturation to 50:
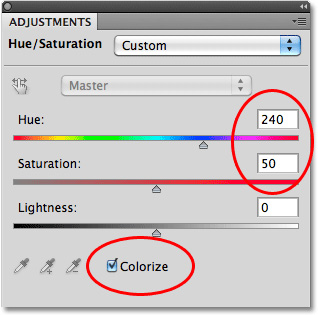
Click OK , and we will get the result as shown below:
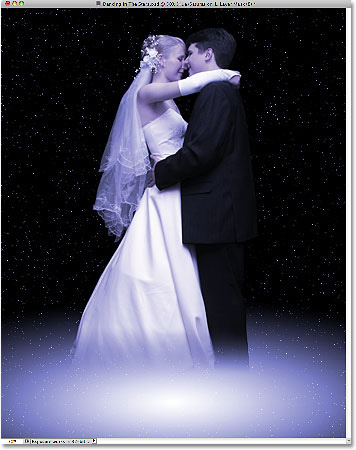
It is too easy to see that this picture has not given our mainstream idea yet, because the color part is disproportionate. So change the current mode of this class
Color
, reduction
Opacity
down
60%:

The color of the photo has changed:
There's still one thing to do here is the top part of the bride, so light and contrast are not the same as reality. Use the Gradient Tool, and work like the image below (remember to hold down the Shift key to make the selection more accurate):
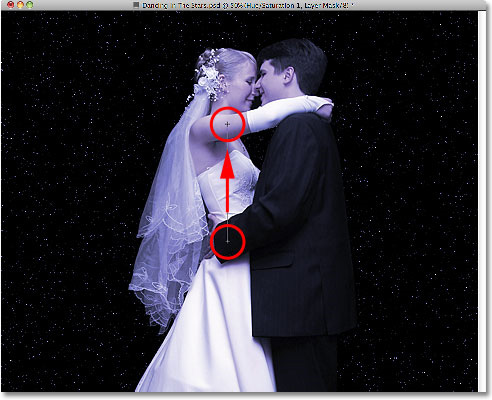
If you have not achieved the desired results, do it again until you feel satisfied. Because our purpose in this step is to bring a natural look on the skin to show outside:

Good luck!