How to use BitLocker to encrypt data on Windows 8
Microsoft provides users with a BitLocker encryption tool to ensure user data is protected at the highest level. If you have some important data to store in your computer hard drive or USB flash drive, you can use the BitLocker encryption tool.
In the article below, Network Administrator will show you how to enable BitLocker on Windows 8.
Steps to enable BitLocker on Windows 8:
Note: In this tutorial, enable BitLocker for C drive
Step 1:
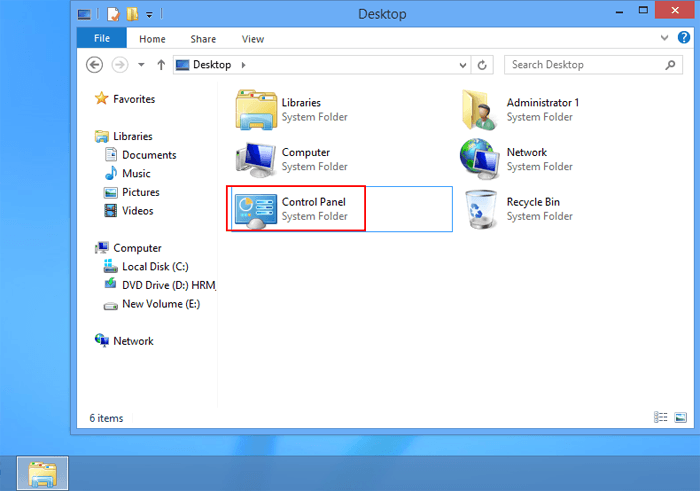
Open Control Panel.
Step 2:
On the Control Panel interface, click System and Security.

Step 3:
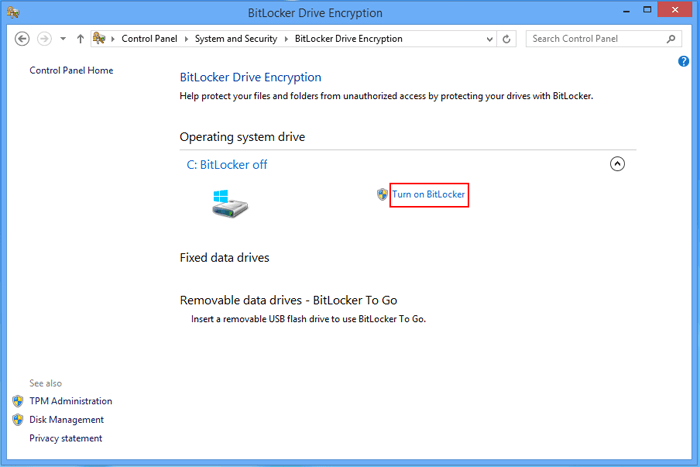
Select the BitLocker Drive Encryption option in the list of right frame options.

Step 4:
Select Turn on BitLocker next to the C drive.
If the error message dialog box appears, as shown below, it means that you cannot open BitLocker.
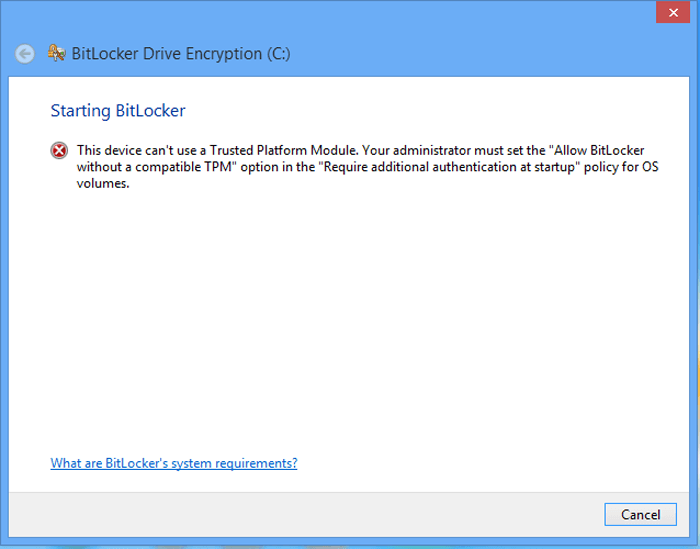
To fix this error, refer to the steps below:
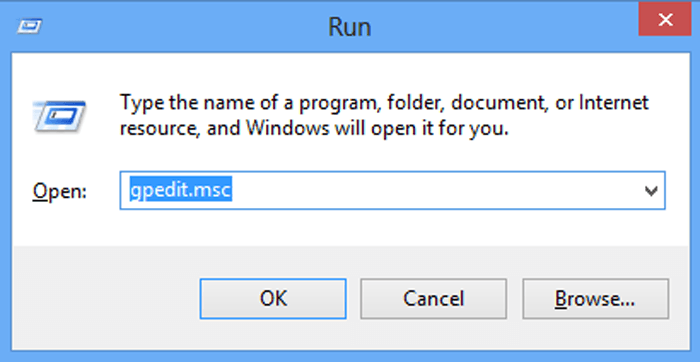
1. Press the Windows + R key combination to open the Run command window.
2. On the Run command window, type the following command and then click OK to open Local Group Policy Editor:
gpedit.msc
3. In the Local Group Policy Editor window, navigate to the following path to find and double-click the Require additional authentication at startup option:
Local Computer Policy / Computer Configuration / Administrative Templates / Windows Components / Bit Locker Drive Encryption / Operating System Drives / Require additional authentication at startup
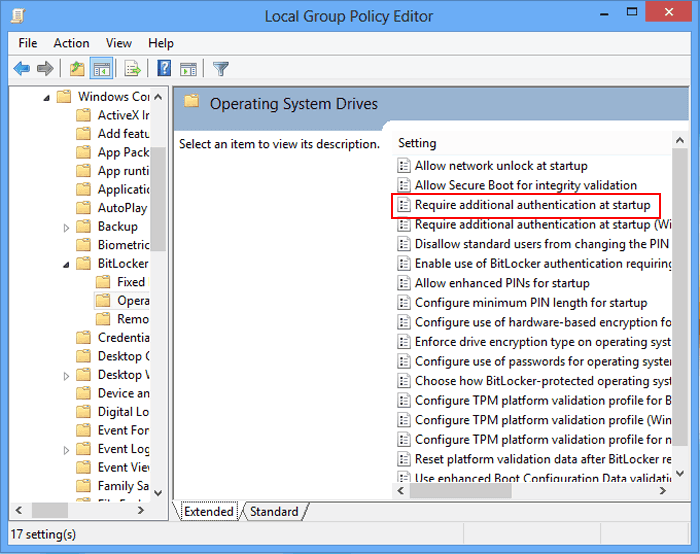
4 On the Require additional authentication at startup window , in the left pane, select Enable.
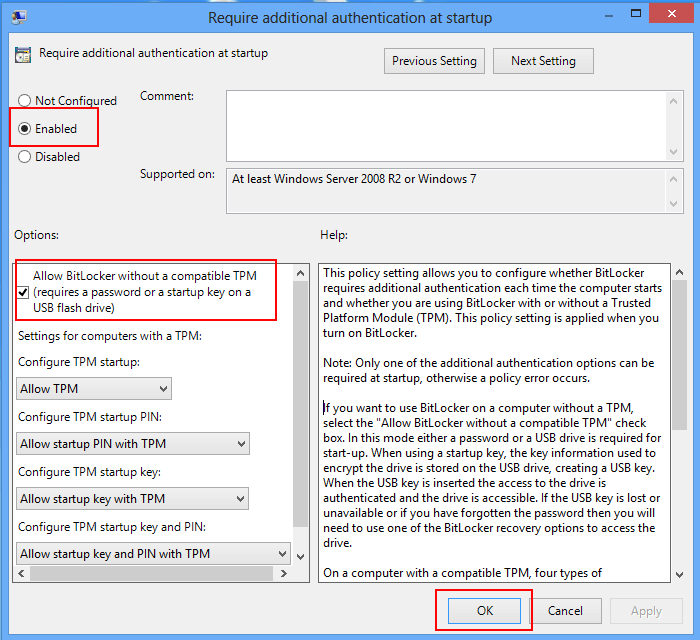
Now the Allow BitLocker option without a compatible TPM is automatically selected.
Next, click OK to save the changes and close Local Group Policy Editor.
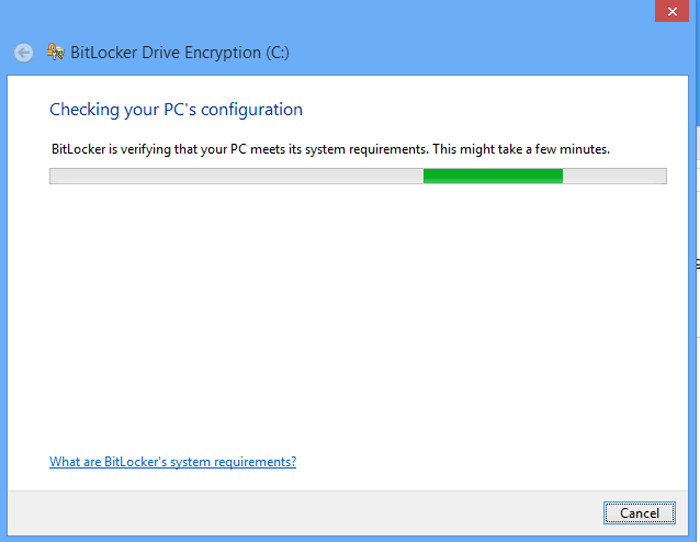
5. Click Turn on BitLocker again and wait for BitLocker to check your computer configuration.
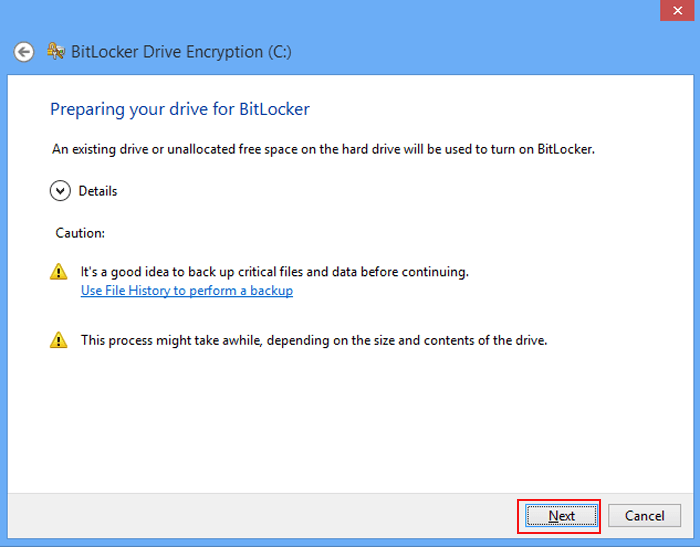
6. On the next interface, click Next.
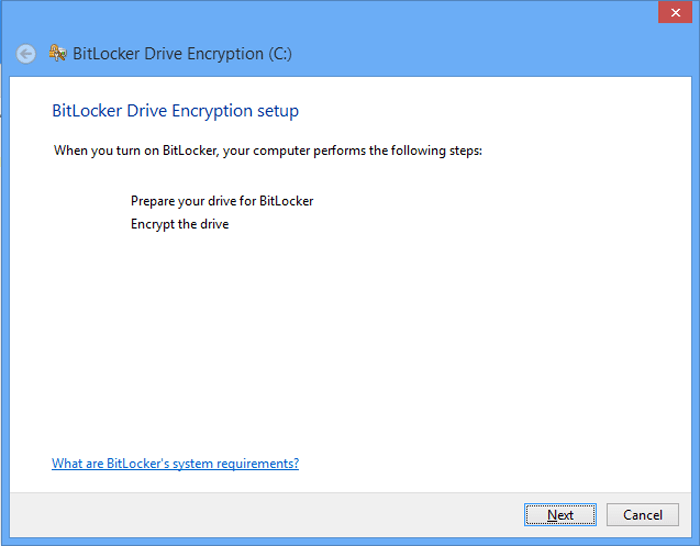
7. Next select Next .
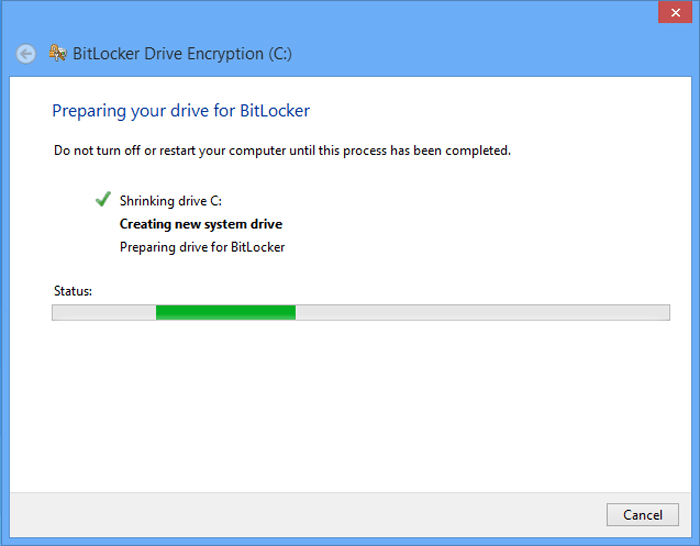
8. Wait for the program to prepare BitLocker for the drive.
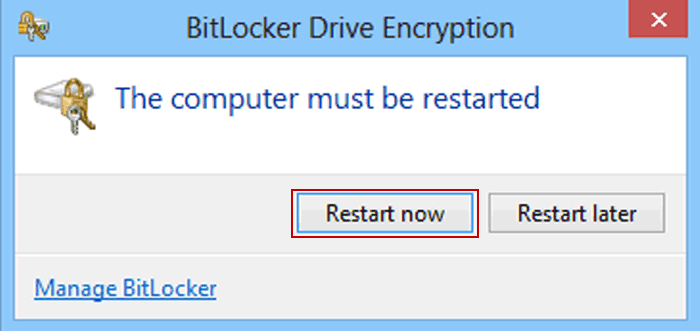
9. Click Restart now to finish the process of preparing the system drive encryption.

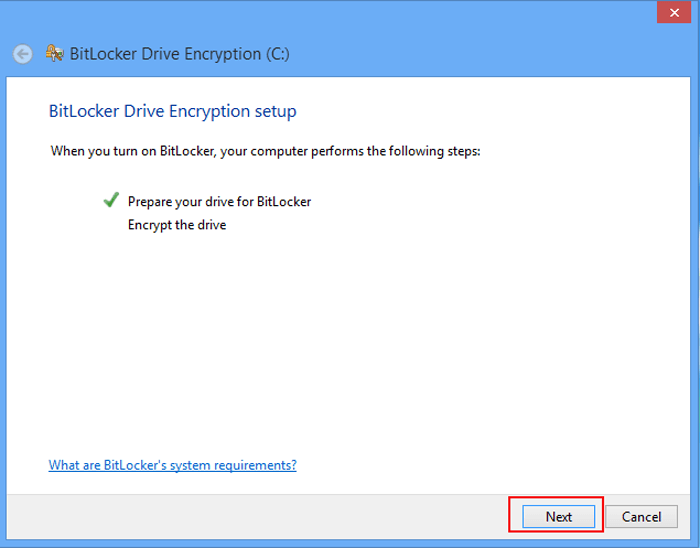
10. After starting, click Next to encrypt the drive.
Step 5:
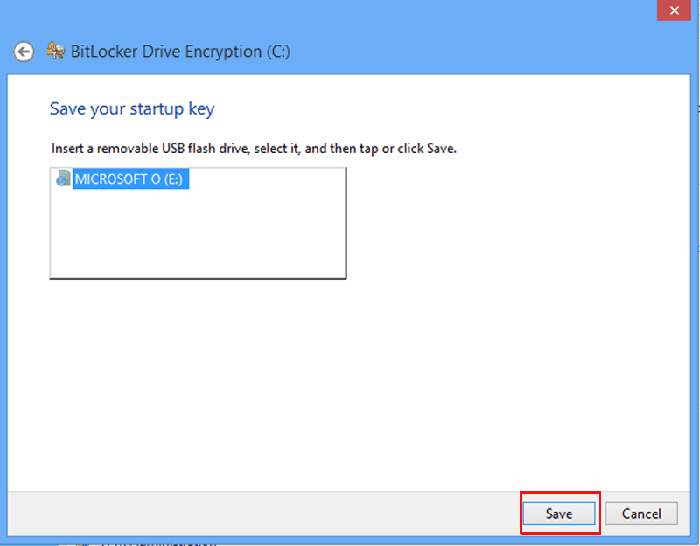
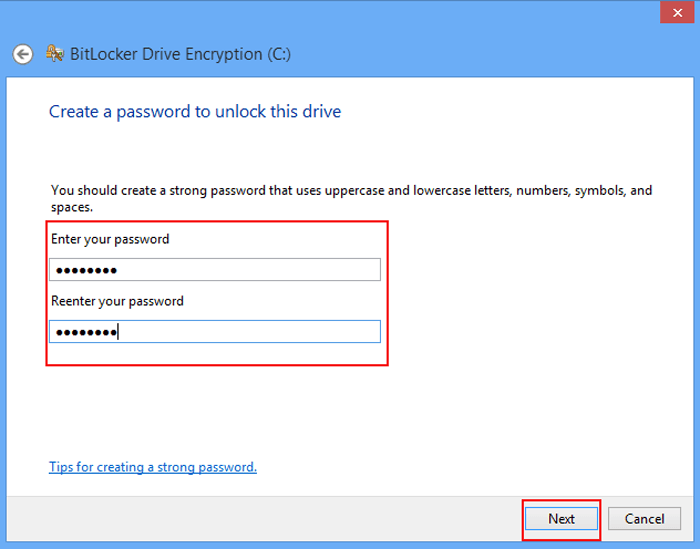
Select Enter a password or Insert a USB flash drive to unlock the drive.
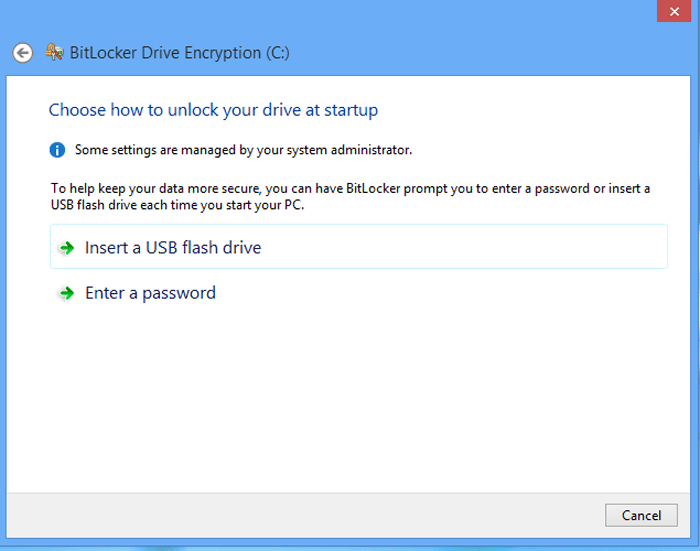
1. If you select Insert a USB flash drive , you must insert a USB drive into the computer, then select the USB drive and click Save.
2. If you select Enter a password , enter the 8-character password or more in the Enter your password box, then re-enter the password in the Reenter your password box and then click Next to continue.
Step 6:
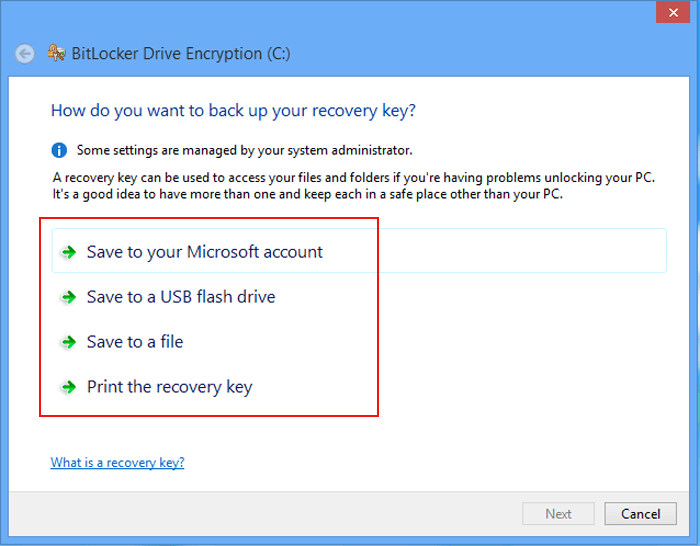
Select one of the options Save to your Microsoft account, Save to a flash drive USB, Save to a file and Print the recovery key to save Recovery key. After selecting, click Next .
Step 7:
Select Encrypt used disk space only or Encrypt entire drive, then click Next.

Step 8:
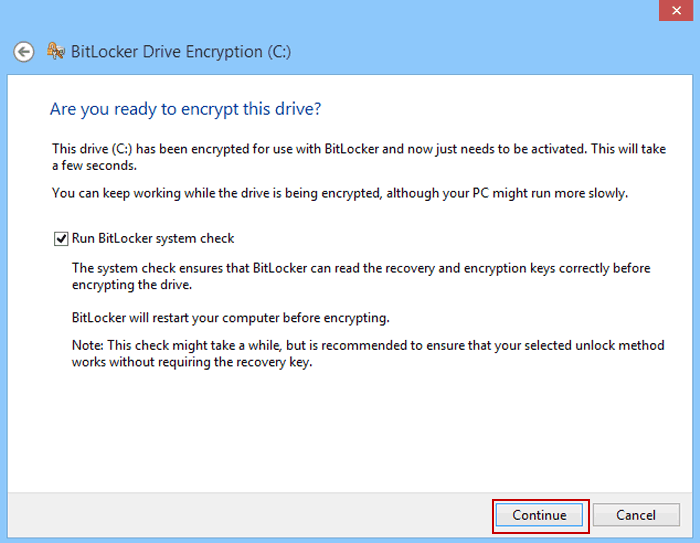
Select Continue to encrypt the drive.
Step 9:
Select Restart now to restart your computer.
From now on you will be asked to enter the password to unlock the encrypted system drive.

Refer to some of the following articles:
- Instructions for encrypting USB or memory cards with Bitlocker on Windows 10
- How to use Bitlocker to encrypt data on Windows 10 (Part 1)
- How to use Bitlocker to encrypt data on Windows 10 (The last part)
Good luck!