How to turn off BitLocker on Windows 11, turn off hard drive encryption
The BitLocker feature on Windows 11 (Professional, Enterprise and Education editions) is designed to encrypt the hard drive to better secure user data. However, for many reasons, users should turn off BitLocker on Windows 11 to avoid trouble.
Table of Contents
In some specific cases, users should turn off BitLocker on Windows 11, such as when dual-booting a PC to access other operating system data stored on their computer's hard drive, . .
1. Important Requirements
- To disable BitLocker on Windows 11 requires you to have Admin account access.
- The BitLocker feature is only available on Windows 11 Pro, Enterprise, and Education editions.
2. How to turn off BitLocker on Windows 11
Method 1: Turn off BitLocker on Windows 11 through the right-click menu
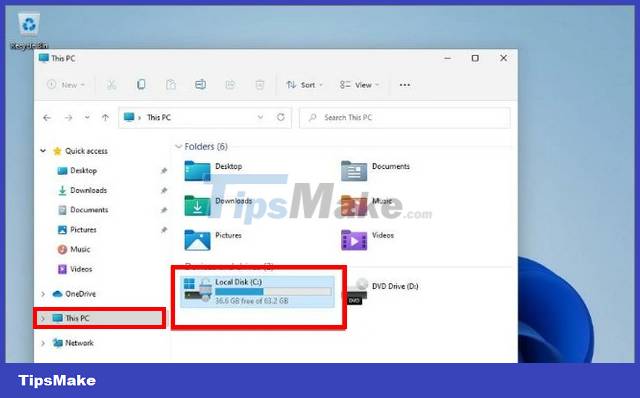
Step 1: Open File Explorer => find and click to open This PC. On the window that appears on the screen, find and right-click the drive that you encrypted earlier.
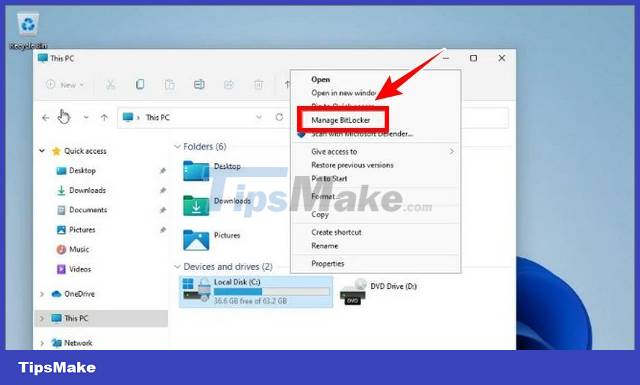
Step 2: Now the screen will display a new menu, here you will see the options Turn off Bitlocker or Manage Bitlocker. In case if the above options are not displayed, click the Show more options option.

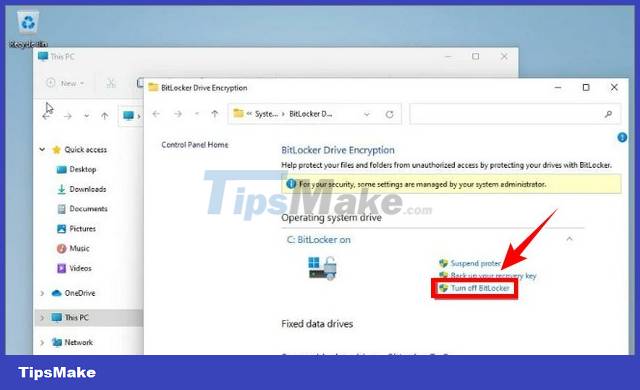
Step 3: Click Manage BitLocker to open the BitLocker Drive Encyption menu.
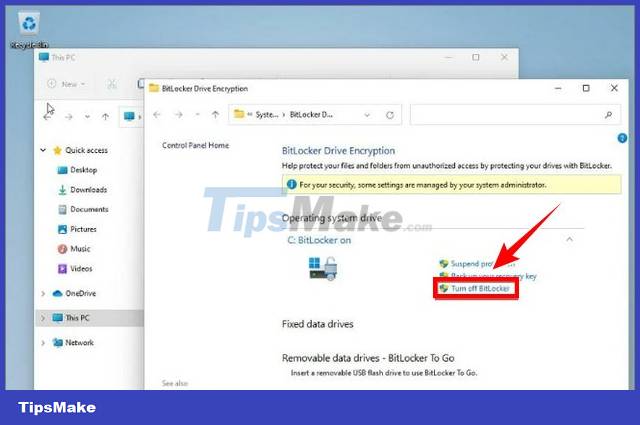
Step 4: On the menu displayed on the screen, click Turn off BitLocker.
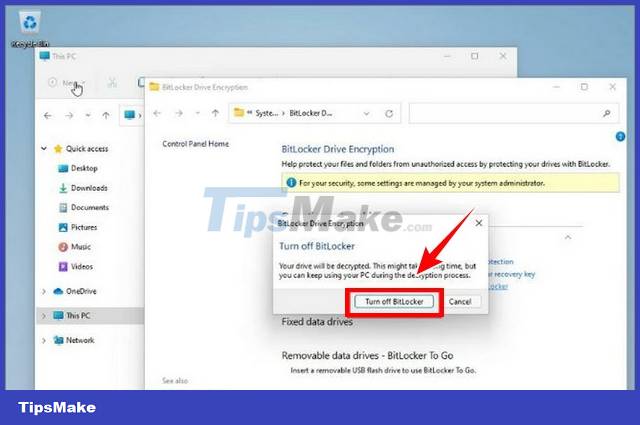
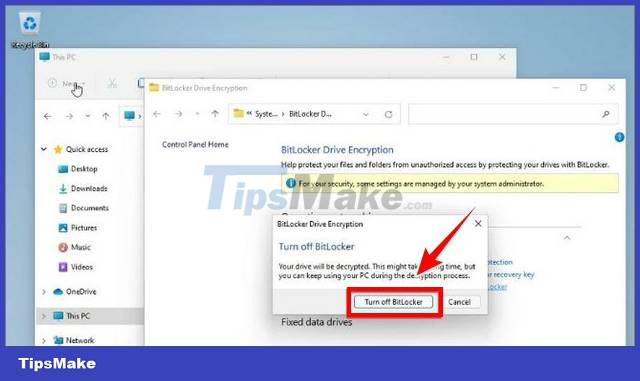
Step 5: At this point, a window will appear on the screen with a message saying that the hard drive will be decrypted. The process may take some time, depending on the size of the hard drive. Click Turn off BitLocker.
Step 6: After the process is completed, a message will appear on the screen saying that BitLocker on Windows 11 has been successfully turned off.

Method 2: Turn off BitLocker on Windows 11 via BitLocker Manager
In addition to turning off BitLocker on Windows 11 through the right-click menu, you can also turn off the feature through BitLocker Manager.
Step 1: Enter bitlocker in the Search box on the Start Menu.
Step 2: On the list of search results displayed on the screen, find and click Manage BitLocker.

Step 3: Do the above to open the BitLocker Drive Encryption menu. Here you find and click Turn off Bitlocker.
Step 4: Click the Turn off Bitlocker button on the next window and wait for the hard drive decryption process to complete.
Besides, if you are using Windows 10, readers can also refer to how to encrypt the hard drive to protect data here to protect information.
Method 3: Turn off BitLocker on Windows 11 through the Settings menu
With this way of turning off BitLocker on Windows 11, follow the steps below:
Step 1: Press Windows + I to open the Settings window.
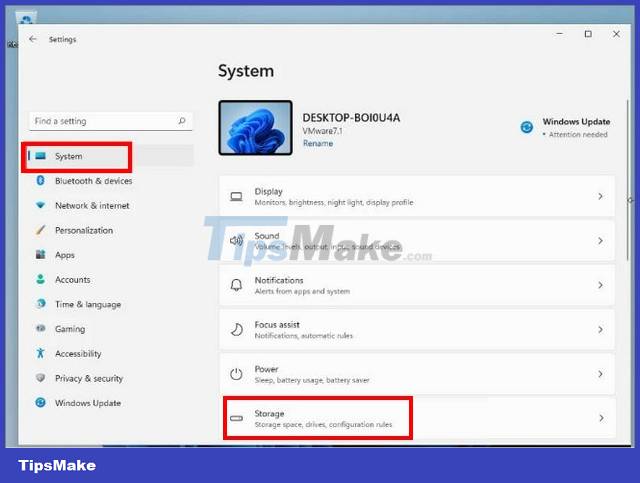
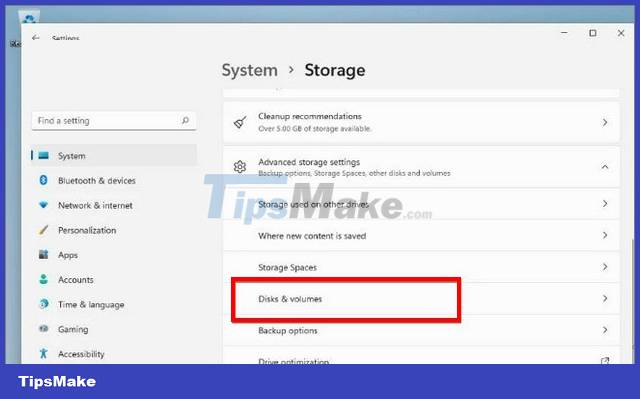
Step 2: Here you find and click the System tab in the left pane, then scroll down to find and click Storage in the right pane.
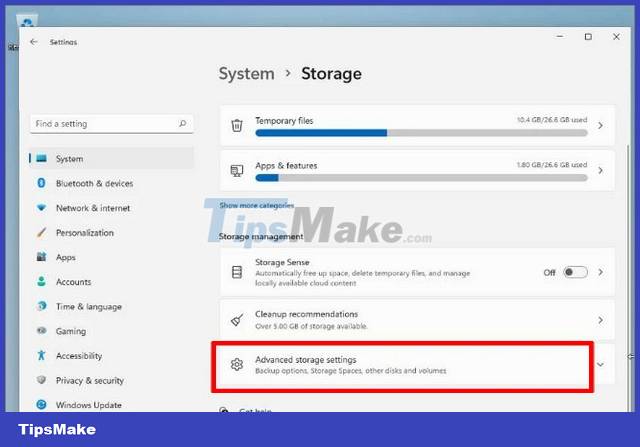
Step 3: Scroll down to find and click Advanced storage settings.
Step 4: Select Disk & volumes from the menu.
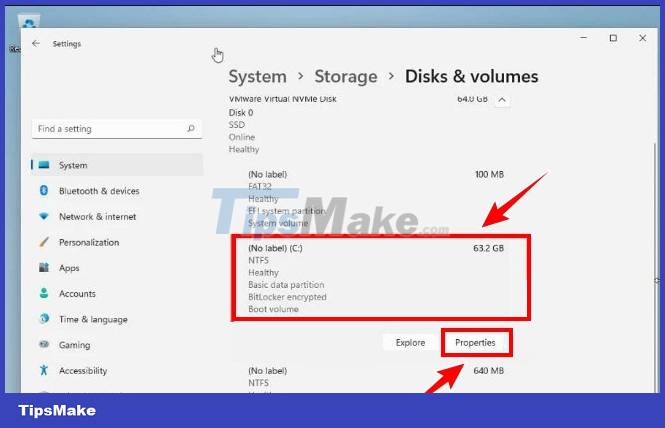
Step 5: Select the hard drive that you previously encrypted to turn off BitLocker on Windows 11, in this tutorial it is the C: drive, and then click the Properties button.
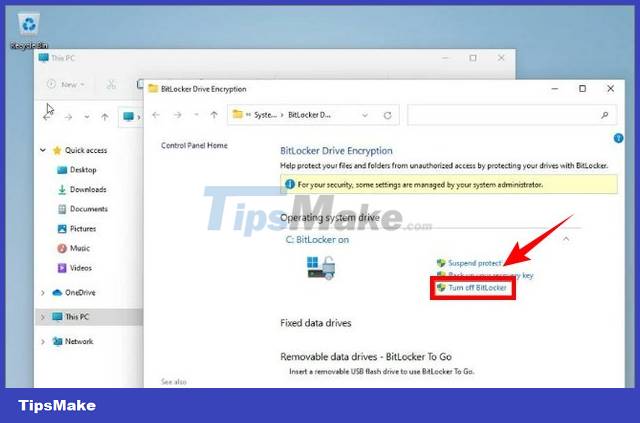
Step 6: Scroll down to the Bitlocker section, find and click the Turn off BitLocker option.

Step 7: The above action will redirect you to the BitLocker Drive Encryption menu. Here click the Turn off BitLocker button.
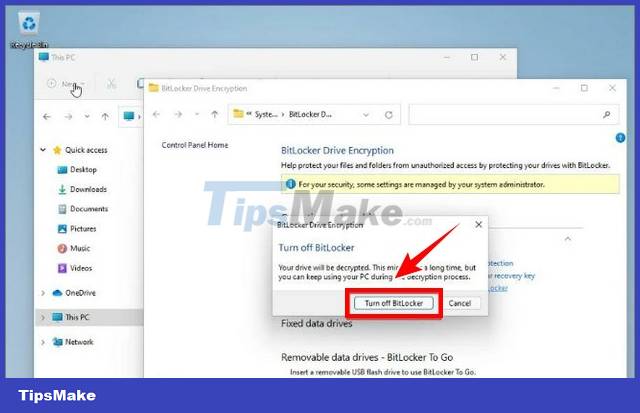
Step 8: On the next window, click the Turn off BitLocker button and wait until the decryption process is complete.
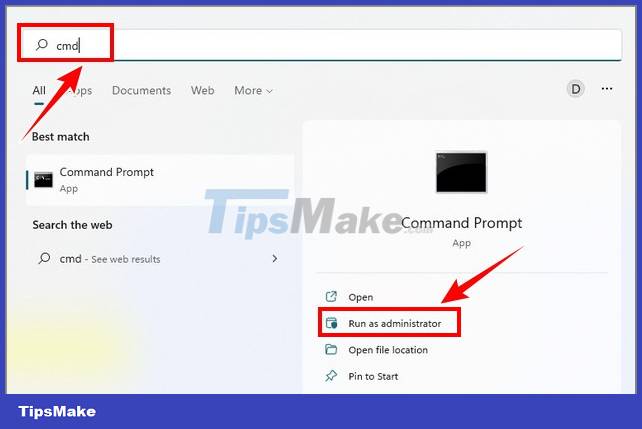
Method 4: Turn off BitLocker on Windows 11 via Command Prompt
Note, with this way of turning off BitLocker on Windows 11, you will have to open a Command Prompt window under Admin to do it.
Step 1: First open the Command Prompt window under Admin by entering cmd in the Search box on the Start Menu.
On the list of results displayed on the screen, click Run as administrator.
Step 2: If the UAC window is displayed on the screen, click Yes to continue.

Step 3: On the Command Prompt window, enter the command below and press Enter:
manage-bde -off :

Note, in the above command replace "" with the hard drive you encrypted. In this tutorial is the C drive.
Step 4: The screen will now display a message saying that the process is in progress. This will disable BitLocker on Windows 11.
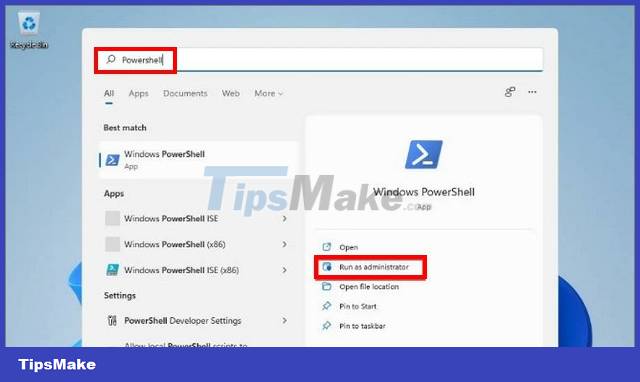
Method 5: Turn off BitLocker on Windows 11 via PowerShell
Similarly, this way to turn off BitLocker on Windows 11 also requires you to open PowerShell as Admin.
Step 1: Enter Windows PowerShell in the Search box on the Start Menu, on the list of search results, click Run as administrator.
Step 2: On the screen that will display the UAC window, click Yes to continue.
Step 3: Next, enter the command below into the PowerShell window and press Enter:
Disable-BitLocker -MountPoint ":"

Note, in the above command replace "" with the name of the hard drive that you want to disable BitLocker on Windows 11, in this case C drive.
Step 4: Turning off BitLocker on Windows 11 will take some time, depending on the size of the hard drive.
Above, Tipsmake has just shown you some ways to turn off BitLocker on Windows 11. In the process of manipulation and implementation, if there are any errors or problems, don't forget to share the error you encountered in the contact section. below the article.
Good luck!
Was this article helpful?
Your feedback helps us improve.
Related Articles
 How to use BitLocker to encrypt data on Windows 84 minutes read
 How to Turn Off BitLocker5 minutes read
 Windows 11 hard drive encryption steps9 minutes read
 Should I use Windows BitLocker to encrypt my hard drive?5 minutes read
 FBI unlocks BitLocker thanks to Microsoft: Is Windows encryption still secure?3 minutes read
 What is BitLocker? How to turn it on and off on Windows 10, 113 minutes read
Reader Comments 0
Sign in with email or Google to join the discussion.