In work and study, Gmail is probably an application that is no stranger to many users today. In addition to sending familiar documents and files, [ Gmail ] also offers users the ability to send and add photos to email very handy. If you do not know how to do it, please read my tutorial.
1. How to upload photos to Gmail using your phone
Currently, the Gmail application is pre-installed on all Android phones, especially for the iPhone, you just need to download the Gmail app on the App Store quickly and easily.
Once you've downloaded Gmail to your full phone, to upload photos to Gmail, follow the steps below:
Step 1: Open the Gmail app.

Step 2: In the main interface, click the plus sign in the bottom right corner of the screen to conduct a new mail.

Step 3: In the gmail compose interface, click on the pin icon at the top of the screen.

Then select the words Attach file.

Step 4: Now the file management folder on your phone will appear, find the folder or location where you want to upload the image and click on the image. Note that you can select multiple photos at once to upload to Gmail if you want.
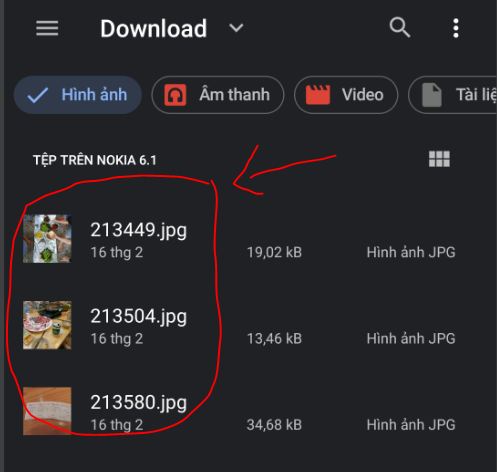
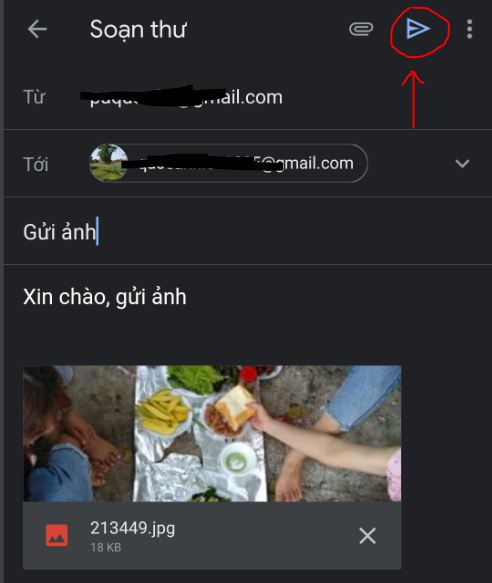
Step 5: Once the image is in the compose section, it has already been uploaded to Gmail, now you just need to write more content, select the sender and click on the blue triangle icon above to send that email. .
2. How to upload photos to Gmail using a computer
In case you are using a computer and want to send photos to Gmail, follow these steps:
Step 1: You open up the web browser on your computer, access the Gmail website and proceed with your account login as usual.
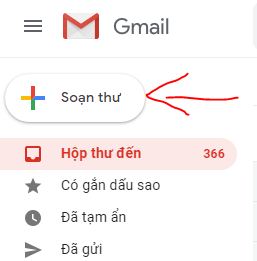
Step 2: Once logged into your Gmail account, in the main interface, click on the Compose box with a plus sign located in the upper left corner of the screen.
Step 3: A compose interface will immediately appear, click on the black square icon as below.
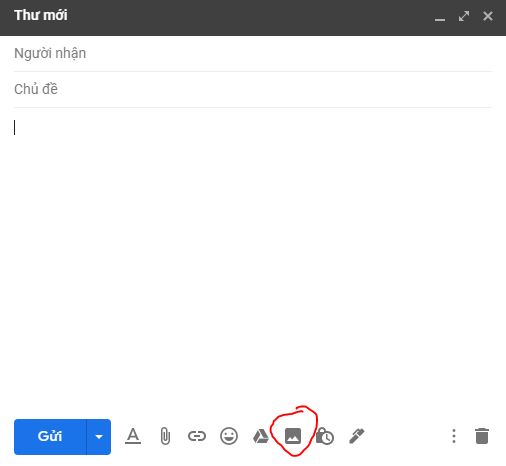
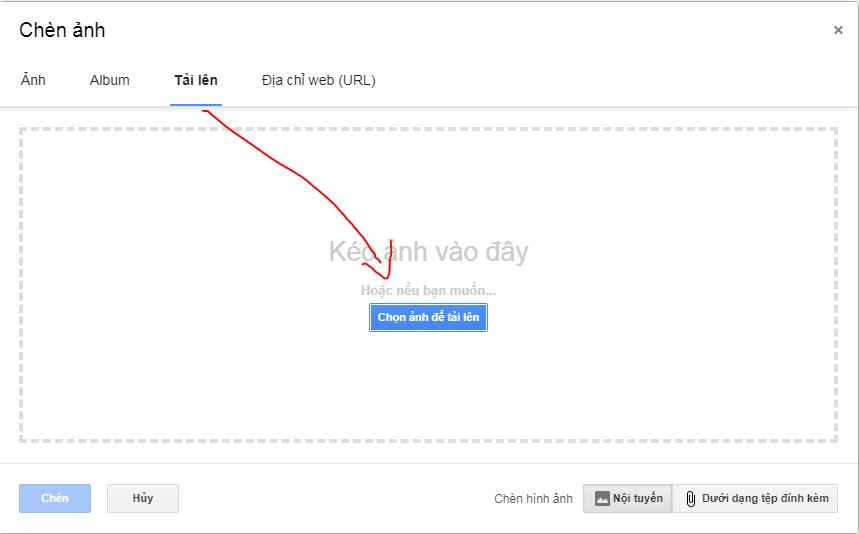
Step 4: The image insertion window will open, click the Upload tab and click Choose photos to upload.
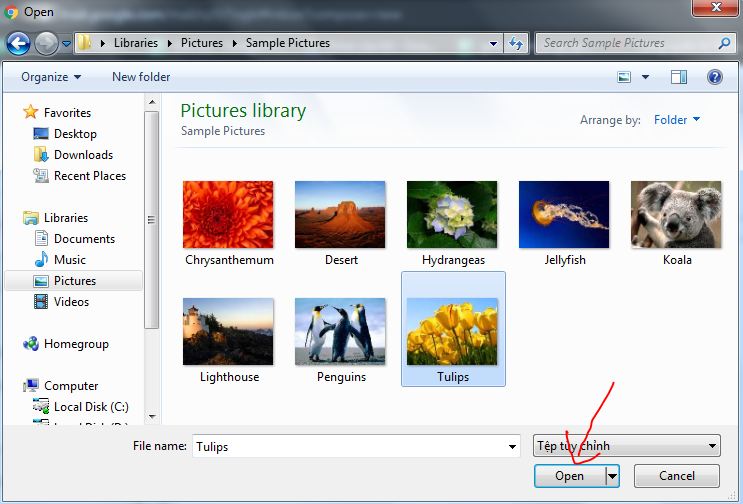
Now the image selection window appears for users to navigate to the folder containing the images to upload, you can select multiple photos at once and click Open to proceed to upload the image files to Gmail.
Step 5: The download process will take place quickly or slowly depending on the size of the photo you have chosen.
When images are uploaded to gmail successfully, they will appear in the body of the email, with each photo uploaded, users can adjust their size by clicking on the photo and selecting the options. Size as Small, Best Fit and Original Size.
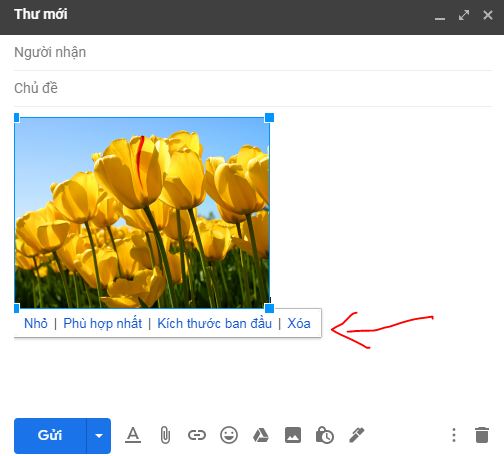
If you do not want to select that image, then click the Delete button next to upload another image instead.
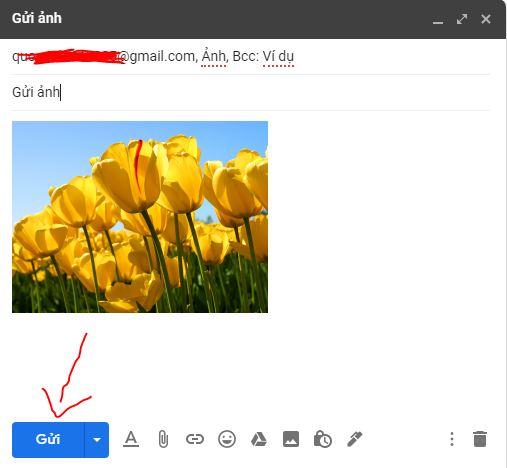
Step 6: Now you just need to complete the form, enter the recipient's name and click the blue Send button below.
So I showed you how to upload photos to Gmail on your phone and computer the fastest way. Hopefully the above article will be useful to you. I wish you successful implementation!