Table of Contents
This updated guide explains how to Sign a Document with GIMP through clear steps, practical examples, and important checks that help prevent common errors.
Why waste paper when you can digitally sign documents? All you need is a picture of your signature, a PDF document you may need to sign and GIMP! Let's find out how to do it via this guide!
Prerequisites
To be able to sign a digital document, you will need the document in PDF format.
Adding a signature to the document is easy, if you have a tablet with a stylus. For most people who don't have such a device, a signature photo taken with a smartphone and saved in JPEG format can also be used.
There is a lot of software that allows you to sign documents. In this tutorial, the article will show you how to add a signature using GIMP.
Begin
Run GIMP and use File> Open. to find, select and open the PDF file you may need to sign.
The PDF file in the example has a single page. If your document has more pages, select the page you want with 'Open pages as: Layers' . Leave the rest of the options as they are and click Import.
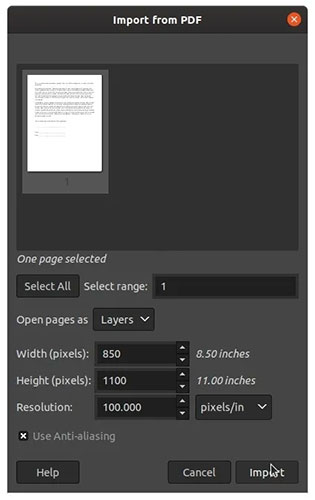 Select the PDF file you may need to sign
If your document includes more than one page, thanks to the previously selected option, you will find them as individual pages in the right panel of the layer. Use the eye icon on the left side of each layer to change its visibility.
Use File> Open as Layers. to find, select and import your signature image as a new layer.
Working with Layers
Move the newly imported signature layer directly onto the page layer you may need to sign, by left clicking and dragging it up or down in the layer list. You will have to click and deselect some eye icons to find the one that fits.
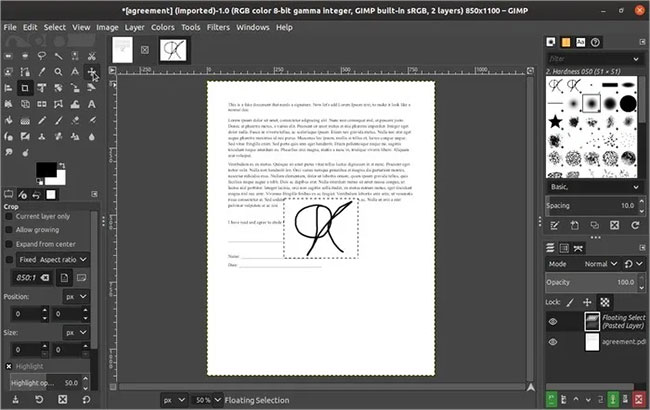 Move the newly imported signature layer directly onto the page layer you may need to sign
To make it easier to set, reduce the opacity of the signature layer by using the bar at the top of the layer panel. Use the Move tool ( M on the keyboard) to move the signature layer to where you want it to appear on the page.
Use the Scale tool ( Shift + S on the keyboard) if you need to shrink your signature to better fit. After you select the tool and start shrinking the signature, press Shift again and hold to limit the rate distortion job. You don't want your signature distorted, do you?
You may need to reselect the Move tool to better position the signature on the page. When you're happy with its position, bring the layer's opacity back to 100%.
You may think that a transparent PNG signature is needed, but in 99.9% of cases, the signature is written in black or blue ink on white paper. And thankfully we have layer modes.
Notice the pulldown Mode menu at the top of the layer panel. With the signature layer selected, change the mode from Normal to Darken only. All whitespace around the signature will be effectively bypassed and transposed.
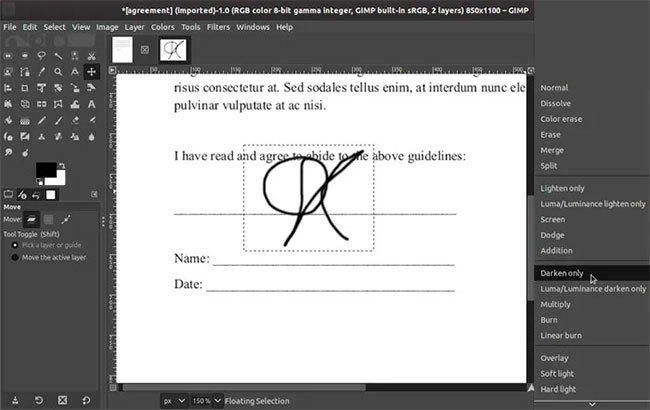 Change the mode from Normal to Darken only
To complete the changes, right-click the signature layer and select Merge Down to associate the signature with the page.
Choose File> Export As. and give the new document a different name to keep the original. Use PDF as an extension to re-export in this format.
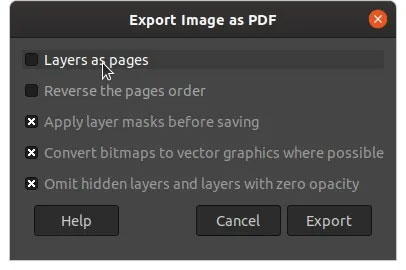 Give the new document a different name and export it in PDF format
FAQ
What is the easiest way to Sign a Document with GIMP?
Start with the requirements in this guide, then follow each step in order. Check the result after every major change so problems are easier to identify.
Can beginners follow these instructions?
Yes. The process is organized into practical steps, and you can repeat any step before moving forward.
What should I check if the method does not work?
Confirm your software or device version, permissions, settings, file format, and internet connection when the task depends on online services.
Related Articles
 New Features of GIMP Version 2.10: GIMP 2.1010 minutes read
 How to Arrange Brushes in GIMP with Tags6 minutes read
 4 Plugins That Help GIMP Become a Professional Tool: Explained7 minutes read
 8 Best GIMP Plugins and How to Install Them11 minutes read
 How to Create X-Ray Effects in GIMP6 minutes read
 Don't Miss Out on These 11 Beautiful Free Brushes for GIMP8 minutes read
Reader Comments 0
Sign in with email or Google to join the discussion.