How to create X-ray effects in GIMP
GIMP can help users highlight parts of the image even if they are obscured by clothing or something. For example, when you need to pay attention to the shape of a model used in corporate advertising..
GIMP can help users highlight parts of the image even if they are obscured by clothing or something. For example, when you need to pay attention to the shape of a model used in corporate advertising. GIMP provides the tools users need to simulate X-ray effects by selecting an area on the model's clothes and adjusting the color intensity, contrast and brightness until the same as the body. people below. You can also simulate X-ray effects using GIMP's Opacity, Grayscale and Desaturate tools on objects in separate layers of the same image.
Create X-ray effects on the same layer
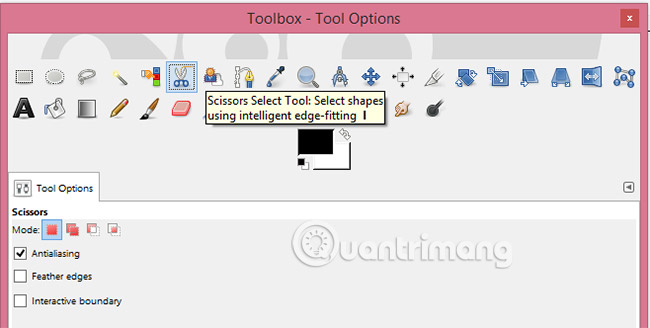
1. Click the Scissors Selection Tool in the toolbox.
2. Click the outline around the area to add X-ray simulation effect. Adjust the size of the selected area accordingly by clicking on the nodes (resizing dots), holding the left mouse button and then dragging them to the desired position.

3. Click the node to make the first adjustment to close the selection and then click anywhere in the outline area to turn it into a selection.
4. Click on the Colors menu and then choose Levels. Levels tool helps control the color intensity of the selected area.

5. Move the Input Levels slider to the left until the selected area is brighter, but still retain most of the original texture and some of the colors below.
6. Move the Output Levels slider slowly to the right until the selected area starts to resemble the underlying details.

7. Click OK to apply the changes.
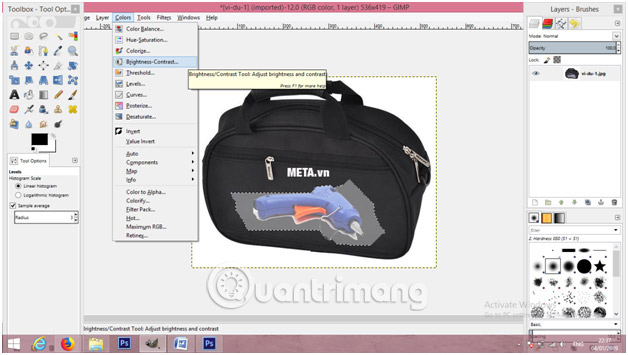
8. Click the Colors menu and then select Brightness-Contrast.
9. Move the Contrast slider to the right to sharpen the area below.
10. Move the Brightness slider left or right to adjust the brightness of the selection.

11. Click OK to apply the changes.
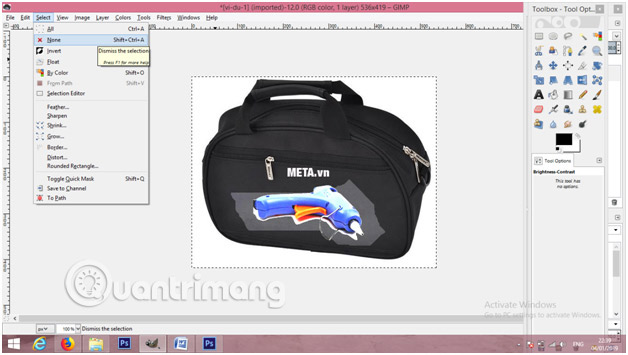
12. Click the Select menu and then select None to uncheck the area.
Create X-ray effects on different image layers
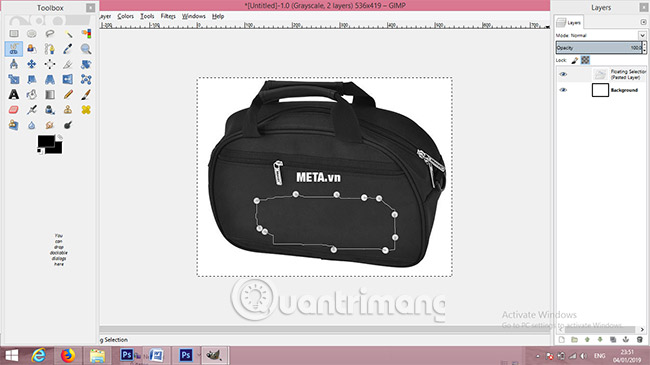
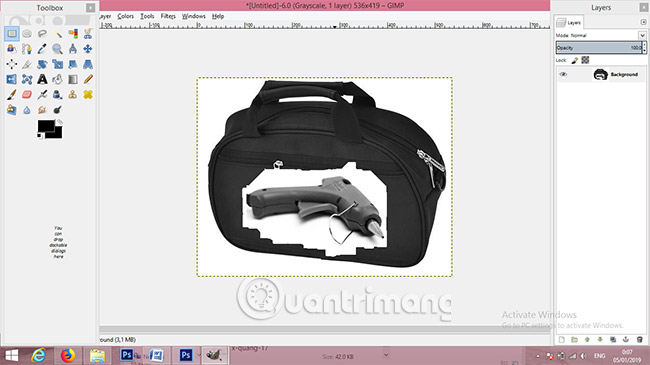
1. Open the two images needed to create the X-ray effect. The first image will be the object that wants to create the X-ray effect. The second image will be the hidden object that the X-ray effect reveals. For example, we have a picture of a suitcase and a glue gun. The X-ray effect will detect the glue gun placed inside the suitcase.

2. Click the tab containing the first image and then click Background in the toolbox.

3. Enter "000000" in the box labeled HTML Notation and then click OK to create a black background for the image.

4. Click the Image menu , select Mode and Grayscale to convert the image to grayscale.

5. Click the tab containing the second object.
6. Change the size of the hidden object (glue gun) so that it will fit in the suitcase, but note that the size must still be large enough to see clearly. For example, if the picture of the suitcase is 400 pixels wide and the glue gun is 410 pixels wide, click the Image menu and select Resize. Enter a width of about 300 pixels and then click Resize.
7. Select the object you want to hide in the first image using the Scissors Selection Tool.
8. Click Crl + I to convert the selection from the object to the rest of the current image.
9. Press Ctrl + X to remove extraneous parts of the image and leave the desired part on the black background.
10. Click Ctrl + I to select the object again.

11. Click the Down arrow on the Opacity tool located in the dock until the image fades but remains visible. Try a blur level of 40 to 50.

12. Click the tab containing the first image, press Ctrl + L to display the Layers panel , then click the New Layer button , then select the newly created layer. The hidden object will be added to the new layer.
13. Click the tab containing the second object.
14. Click the Image menu , select Mode and Grayscale to convert the image to grayscale.
15. Press Ctrl + A and then select Ctrl + Shift + C to copy the object. The Ctrl + Shift + C key or Copy Visible command forces GIMP to put everything visible in the workspace to the clipboard. The usual Copy command also works, but sometimes it doesn't select the current area when you press Ctrl + C. The Copy Visible command always works very well.

16. Click on the layer containing the first image, press Ctrl + V to paste the selected object into the new layer and then Ctrl + H to anchor it.
17. Click on the Move tool and adjust the position of the object in the larger image.
18. Click the Colors menu and then select Invert to create an image that resembles a negative image.

19. Click the Down arrow on the Opacity until the opacity is 90 to allow some parts of the background to be black.
20. Click Image and select Flatten to mix both layers together and display the desired X-ray effect.

Note: This method works best if the overlay and the underlying object have contrasting colors. For example, it is difficult to see an almond-colored outfit and a yellow or dark brown skin color.
Note : The information in this article applies to GIMP version 2.8.8. The steps may vary slightly in other versions.
See more:
- Instructions for drawing arrows with Gimp
- How to remove pixels in GIMP
- How to use Paintbrush in GIMP