Table of Contents
This practical guide walks through how to set a password for PowerPoint files to protect data, explains the main requirements, and highlights common issues that may appear along the way.
For PowerPoint applications, we can completely set up passwords to secure content, because Microsoft has built this feature for us already.
Yes, and in this article I will show you two ways to keep the content in your PowerPoint file safer.
- One is you set a password for the PowerPoint file, and now the user needs to enter the correct password to open the file.
- The second is to only allow opening and reading files but not allowed to edit the content.
#first. Set a password for the PowerPoint file
For this method, the user must enter the correct password to view the content, otherwise the user cannot view the content incorrectly.
Perform:
+ Step 1: Click on the File Tab

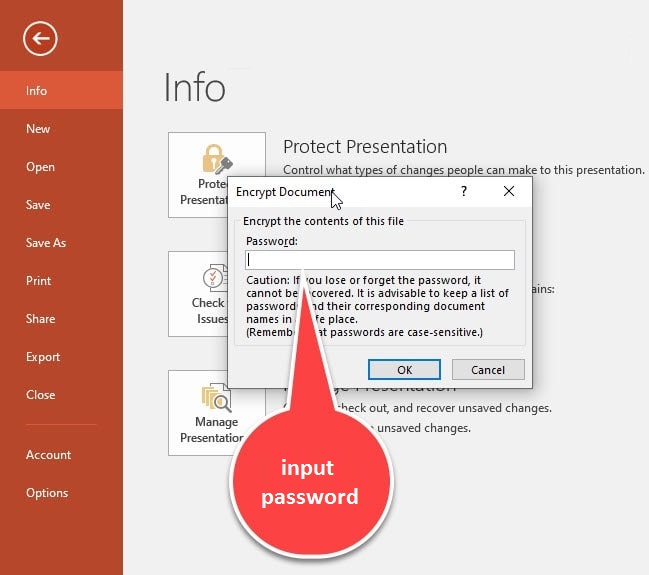
+ Step 2: Select the info item, then choose the Protect Presentation in the next interface. Display the category => click to select the Encrypt with Password feature.

+ Step 3: The Encrypt Document dialog box will be displayed.
- We will type a password to prevent others from opening => next select OK.
- Enter the password again to confirm the password created, note that 2 entries must match.
+ Step 4: When setting the password successfully, the PowerPoint interface displays a message asking for password to open the file.
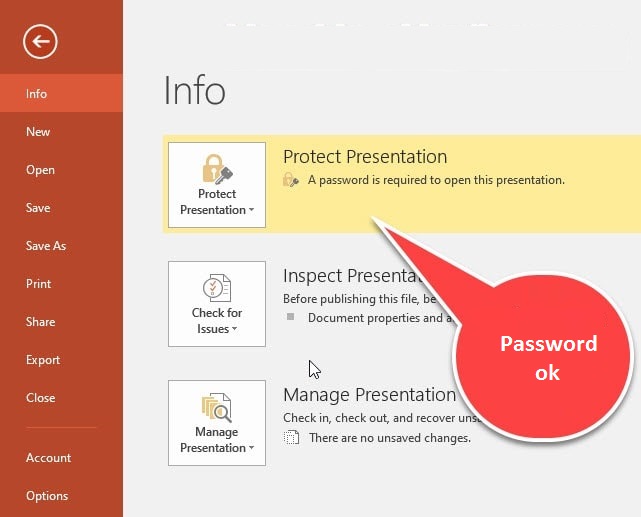
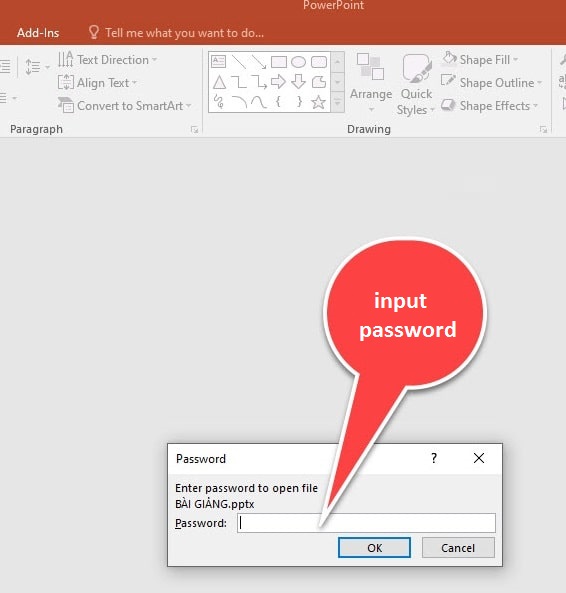
From now on, To open the file, it is imperative that the user enter the correct password to open the file.
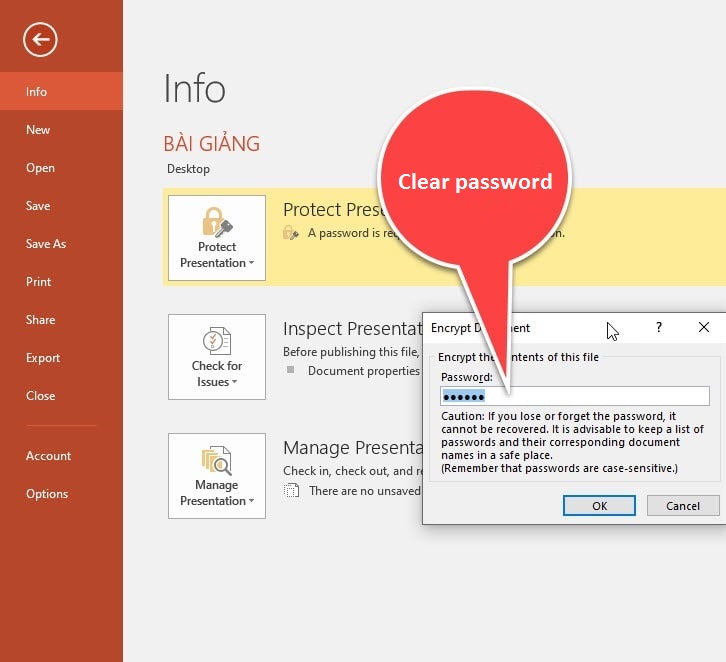
+ Step 5: To remove the password set for the PowerPoint file, click File => select Protect Presentation => and then click Encrypt with Password.
=> Then delete the password and select OK.
#2. Set the mode for others to see, but not to edit
Also known as Real-only mode. For this way, if the user knows the password, then enter the password to view the content and edit it. If the user does not know the password, the content can still be viewed but cannot be edited.
Perform:
+ Step 1: Click on the File Tab
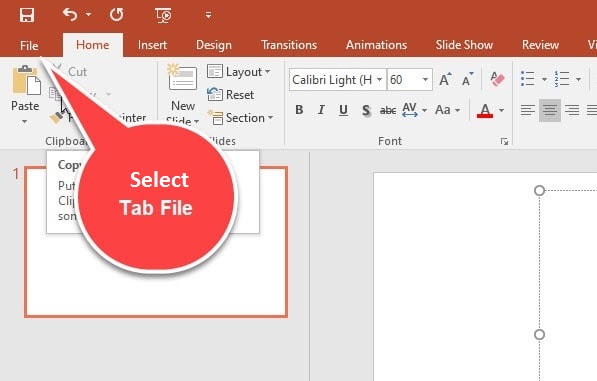
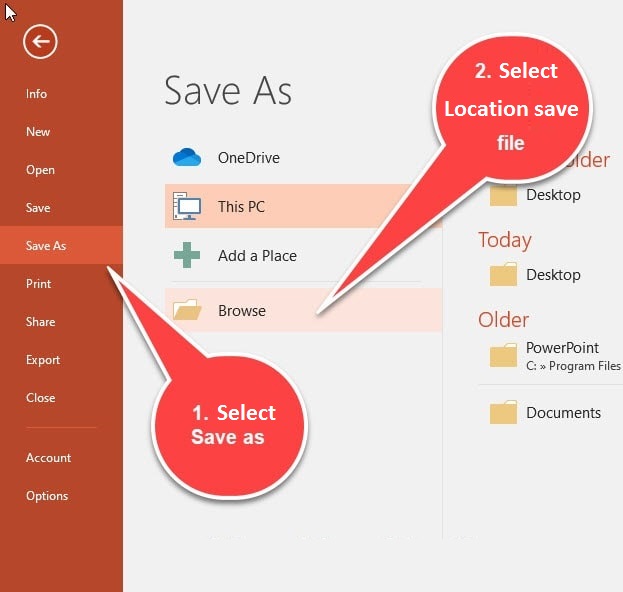
+ Step 2: Select Save As => then choose where you want to save the file.
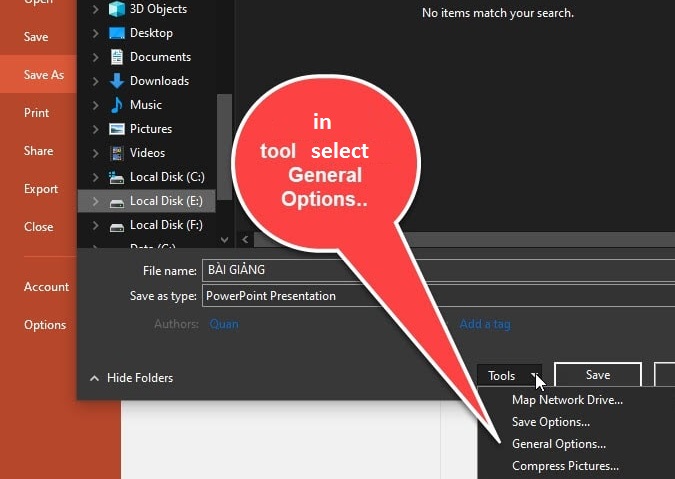
+ Step 3: In the section Tools => select General Options.
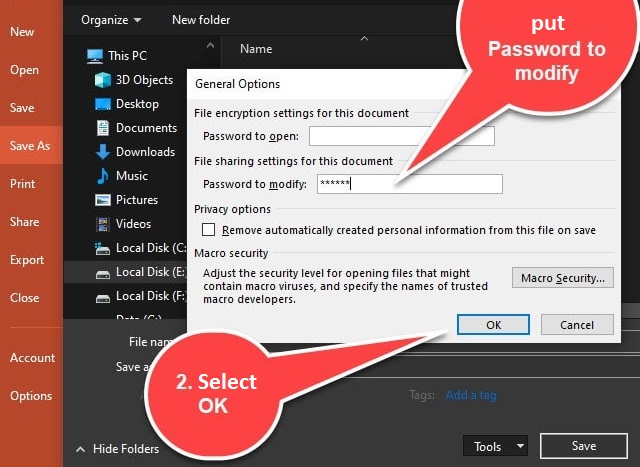
+ Step 4: There are 2 boxes to enter, Password to open box is used to enter the password to open the file.
And in the box Password to Modify you enter the password to allow reading the content but not be edited, here we only use the Password to Modify option.
Enter the password, click OK, then enter one more time.
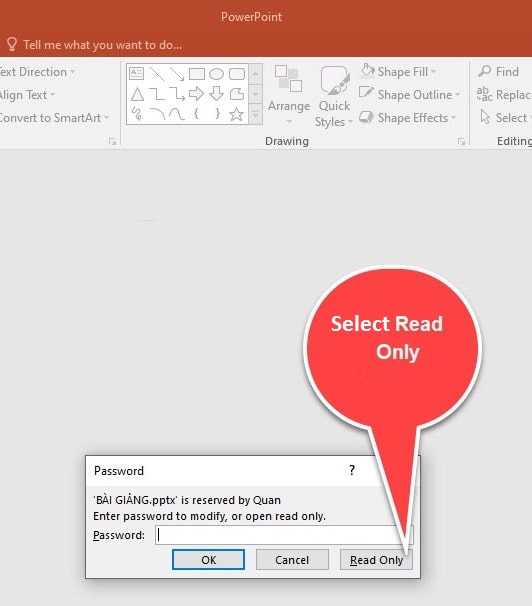
When others open the file, they also receive an interface asking for the correct password.
If you do not know the password but want to view the content, just click on Read Only to read, and as I mentioned above, at this option, you can only see it, not edit it.
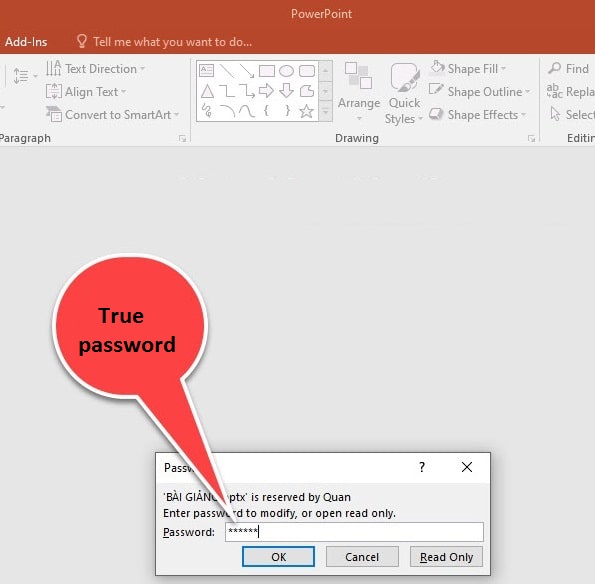
+ Step 5: To remove the password, you must enter the correct password => then click OK to open the file.
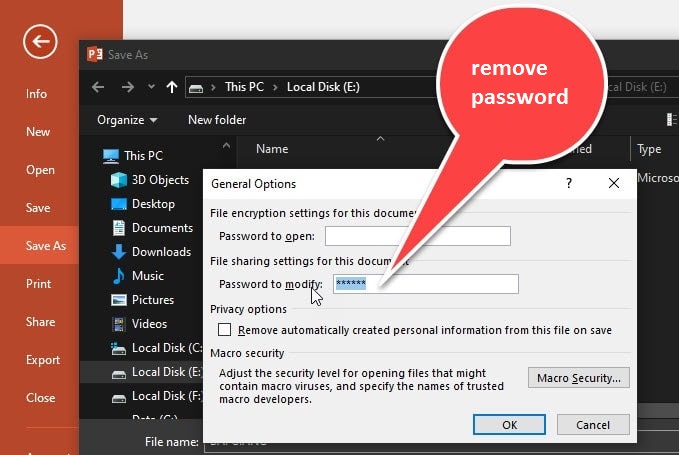
+ Step 6: Select the File Tab => next to Save As => choose where to save the file => then click on Tools => select General Options to display the password input interface for Ready Only mode.
=> Delete the password set at Password to Modify => then click OK.
# 3. Conclude
So in this article I have shown you two ways to protect PowerPoint files, each with its own advantages, so you should choose to use it to suit your needs.
Well, in addition to setting a password for the PowerPoint file that I just instructed above, To secure many other document files, Review how to encrypt files or lock important folders.
Key Takeaways
Use the information above as a practical reference for how to set a password for PowerPoint files to protect data. Review each step carefully, confirm any requirements, and choose the option that best fits your situation.
FAQ
What does this guide explain about Set a Password for PowerPoint Files to Protect Data?
It explains the main concepts, practical considerations, and useful steps related to set a password for PowerPoint files to protect data without requiring advanced knowledge.
Who can benefit from learning about Set a Password for PowerPoint Files to Protect Data?
This information is useful for readers who want a clear overview, practical guidance, and reliable steps related to set a password for PowerPoint files to protect data.
What should I check before applying this information?
Review the requirements, confirm that your device, software, or situation matches the instructions, and back up important data before making major changes.
Related Articles
 How to Set Password to Protect Files on Windows 106 minutes read
 How to Lock, Not Edit PowerPoint Files3 minutes read
 How to Create a Powerpoint File Password4 minutes read
 How to Password Protect PDF Files: Complete Guide8 minutes read
 Set BIOS and UEFI Password to Protect Data on Your Windows 108 minutes read
 How to Set Password for Folder and File in Windows9 minutes read
Reader Comments 0
Sign in with email or Google to join the discussion.