How to Secure a Mac Computer
This wikiHow teaches you how to tighten up system security and protect your privacy on a Mac. Since Apple includes a wide variety of customizable security features in the System Preferences panel, you won't need to install any additional...
Table of Contents
Method 1 of 10:
Enabling Two-Factor Authentication
-
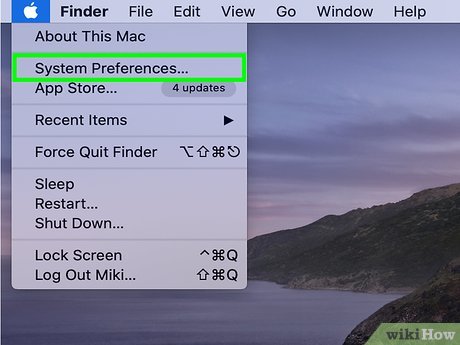 Open System Preferences on your Mac. You'll find it in the Apple menu, which is at the top-left corner of the screen.
- Two-Factor Authentication is different than two-step verification, as it requires at least two 'trusted' devices, like a Mac and an iPhone. For instance, when you first log into a new device, you'll receive a pop-up prompt on the other device. Click or tap Allow on the second device and enter a provided code on the first device.
- To edit settings in System Preferences, you'll need to click the yellow lock located in the bottom right corner of each open window and enter your password.
-
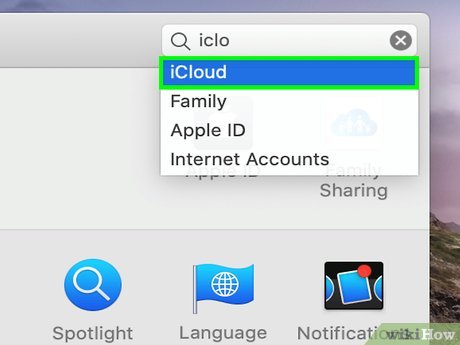 Click the iCloud icon. It's the white icon with a blue cloud inside.
 -
 Click the Account Details button. It's in the left panel.
- If prompted to enter your password, follow the on-screen instructions to do so now.
-
 Click the Security tab. It's at the top-center part of the window.
 -
 Click Turn on Two-Factor Authentication. A confirmation message will appear.
 -
 Click Continue.
 -
 Verify your phone number and click Continue.
Method 2 of 10:
Requiring a Password after Sleep
-
 Open System Preferences on your Mac. You'll find it in the Apple menu, which is at the top-left corner of the screen.
 -
 Click Security & Privacy. It's the gray house icon with a black circle inside.
 -
 Click the General tab.
 -
 Select the option to "Require password [number] after sleep or screen saver begins." You can change this setting to Immediately or set the duration between five seconds and eight hours.
- If you're at work or in another public scenario, changing this setting to Immediately is a good idea. If you're at home, five minutes may be ideal.
Method 3 of 10:
Using an Apple Watch to Unlock
-
 Open System Preferences on your Mac. You'll find it in the Apple menu, which is at the top-left corner of the screen.
- This feature enabling both Wi-Fi and Bluetooth on your Mac. It also requires the Apple Watch to be on your wrist. Both the Apple Watch and Mac must be signed in to iCloud using the same Apple ID.
- To edit settings in System Preferences, you'll need to click the yellow lock located in the bottom right corner of each open window and enter your password.
-
 Click Security & Privacy. It's the gray house icon with a black circle inside.
 -
 Click the General tab.
 -
 Click the box next to "Allow your Apple Watch to unlock your Mac."
Method 4 of 10:
Enabling Find My Mac
-
 Create a guest user account. The idea behind creating a guest user account is to help you find your Mac if it's lost or stolen. If someone finds your lost Mac and logs in with the guest account, you can use Find My Mac to track its location. Here's how to create the guest user account:
- Click the Apple menu and select System Preferences.
- Click Users & Groups.
- Select Guest User on the left.
- Check the box next to "Allow guest users to log in to this computer." Guests can now log in to this Mac without a password. With FileVault turned on, guests can only access Safari. Guests cannot access the Mac remotely, and all their data are deleted when they log out.
-
 Open System Preferences on your Mac. You'll find it in the Apple menu, which is at the top-left corner of the screen.
- To edit settings in System Preferences, you'll need to click the yellow lock located in the bottom right corner of each open window and enter your password.
-
 Click Security & Privacy. It's the gray house icon with a black circle inside.
 -
 Click the Privacy tab. It's the last of the four tabs at the top of the window.
 -
 Click Location Services at the top of the left panel.
 -
 Check the box next to "Enable Location Services" if it isn't selected. It's at the top of the right panel.
 -
 Return to System Preferences and click iCloud. You can click the back-arrow button near the top-left corner of the window to get back to System Preferences.
 -
 Click the iCloud icon.
 -
 Select Find My Mac in the left panel. You may have to scroll down in the panel to find it. A confirmation message will appear.
 -
 Click Allow to confirm. Find My Mac is now enabled.
Method 5 of 10:
Enabling Parental Controls
-
 Open System Preferences on your Mac. You'll find it in the Apple menu, which is at the top-left corner of the screen.
- To edit settings in System Preferences, you'll need to click the yellow lock located in the bottom right corner of each open window and enter your password.
-
 Click Parental Controls.
 -
 Create or convert the account.
- If the child doesn't already have an account, click 'Create a new user account with parental controls, and then follow the on-screen instructions to set up parental controls.
- If you're logged in to your child's secondary account and want to enable parental controls, select Convert this account to a parental controls account and follow the on-screen instructions.
-
 Click Continue to save your changes.
Method 6 of 10:
Limiting App Downloads
-
 Open System Preferences on your Mac. You'll find it in the Apple menu, which is at the top-left corner of the screen.
- To edit settings in System Preferences, you'll need to click the yellow lock located in the bottom right corner of each open window and enter your password.
-
 Click Security & Privacy. It's the gray house icon with a black circle inside.
 -
 Click the General tab.
 -
 Select an option under "Allow apps downloaded from."
- Choose App Store if you only want to install apps that are available through the Mac App Store.
- Choose App Store and identified developers if you want to be able to download non-App Store apps from developers that are trusted by Apple.
Method 7 of 10:
Adjusting Privacy Options
-
 Open System Preferences on your Mac. You'll find it in the Apple menu, which is at the top-left corner of the screen.
- To edit settings in System Preferences, you'll need to click the yellow lock located in the bottom right corner of each open window and enter your password.
-
 Click Security & Privacy. It's the gray house icon with a black circle inside.
 -
 Select Location Services to manage how your location is used. Clicking this option at the top of the left panel displays your options on the right. Here you can manage the following:
- Check the box next to "Enable Location Services" if you want to allow some or all apps to use your location. If you'd prefer not to use Location Services, make sure the box is not checked.
- If Location Services are enabled, you can allow or block access to these apps:
- Weather
- Maps
- Siri & Dictation
- Calendar
- Safari
- Click Details on the System Services entry to adjust Location Services preferences for the following services:
- Location-based suggestions
- Time Zone & System Customization
- Significant Locations
- Location-Based Apple Ads
- Find My Mac
- HomeKit
- Wi-Fi Networking
- Wi-Fi Calling
- Click Done to save your changes.
-
 Control app access to other services. The other options in the left panel allow you to manage which apps can access those services. Here you can manage the following:
- Click Contacts to enable or disable access to your contacts.
- Click Calendars to enable or disable access to your calendars.
- Click Reminders to enable or disable access to your reminders.
- Click Photos to enable or disable access to your photos. Google Chrome, GIMP, Photoshop, and more may appear on this list.
- Click Camera to enable or disable camera access to Zoom and other listed apps.
- Click Microphone to enable or disable microphone access to apps like Slack, GarageBand, and others.
- Click Accessibility to allow apps to control your Mac, like Chrome's remote desktop client.
- Click Full Disk Access to grant full disk access to any app.
- Click Automation to allow or not allow specific apps to control other apps, like Google Chrome controlling Finder.
- Click Analytics to share Mac analytics with app developers.
- Click Advertising to opt-out of receiving targeted ads in Apple apps on your Mac.
Method 8 of 10:
Enabling the Firewall
-
 Open System Preferences on your Mac. You'll find it in the Apple menu, which is at the top-left corner of the screen.
- To edit settings in System Preferences, you'll need to click the yellow lock located in the bottom right corner of each open window and enter your password.
-
 Click Security & Privacy. It's the gray house icon with a black circle inside.
 -
 Click the Firewall tab. It's near the top-center part of the window.
 -
 Click the Turn on Firewall button. If the firewall is already on you can skip this step.
 -
 Click the Firewall Options button.
 -
 Click + to allow an app through the firewall. If you're having trouble using an app because it's being blocked by the firewall, click the + and select the app to add it to the list.
 -
 Click OK to save your changes.
Method 9 of 10:
Encrypting the Hard Drive with FileVault
-
 Open System Preferences on your Mac. You'll find it in the Apple menu, which is at the top-left corner of the screen.
- To edit settings in System Preferences, you'll need to click the yellow lock located in the bottom right corner of each open window and enter your password.
-
 Click Security & Privacy. It's the gray house icon with a black circle inside.
 -
 Click the File Vault tab. It's near the top-center part of the window.
 -
 Click Turn on FileVault. FileVault is now enabled.
- To learn about customizing FileVault, see How to Encrypt a Mac Hard Drive with FileVault 2.
Method 10 of 10:
Disabling Unused Sharing Options
-
 Open System Preferences on your Mac. You'll find it in the Apple menu, which is at the top-left corner of the screen.
- To edit settings in System Preferences, you'll need to click the yellow lock located in the bottom right corner of each open window and enter your password.
-
 Click the Sharing icon. It's the blue folder with a black-and-yellow street sign inside.
 -
 Uncheck all options you aren't using. Here's a breakdown of your sharing options:
- Screen Sharing: Allows other computers to remotely view your screen.
- File Sharing: Other computers can remotely access your Mac's shared folders. This is actually really useful on a home network.
- Printer Sharing: This shares a printer physically connected to your Mac with the local network. Another useful tool if other computers need access to the printer.
- Remote Login: Allows other computers to remotely access your Mac using Secure Shell (SSH) and Secure File Transfer Protocol (SFTP).
- Remote Management: Allows access using Apple Remote Desktop.
- Remote Apple Events: Apps on other Macs can send Apple events to your Mac.
- Internet Sharing: Broadcast your internet connection to other computers.
- Bluetooth Sharing: Share files with other Bluetooth-enabled devices. If this is enabled, you can control how your Mac handles incoming files, as well as which files and folders are accessible to others.
- Content Caching: This feature stores software updates, apps, and other content for all your Apple products so you're not downloading from Apple. Consider your Mac as a local iCloud server for updating an iPhone, iPad, Apple TV, and so on.
Was this article helpful?
Your feedback helps us improve.
Related Articles
 How a VPN Can Make Your Computer More Secure4 minutes read
 Secure folders with Secure Folders software2 minutes read
 How to disable Secure Boot mode3 minutes read
 How to check Secure Boot has been enabled on your computer or not?4 minutes read
 Review F-Secure Sense routers: Effective, affordable protection7 minutes read
 How to enable and disable Secure Sign-In in Windows 104 minutes read
Reader Comments 0
Sign in with email or Google to join the discussion.