INSTRUCTIONS FOR TAKING a SCREEN AREA OF Windows 10
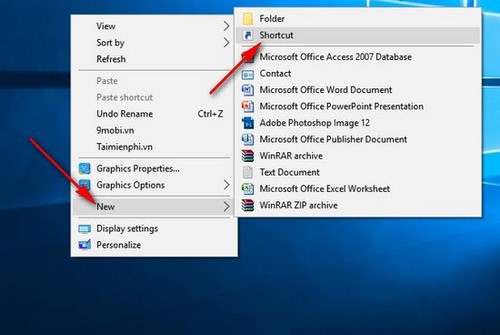
Step 1: On the Desktop, right-click, select New , then select Shortcut
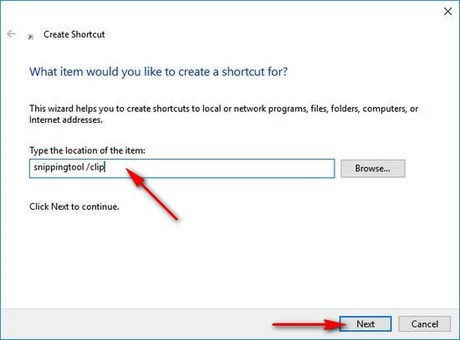
Step 2: On the Create Shortcut window, paste the path snippingtool /clip Type the location of the item Next
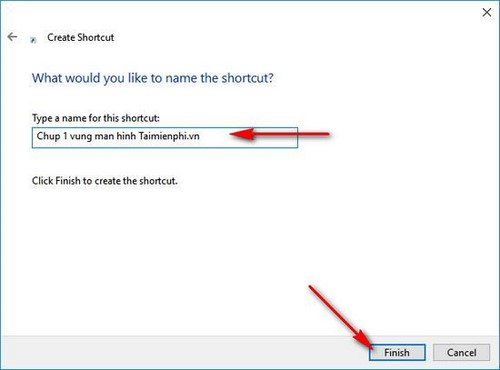
Step 3: Next, enter a name for the shortcut in the Type a name for this shortcut box, then click Finish to complete creating the shortcut to the desktop.
Creating a shortcut to take a screenshot of an area of your screen in Windows 10 is done. Next you need to do is assign a shortcut to that shortcut to quickly turn on the Snipping Tool application to capture an area of the Windows 10 screen with just one key combination.
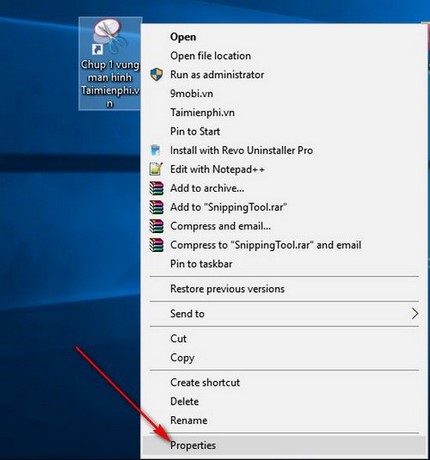
Step 4: Right-click on the shortcut you just created and select Properties at the bottom
Step 5: Click on the Shortcut key box then press the key combination you want to set the shortcut for the tool to capture an area of the Windows 10 screen and click OK to complete.
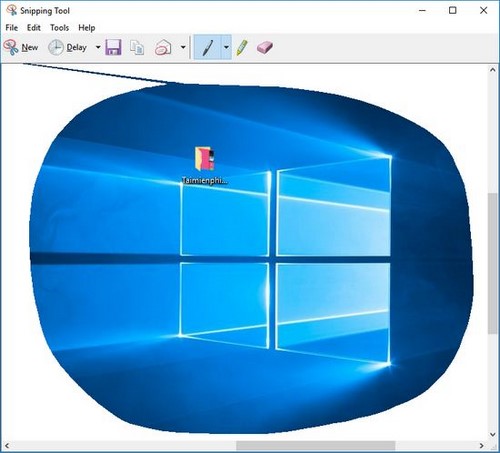
After setting the shortcut, you can press the key combination you just set to check. The Snipping tool application will appear allowing you to choose the options of capturing an area of the windows screen 1, capturing the entire screen, and capturing the window.
So TipsMake has completed a guide to help you take a screenshot of an area of the Windows 10 screen with quick keyboard shortcuts, minimizing time and operations. In addition to the Snipping Tool available on Windows, you can also use Faststone Capture, which is also a very popular third application that helps take screenshots and capture an area of the screen.
In addition, while using Windows 10 if you suddenly hear a sound



Reader Comments 0
Sign in with email or Google to join the discussion.