Table of Contents
This practical guide explains how to restore WordPad in Windows 11 in a clear sequence, including preparation, key settings, common mistakes, and troubleshooting steps.
Although not the application with the richest, most diverse feature set, WordPad is still basically a simple and fun tool for basic offline text editing. Starting with Windows 11 24H2 version, Microsoft has decided to remove WordPad from its computer operating system environment. Fortunately, you can still bring WordPad back to your PC through a setup process that is not too difficult. complicated.
The idea is simple: all you have to do is copy a bunch of files from the pre-Windows 11 24H2 version to the target system.
1. On a system running Windows 11 version 23H2 or later, go to C:Program FilesWindows NTAccessories (copy the path and paste into the address bar for quick access) and find 3 files: WordpadFilter.dll , wordpad. exe and a localization folder (e.g. en-US ). If you don't have access to a computer running Windows 11 before version 24H2, download those files HERE .
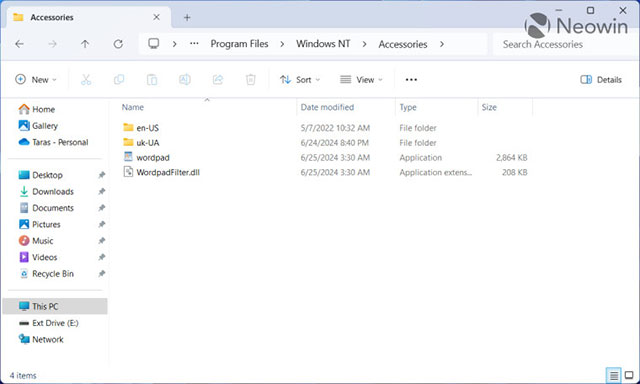
2. Copy all three items (there may be more folders if you have multiple language packs installed) and move them to the target system. You can paste files into any convenient folder.
3. Right-click the wordpad.exe file and select Show More Options > Send to > Desktop (create shortcut) .

4. Copy or move the newly created shortcut and navigate to C:ProgramDataMicrosoftWindowsStart MenuPrograms .
5. Paste the shortcut and rename it if necessary.
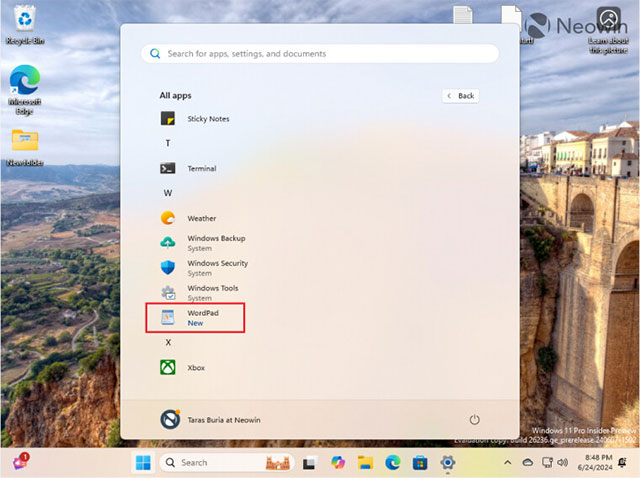
6. Open the Start menu , click " All Apps " and scroll down to find WordPad . Now, you can pin it to the Start menu or Taskbar.
You can now also set the restored WordPad as the default application for supported file formats, including RTF, ODT, XML, and TXT.
1. Right-click the file you want to open in WordPad and select Open With > Choose another app .
2. Select " Choose an app on your PC " in the " Select an app to open this file " window .
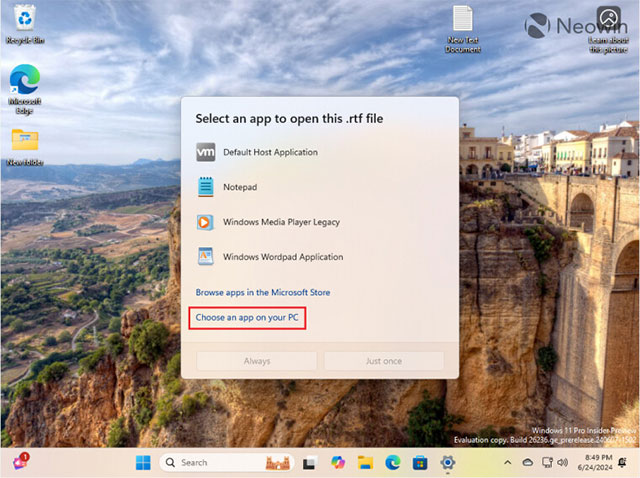
3. Move to the folder containing the WordPad file and select wordpad.exe .
4. Select Windows Wordpad Application and click Always .
It's all that simple. You can now use WordPad on systems with Windows 11 version 24H2 or later. However, keep in mind that Microsoft could also intervene in the system to prevent users from restoring WordPad, although that seems unlikely.
Final Thoughts
Use the instructions and checks above in order, verify the result after each major step, and keep a backup whenever the process changes important files or system settings.
FAQ
What should I check before starting?
Confirm that your device or software version matches the instructions, save important data, and note the original settings before making changes.
What should I do if the steps do not work?
Restart the app or device, install available updates, review any error message, and repeat the steps carefully in the same order.
Can I undo the changes?
Many changes can be reversed, but the exact method depends on the feature. A backup or restore point gives you the safest way to recover.
Related Articles
 Microsoft Is Testing Ads in Wordpad on Windows 103 minutes read
 The Difference Between Notepad and Wordpad9 minutes read
 Differences Between Notepad and Wordpad in Windows11 minutes read
 How to Open Wordpad in Windows 104 minutes read
 What Is WordPad? Compare the Differences Between Notepad, WordPad and Word6 minutes read
 How to Open and Save DOCX Files with WordPad Without Word3 minutes read
Reader Comments 0
Sign in with email or Google to join the discussion.