How to use Captura to take photos, record, film screen of Windows 10
To be able to record all actions performed on the screen, especially those who return to the gaming screen, or instruct to handle errors on the computer, . the computer recording software will be public tools needed.
There are many tools to help users to record screen movies, such as Bandicam, Camtasia Studio, . or features available on Windows 10 Game Bar. And in the article below, Network Administrator will introduce users to Captura screen recording software. This is a screen capture tool, recording, computer screen recording and many other useful use features. How to use Captura program to record Windows 10 screen will be guided by Network Administrator in the article below.
Step 1:
Captura is an open source, free and ad-free software. You can access the link below to download the software. Click Download to download the Captura installation file.
- https://mathewsachin.github.io/Captura/

Software requires installation of Microsoft .NET Framework 4.6.1 or later to use. To download the Microsoft .NET Framework 4.6.1 online version, visit the link below, select the language and then click Download to download.
- https://www.microsoft.com/en-us/download/details.aspx?id=49981
If you want to install the offline version of Microsoft .NET Framework , click on the link below.
- https://www.microsoft.com/en-us/download/details.aspx?id=49982
Step 2:
Then, click on the Captura installation file to use the program.
1. Record screen video with Captura:
Step 1:
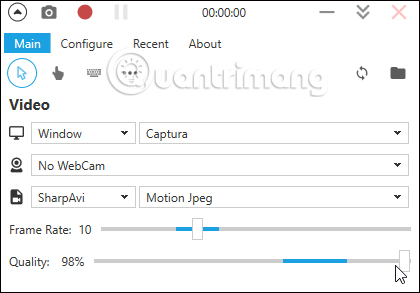
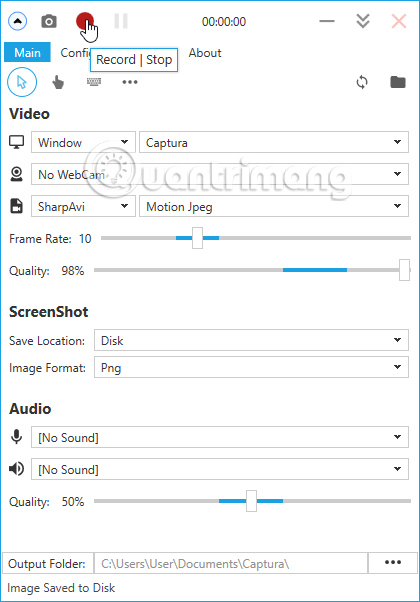
At the interface of the program in the Main section, look down to the Video section , we will proceed to the video recording screen.
First, select computer screen mode including Screen (full screen), Windows (only on the open window), Region (only rotating in a window that the software displays for you), Only audio (recording). If you want to collect the Webcam , click HD Webcam.

Step 2:
After selecting the screen rotation mode, select the screen rotation component. For example, I chose the video recording mode of Windows and selected the window that wanted to record the video screen.

Step 3:
Next select the extracted video format with the selection of FFMpeg (MP4), GIF (animation), Sharp AVI (AVI). Adjusting the frame rate at Frame rate , the quality of the video recording at Quality .
Step 4:
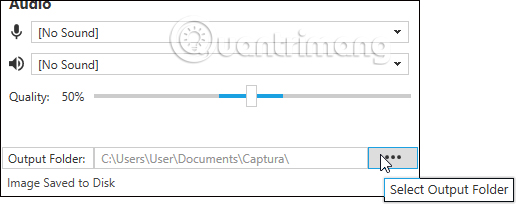
Looking down at the Captura interface in Output folder , users can change the video archive folder after the recording is finished. By default, videos and screenshots will be saved in the Captura folder in Documents. Press the 3-dot mark to change the archive folder.
Step 5:
By default when conducting screen video recording, the software will capture both the mouse cursor, the keyboard click effect, the dot dot effect when clicking the mouse.
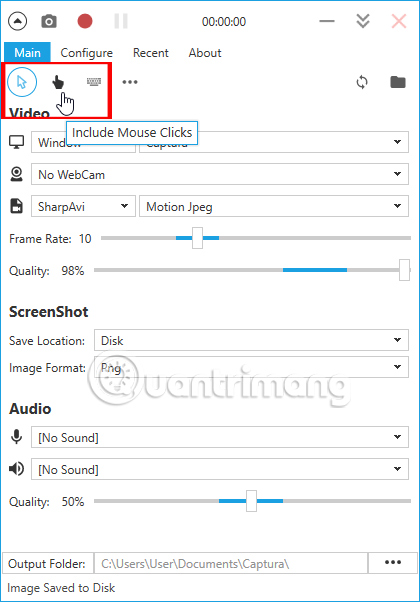
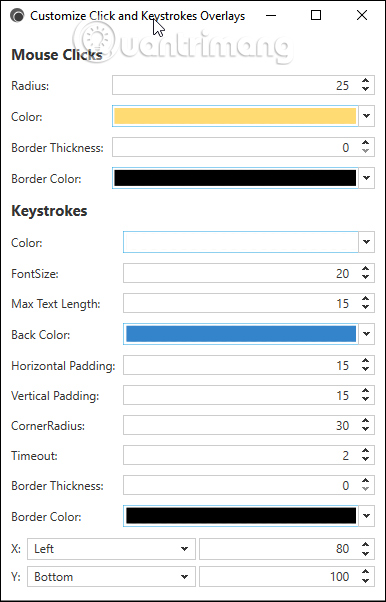
We can add icons above, set the color for the mouse click effects, press the keyboard. Click the 3 dot icon to customize.
Step 6:
After you've set up the video recording modes, press the red circle icon above to rotate, or press the shortcut key Alt + F9. Rotation time is unlimited.
To pause the recording press 2 vertical or use Shift + F9.
To stop recording , press the red circle button again or use Alt + F9 shortcut key combination.
Step 7:
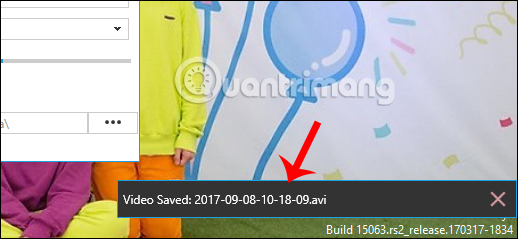
When you finish recording, you will see a pop-up Video Saved message in the system tray. Click on it to open the video. Or you can click on the folder icon on the Captura interface to quickly open the archive folder.
Note to readers , when proceeding to choose to extract FFMpeg (MP4) format, the software will require installation of FFMpeg package. We follow the request, click Download FFMpeg> Start download to download.
2. Take a screenshot on Captura:
Screen capture will be simpler than video capture, we will only have 3 screen capture settings: Save Location, Image Format and screen capture area.
Step 1:
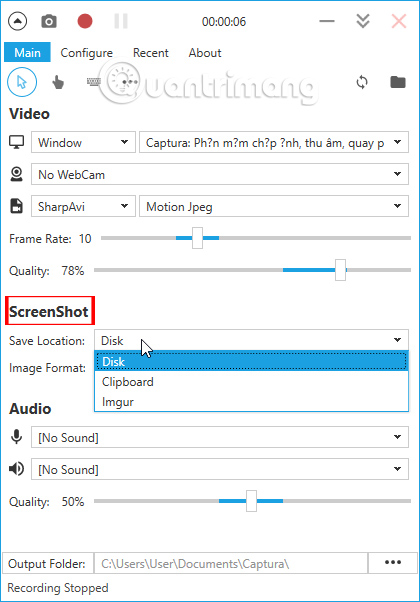
In Screeenshot section, when clicking on Save location , select the place to save for the image file after taking it with three options: Disk (saved on the computer that is the Captura folder by default), Clipboard (cached), Imgur (upload to Imgur).
Step 2:
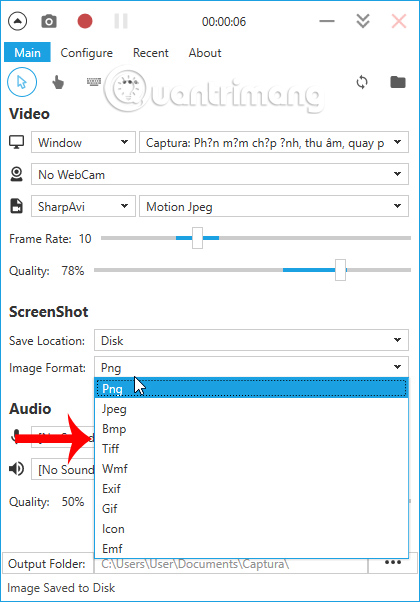
Next click on Image format , select the format to save the screenshot including png, jpeg, bmp, tiff, wmf, exif, gif, icon, emf.
Step 3:
The user selects the screen capture area by clicking the screen icon and performing a selection operation like when recording video screen. To take a screenshot, you can press the camera icon or use the shortcuts below.
- PrintScreen: Take full screen photos or select region.
- Alt + PrintScreen: Take a screenshot of the active window.
- Shift + PrintScreen: Take a screenshot of the desktop including the open window.
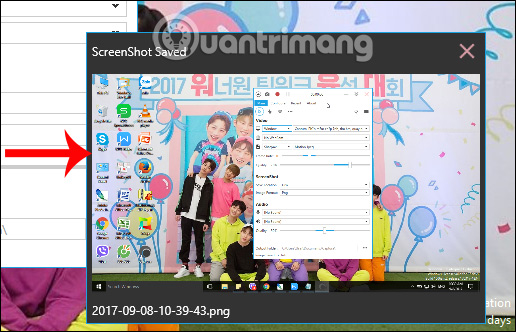
The captured image will display in the pop-up notification, you click to open in the system's image viewer.
3. Collect video recording audio with Captura:
When a user records a video if he does not want to record the video but only sounds, we will proceed to set up the audio source in the Audio section.
Step 1:
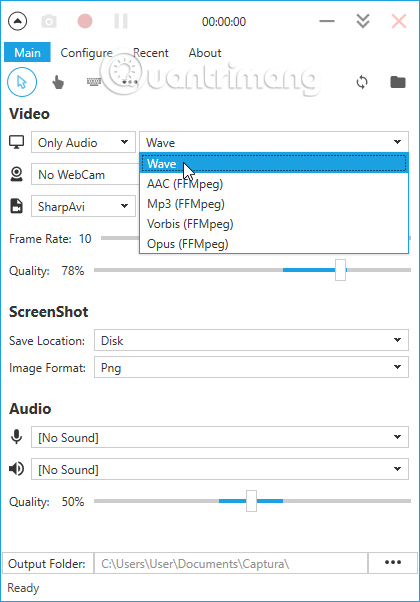
In the Video section we will click the Only audio option, then select the extracted format in the next section, the default is wave.
Step 2:
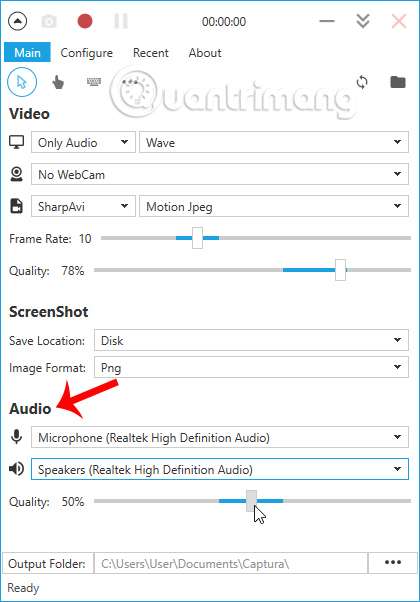
Next to the Audio section , select the audio source as the microphone or speaker. Adjust sound quality collected at Quality below. Finally, we proceed to record the video by pressing the red button.
4. Set up screen recording with Captura:
Step 1:
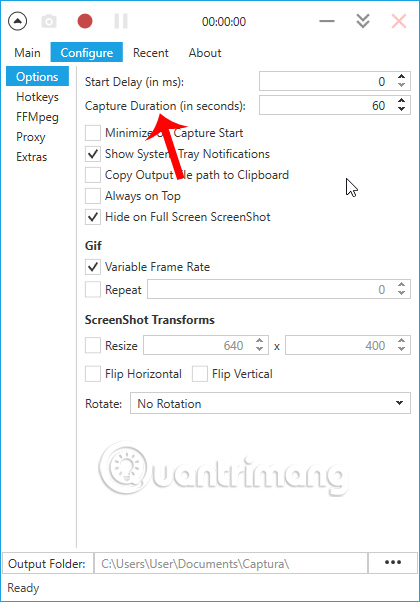
To set the video recording time, click Configure> Options and enter the time value (in seconds) into Capture duration .
Step 2:
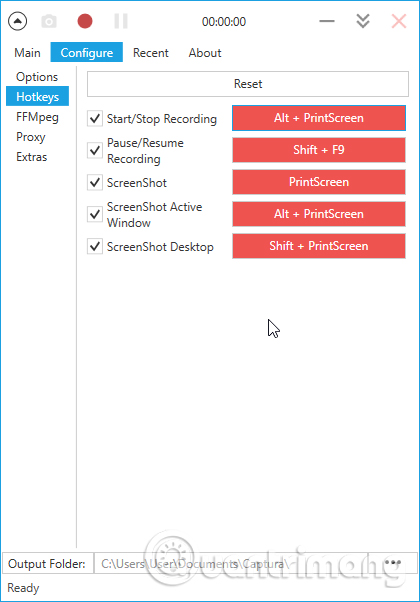
If you want to set the dial or capture shortcut , also click Configure , you open Hotkeys and then press the shortcut of the operation you want to change to reset. To return to the old settings click Reset.
Step 3:
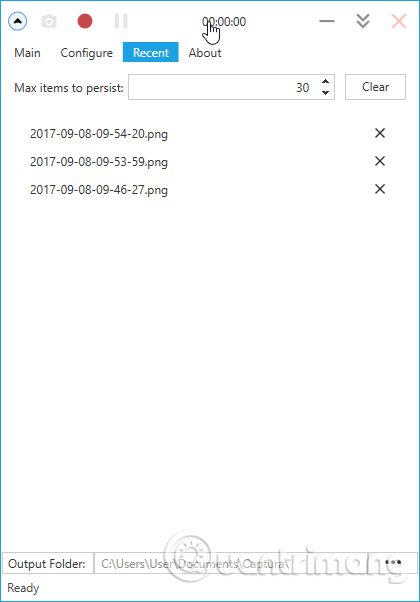
When you click on the Recent item, you will be able to view all photos and videos taken and recorded on the software to manage.
Thus, we have instructed you to read in detail how to use Captura software to record screen videos, take screenshots, record video with audio and manage files made on Captura. Overall, Captura offers a professional screen recorder, with lots of other useful options.
I wish you all success!