How to reset SoftwareDistribution and Catroot2 folders on Windows 11 PC
Users widely reported Windows 11 update errors on support forums. Updates fail to install because of such errors. You can usually fix update errors by resetting the catroot 2 and Windows SoftwareDistribution folders as shown below.
What are the SoftwareDistribution and Catroot2 folders?
The SoftwareDistribution folder is the folder that stores the files needed to install Windows updates on your PC. It is a temporary repository of update files. So, the SoftwareDistribution folder is an important component for updating Windows.
Catroot 2 is the folder that stores signature data for Windows 11 updates. Those are the files that the Cryptographic service needs to verify the update.
Both folders contain files needed to install Windows updates. Problems installing Windows updates can occur due to data corruption in those folders. Those errors often appear in Settings with codes like 0x800f0922 when users manually choose to check and install updates.
Therefore, resetting those folders is a method to fix Windows 11 update installation problems. Resetting the SoftwareDistribution and Catroot2 folders removes corrupted data they may contain, then rebuilds them. You can reset those folders by deleting their contents or renaming them.
How to reset the SoftwareDistribution and Catroot2 folders by deleting their contents
This method of resetting the SoftwareDistribution and Catroot2 folder involves deleting the data therein manually through File Explorer. You also need to disable and re-enable certain services via Command Prompt to ensure they do not use the files in them. Delete the files in the SoftwareDistribution and Catroot2 folders as follows:
1. Open the utility to find files accessible with Windows + S .
2. Locate Command Prompt by entering the keyword cmd in the search text box.
3. Open Command Prompt with admin rights by clicking the Run as administrator option to the right of the search engine.
4. Enter and execute the following separate commands to turn off the services needed to update Windows 11:
net stop bits net stop wuauserv net stop cryptsvc net stop msiserver5. Press Windows key + E on the keyboard to access File Explorer.
6. Open the SoftwareDistribution folder at this path:
C:WindowsSoftwareDistribution7. Press Ctrl + A to select all files in the SoftwareDistribution folder.
8. Right-click and select Delete (trash button) to delete the selected content.
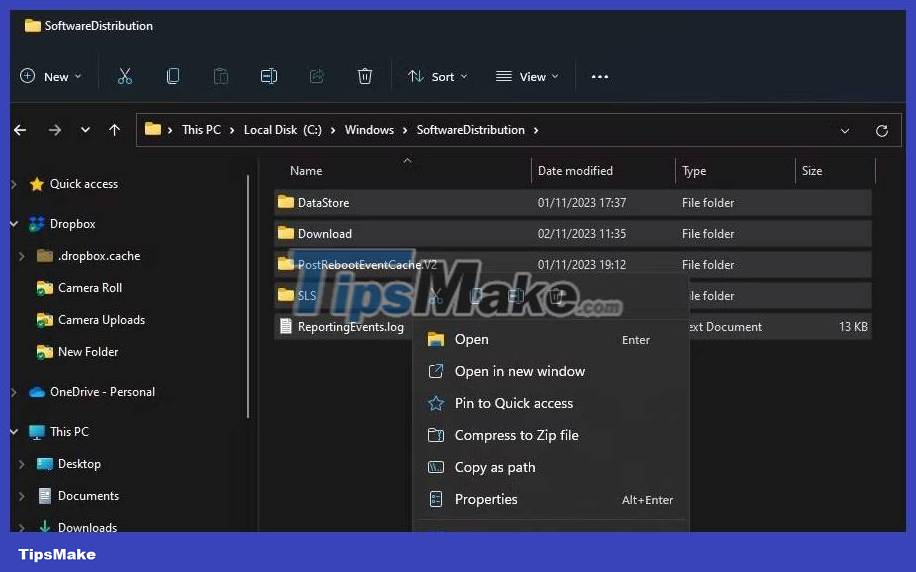
9. Open the catroot2 folder by entering this path in Explorer's address bar:
C:WindowsSystem32catroot210. Repeat steps 7 and 8 above to delete everything in that folder.
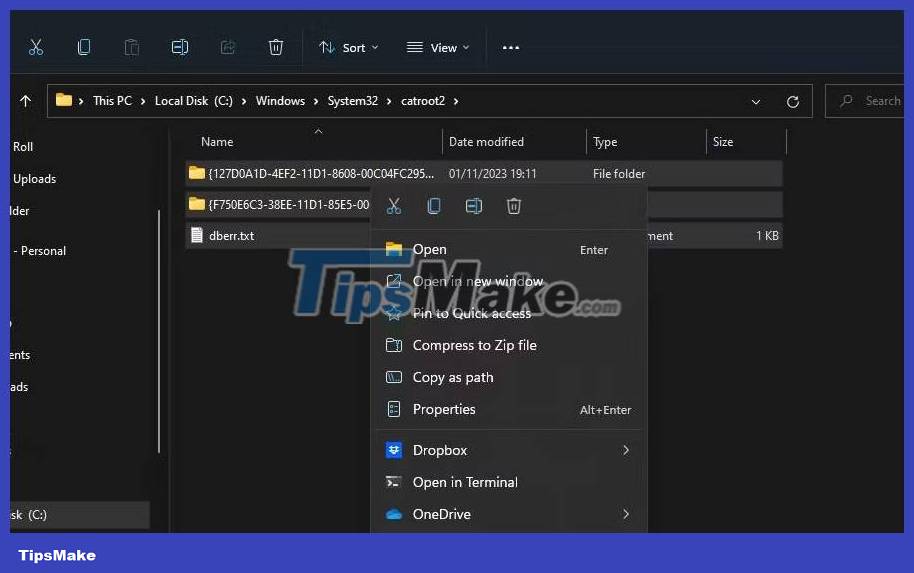
11. Return to Command Prompt and execute these separate commands to restart disabled services.
net start bits net start wuauserv net start cryptSvc net start msiserver12. Restart your PC and check for updates after deleting those folders.
Reset the SoftwareDistribution and Catroot2 folders by renaming them
Renaming the SoftwareDistribution and Catroot2 folders is an alternative method to reset those folders. Windows will recreate those folders after you rename them. You can rename the SoftwareDistribution and catroot2 folders using Command Prompt like this:
1. Run Command Prompt with admin rights.
2. Repeat step 4 of the previous method to execute the command to disable services.
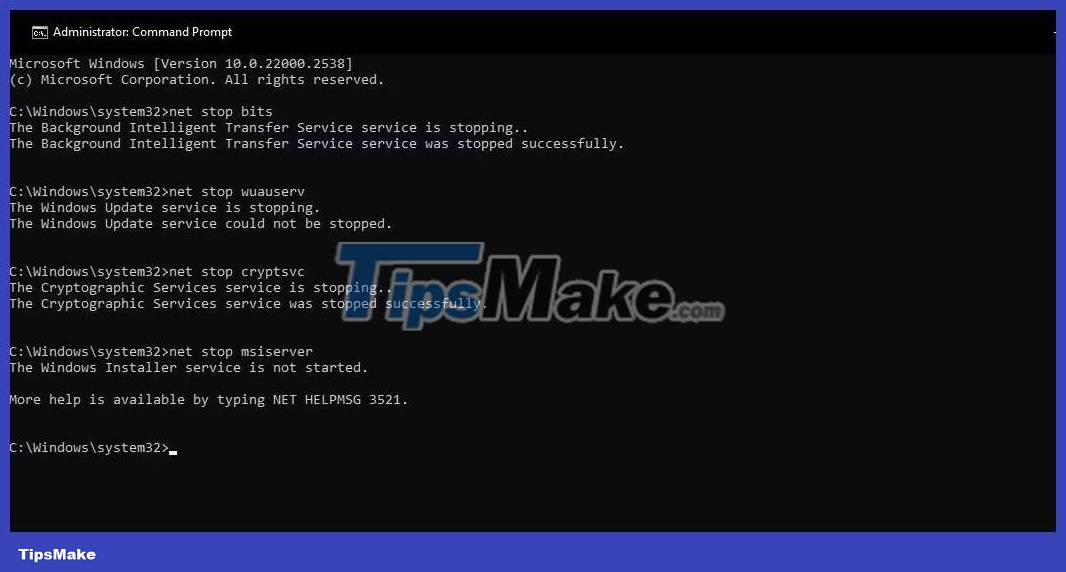
3. Enter this command to rename the SoftwareDistribution folder and press Return :
ren %systemroot%softwaredistribution softwaredistribution.bak 
4. Enter and execute this rename command for the catroot2 folder:
ren %systemroot%system32catroot2 catroot2.bak 
5. Repeat step 11 of the previous method by executing 4 commands to restart disabled services.
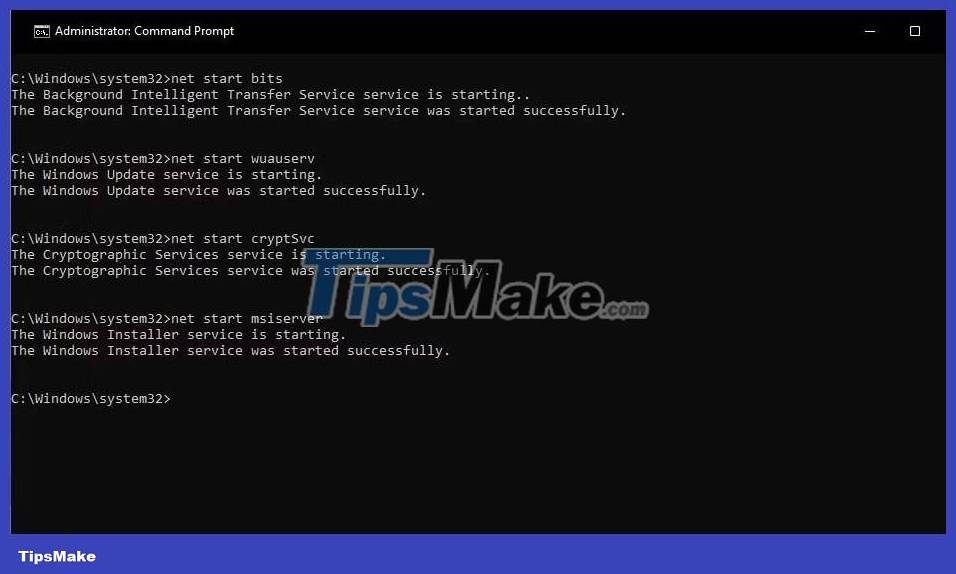
6. Exit Command Prompt and restart your PC.
How to reset SoftwareDistribution and Catroot2 folders with FixWin 11
FixWin 11 is one of the best free Windows repair tools that includes troubleshooting options. Among them are two options to reset the catroot2 and SoftwareDistribution folders. Here's how you can select those quick fix options in FixWin 11:
1. Open this FixWin 11 page on the Softpedia website.
2. Click the Free Download button for FixWin.
3. Select Secure Download (US) to get the FixWin ZIP archive.
4. Activate the File Explorer window and go to your browser's download folder.
5. Extract the FixWin archive by following the steps in this article on how to extract ZIP files on Windows.
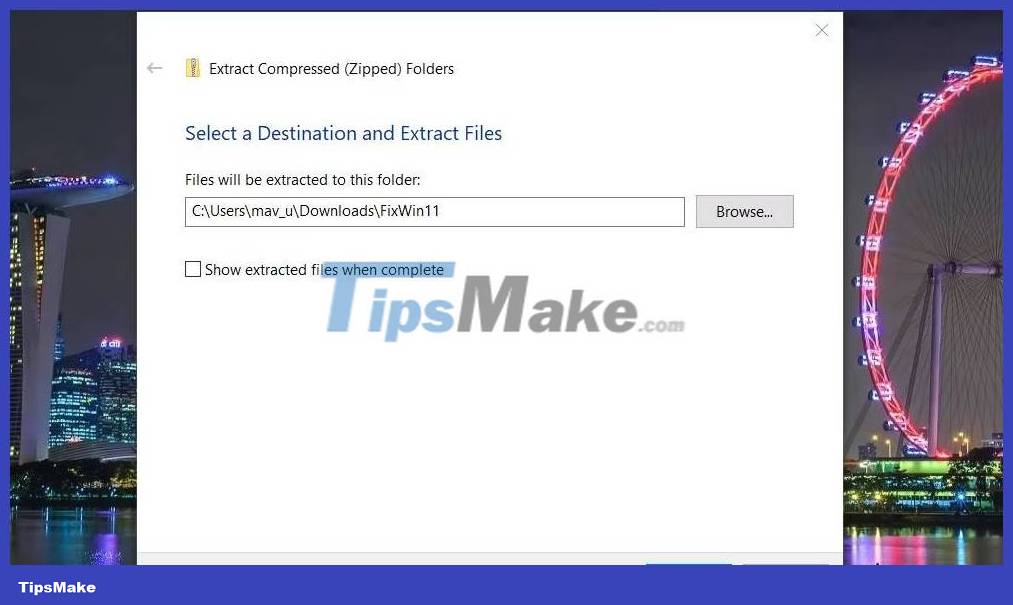
6. Double click the FixWin 11.1.exe file in the unzipped folder for FixWin.
7. Click Additional Fixes on the left side of the FixWin window.
8. Select the Quick Fixes tab .
9. Click the Reset Software Distribution folder button .
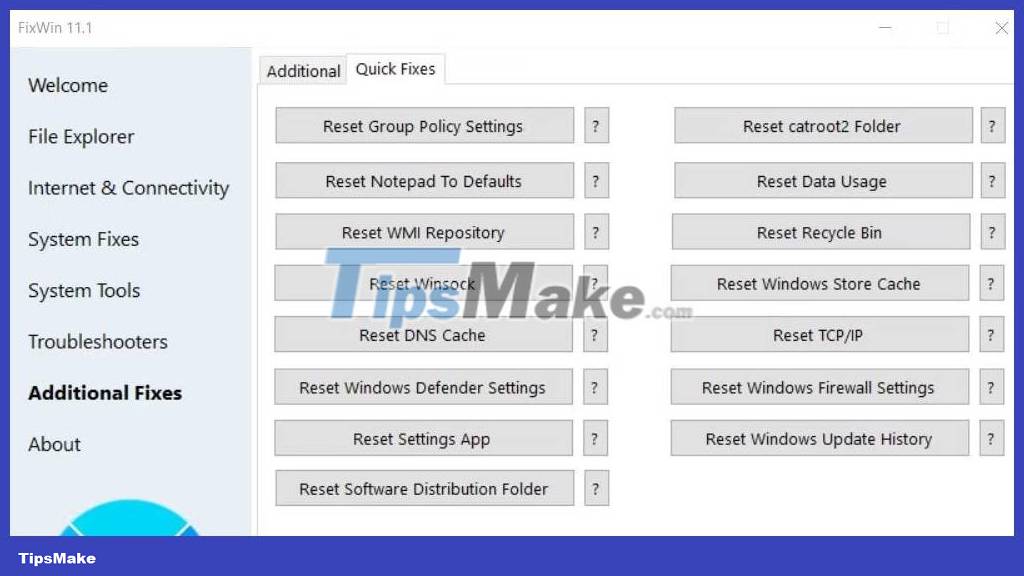
10. Click on the Reset catroo2 Folder option .
11. Exit FixWin and restart your PC after selecting those options.