How to reinstall audio driver on Windows 10, 11
You have a problem and want to find a way to reinstall the sound driver on Windows quickly. Below is How to reinstall the sound driver on Windows 10, 11 for your reference.
While using your computer, if you encounter a problem related to sound, the simplest way to handle it is to reinstall the sound driver for Windows. Please refer to the way to reinstall the sound driver on Windows 10, 11 that TipsMake.com shares below.

To reinstall the audio driver on Windows 10, 11, follow these steps:
Step 1 : Remove old audio driver on Windows
Select the Start menu icon and search for the keyword Device Manager , then select Device Manager in the search results.

In the Device Manager window , locate and expand Sound, video and game controllers .

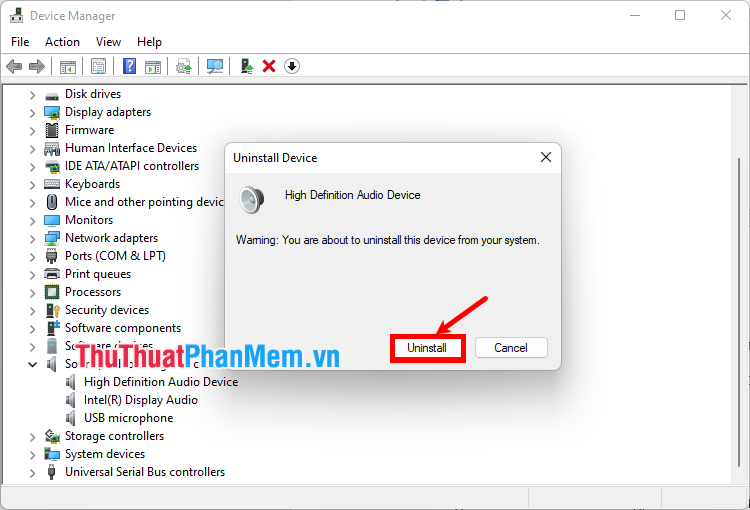
Right-click on the audio driver you want to remove and select Uninstall device .

In the audio driver removal confirmation dialog box, you can select Delete the driver software for this device to completely remove this driver (if any), and select Uninstall to confirm the driver removal.
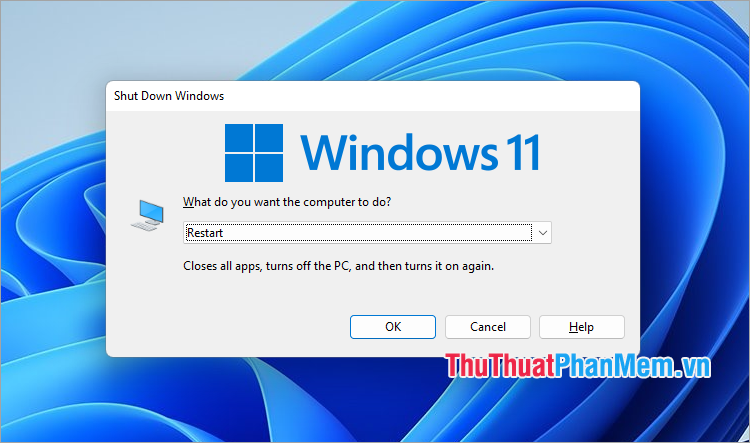
After removing the audio driver, restart your computer.
Step 2 : Reinstall the audio driver on Windows 10, 11
When the computer has been restarted, Windows will automatically search and install the audio driver by default. But if the audio driver is not automatically installed, or you want to install the latest driver, you can reinstall the audio driver on Windows 10, 11 as follows:
Method 1 : Install audio driver on Device Manager
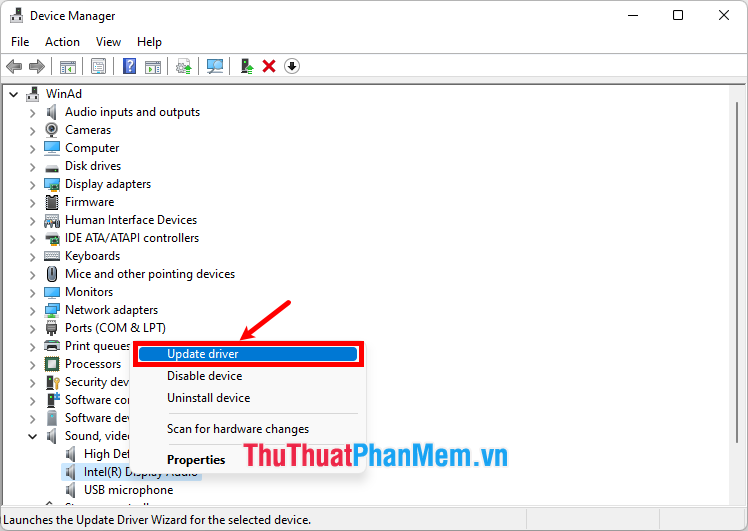
Go to Device Manager , right-click on any item in the Sound , video and game controllers section and select Update driver .
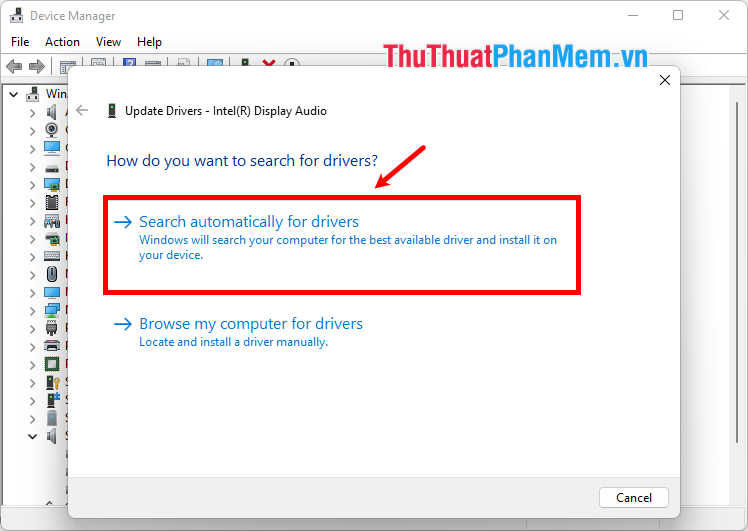
Select Search automatically for drivers to let Windows search and install the best driver on your computer.
Method 2 : Use Windows Update
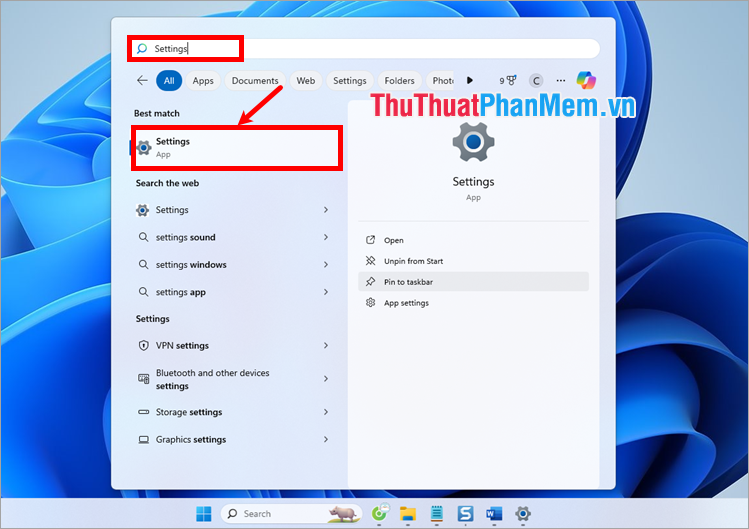
Select the Start menu icon , search for Settings and select Settings in the search results.
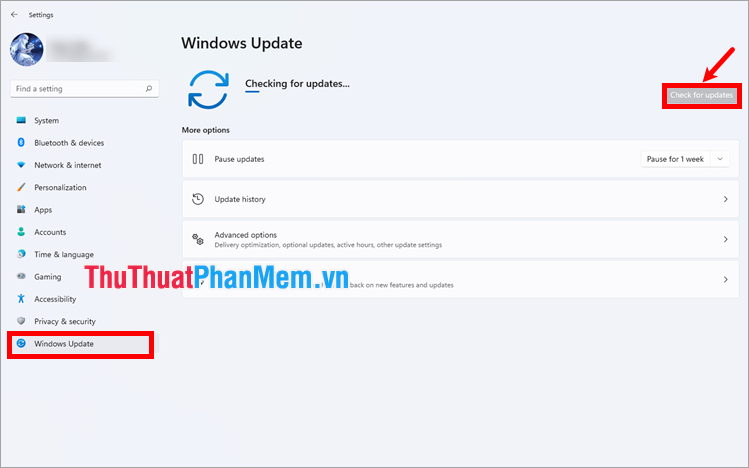
In the Settings window , select Windows Update (or Update & Security → Windows Update ). Then click Check for updates . Windows will automatically download and install updated drivers, including audio drivers.
Method 3 : Install driver from manufacturer's website
You can also reinstall the audio driver on Windows 10, 11 by visiting the manufacturer's website (e.g. Realtek, ASUS, HP, Dell, .). Download the audio driver that is suitable for your operating system.
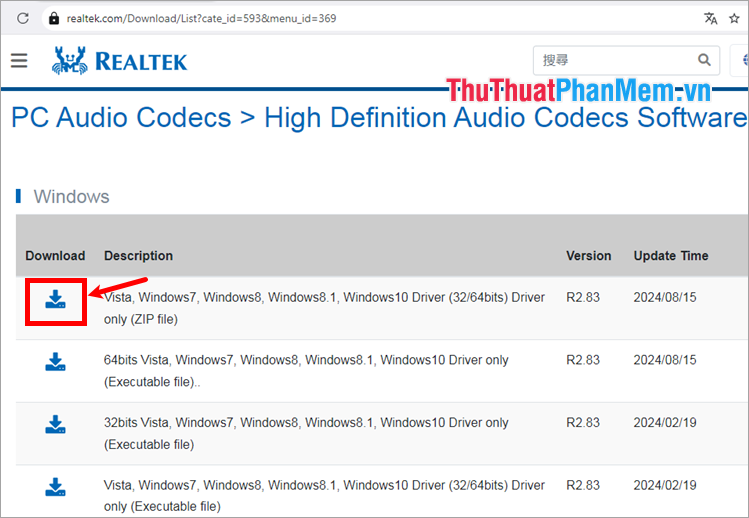
Run the installation file and follow the instructions to install the audio driver on Windows 10, 11.
Step 3 : Check the sound again
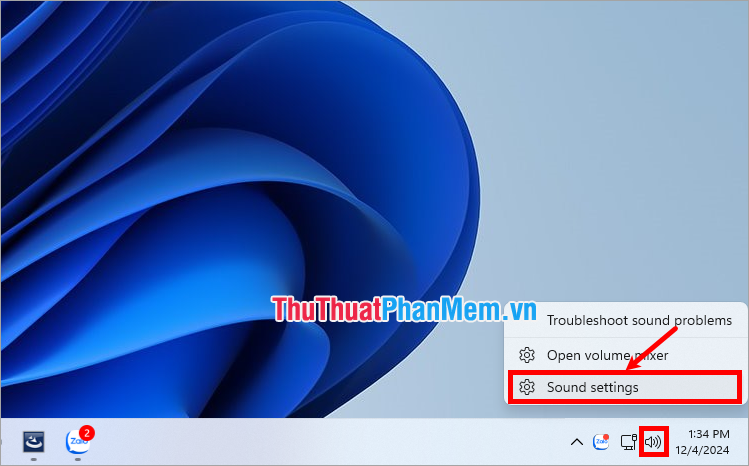
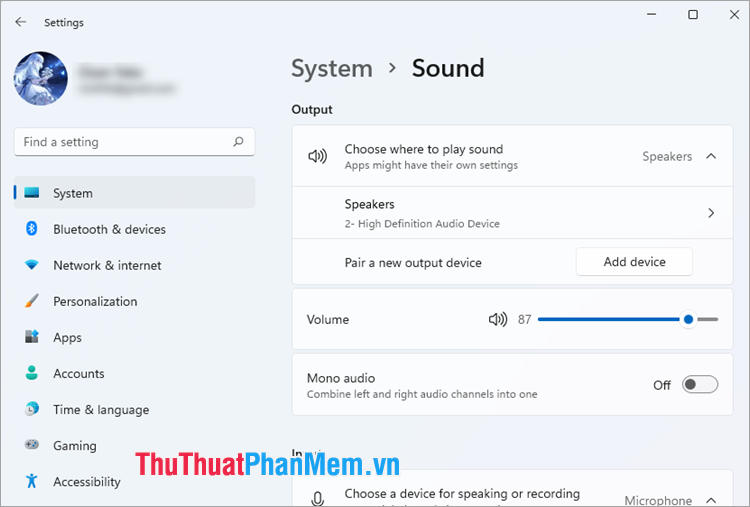
After reinstalling the sound driver on Windows 10, 11, you can check the sound again by right-clicking on the sound icon on the taskbar and selecting Sound Settings .
In the Sound section , check to see if your sound is working properly.
Above, TipsMake.com has shared with you how to reinstall the sound driver on Windows 10, 11 quickly and simply. Thus, if your computer's sound is faulty, you can remove the old driver and install a new sound driver for your computer. Thank you for your interest and following this article.
- How to reset graphics driver on Windows 11
- How to update and reinstall Realtek HD Audio Manager
- How to Reinstall WiFi Driver
- Reinstall the Wi-Fi driver on Windows 10.
- How to uninstall and reinstall WiFi drivers on Windows 11
- How to install/reinstall GPU driver on Windows
- Frustrated by losing Windows 10+11 audio driver? Apply effective fixes
- Fix a sudden loss of video when watching videos on Windows
- How to completely disable Windows Sync Center, stop Mobsync.exe
- Download Ghost Win 10 32bit - 64bit Light, Get Self Full Driver
- How to start / stop Windows Event Log
- Shutdown timer on Windows 10 is very simple with the command Shutdown -s -t
- How to set up BIOS to install Hackintosh for PC and Laptop
- How to install Bliss OS X86 on PC and VirtualBox
- How to release RAM helps the computer run faster
- 4 ways to turn off touchpad on Asus laptop from simple to complicated
- How to increase browser buffer size for better performance
- How to increase the number of Remote Desktop connections


-
 What are drivers? The importance of drivers for computers.
-
Causes and the simplest, most effective ways to fix driver errors.
-
How to set up Bluetooth on your laptop quickly and easily.
-
Find VGA drivers for laptops with 3DP chips.
-
How to uninstall VGA drivers, computer graphics card drivers
-
Update AMD graphics card drivers on Windows 10
 What are drivers? The importance of drivers for computers.
 Causes and the simplest, most effective ways to fix driver errors.
 How to set up Bluetooth on your laptop quickly and easily.
 Find VGA drivers for laptops with 3DP chips.
 How to uninstall VGA drivers, computer graphics card drivers
 Update AMD graphics card drivers on Windows 10