Table of Contents
This guide explains how to insert Logo into Word, with clear steps, practical tips, and important checks before you begin.

1. Insert Logo into Word file
Step 1: You select the Design tab and select Watermark . After that, you choose Custom Watermark. to proceed with adding your Logo stamp.

Step 2: We will insert the Logo, so you select Picture watermark , then you select Select Picture. to open the Logo file on the computer.

Step 3: You proceed to select the Logo file and click Insert to open.
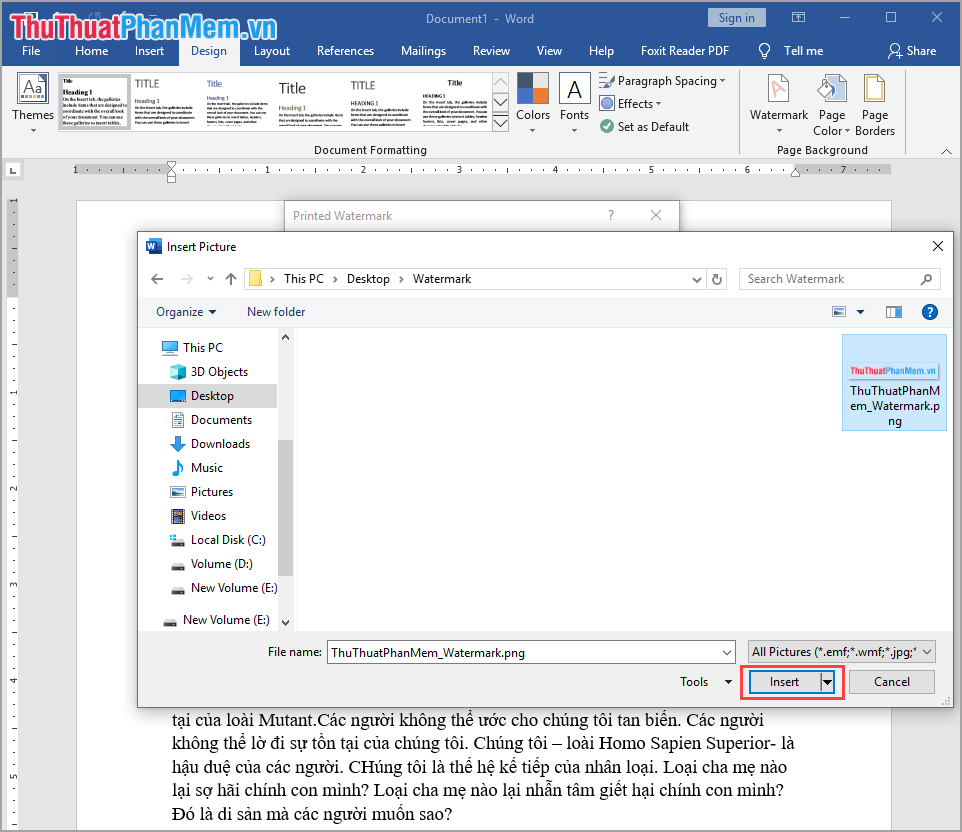
Step 4: After selecting the Logo file, you proceed to set the Scale (should be Auto) and select Without if you want your Logo to be light, hard to detect. When you have finished setting up, select OK to have Word automatically insert the Logo for you.

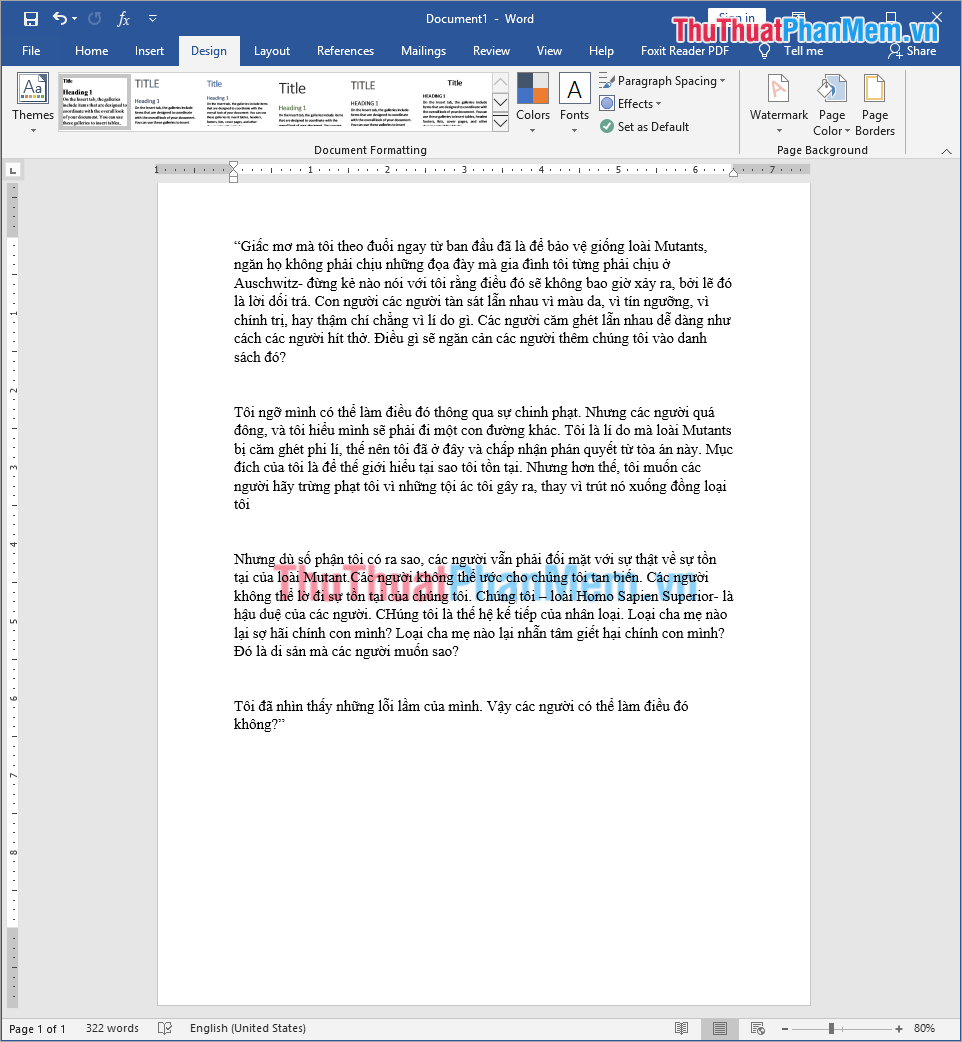
Word will automatically insert the Logo you have selected in the middle of the page, here is our result:
2. Insert Logo in words into Word file
For some reason that you do not have the Logo image file, do not worry, we can use Logo in words.
Step 1: You select the Design tab and select Watermark . After that, you choose Custom Watermark. to proceed with adding your Logo stamp.
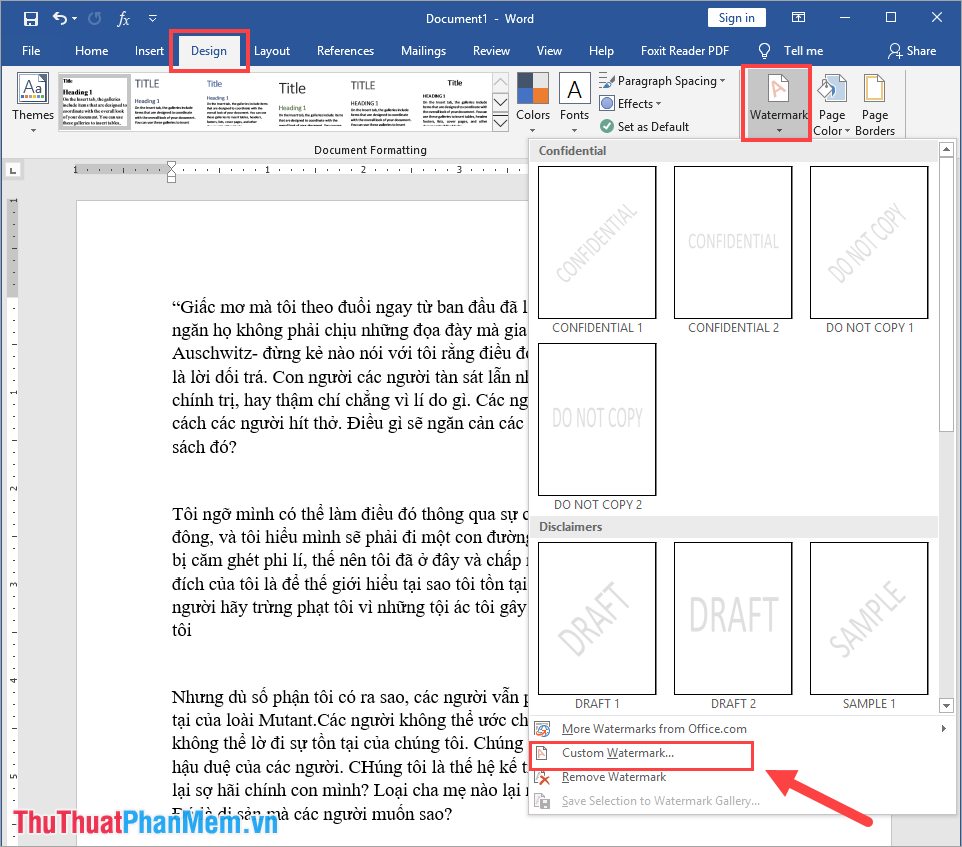
Step 2: We will insert Logo in words so you select Text watermark , then you proceed to set the following information.
- Language: Language
- Text: Logo content
- Font: The font for the Logo
- Size: Logo Size (recommended for Auto)
- Color: Logo color
- Layout: Diagonal (Cross Logo), Horizontal (Horizontal Logo)
After setup is complete, click OK to insert Logo.

And here is our result after inserting the Logo in words.

3. Insert the default Logo
There are some logos and Watermark available on Word, so you can use them to mark copyright fast.
You proceed to select the Design tab and select Watermark . After that, you can choose one of the logo templates available in it.

4. How to delete Logo in Word
To delete Logo in Word, you only need a few very basic and fast operations as follows:
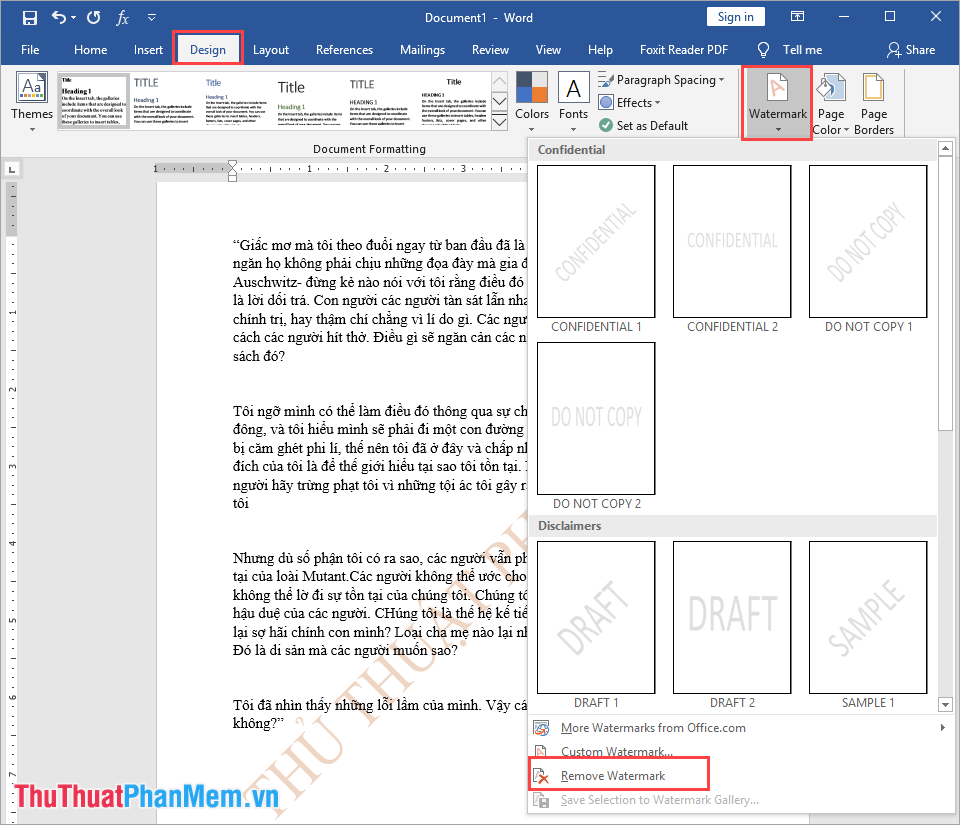
You select the Design tab and choose Watermark . After that, you select Remove Watermark is done, the Logo will disappear.
In this article, Software Tips guide you how to insert Logo into Word quickly and beautifully. Good luck!
FAQ
What should I know about Insert Logo into Word?
Focus on the key features, requirements, limitations, and practical use cases explained in this guide.
How do I get the best results with Insert Logo into Word?
Follow the recommended steps, use current software or information, confirm compatibility, and review settings before major changes.
Are there any risks or limitations?
Potential limitations depend on compatibility, data quality, cost, privacy, support, and how the product or method is used.
Related Articles
 How to Insert Logo into Images Online2 minutes read
 How to Insert Images into Header, Footer on Word: Insert Header5 minutes read
 How to Insert Watermark, Logo Sink into Excel5 minutes read
 How to Insert a Logo into a Video Without Software5 minutes read
 Inserting Letters, Logos Sink into Microsoft Word 20134 minutes read
 How to Stamp Videos on Extremely Simple Video Watermark Software5 minutes read
Reader Comments 0
Sign in with email or Google to join the discussion.