How to make crosswords on PowerPoint fast and beautiful
How to make crosswords on PowerPoint fast and beautiful. Are you looking to do a crossword puzzle on PowerPoint so that students can play, crosswords can be related to the content of lesson knowledge to help students consolidate their knowledge. But the contacts.
Are you looking to do a crossword puzzle on PowerPoint so that students can play, crosswords can be related to the content of lesson knowledge to help students consolidate their knowledge. But you do not know how to do it yet? So, please refer to the article below to know how to make crosswords in PowerPoint fast and beautiful.
Below is a tutorial on how to make crosswords in PowerPoint, you can download the .pptx sample file at the end of the lesson.
Step 1 : Open PowerPoint, delete all available PowerPoint textboxes on the slide, then right-click and choose Format Backgound.

The Format Background section on the right shows the background for PowerPoint (if you want to leave a white background, there is no need to fill the background) in the Fill section . Then choose Apply to All to apply the background to all slides.

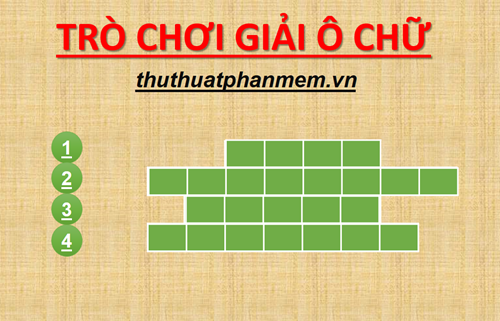
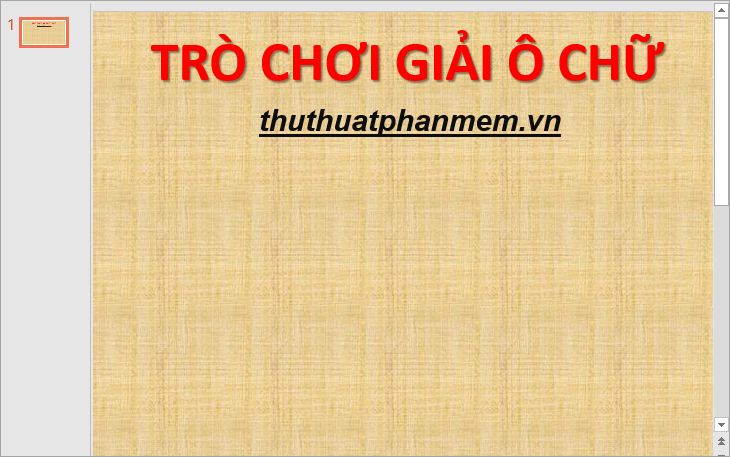
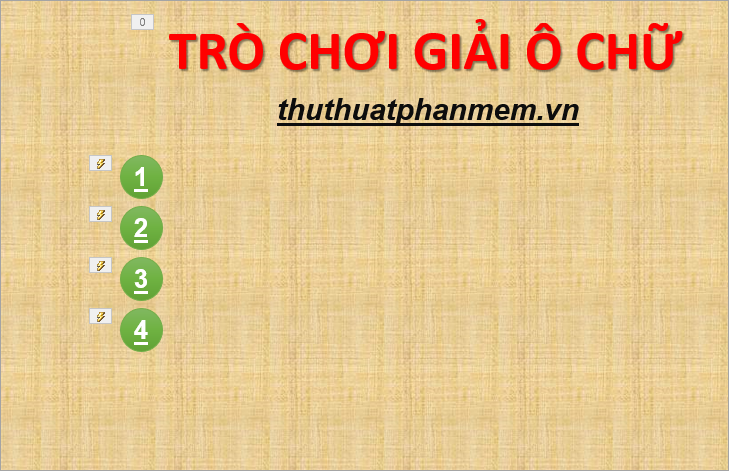
Step 2: Add a title for the game: Crossword GAME
Select Insert -> WordArt to create art fonts or you select Insert -> Text Box and draw textbox frames on the slide.

Next, enter the text of the word LIST GAME in the textbox and move the textbox to the position at the top of the slide. Then select (black out) the text and apply color and font correction in the Font section of the Home tab .

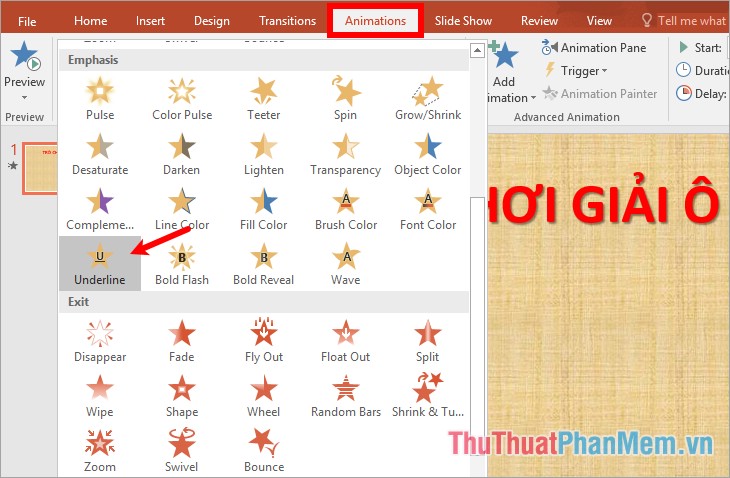
Next you create the effect for the text by selecting the Animation tab and selecting the Underline command (or an effect you want in the yellow Emphasis section ).
To adjust the effect of the running text until the end of the slideshow, select Animation Pane on the Animation tab . On the right of Animation Pane, click the black arrow next to the name of the text box and select Timing .
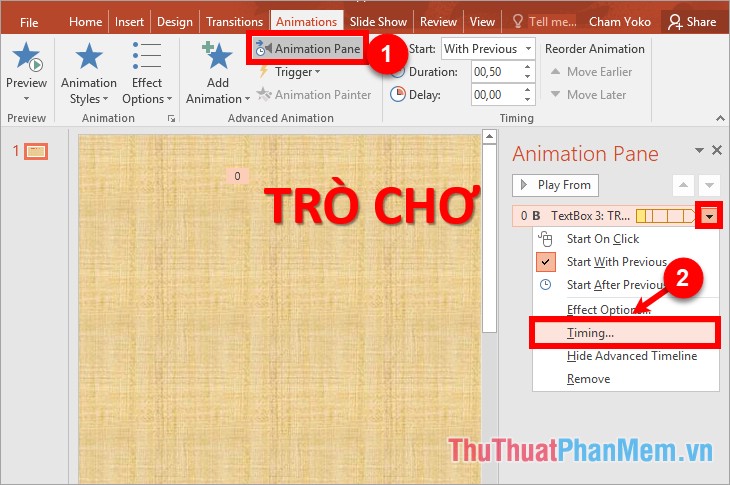
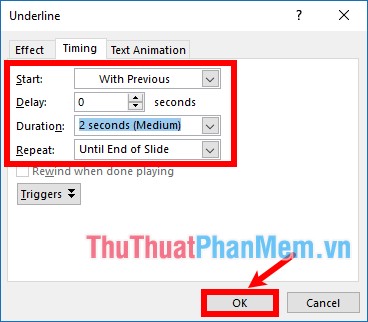
Dialog box names effects you chose above, in the card Timing of your choice in the Start is with Previous , in the Duration you choose runtime effect accordingly, and in part Repeat the Until End of Slide later then click OK to close.
You can add other Text Box to add information for the title.
Step 3 : Insert the picture containing the question number.
Click the Insert tab -> Shapes -> Oval.
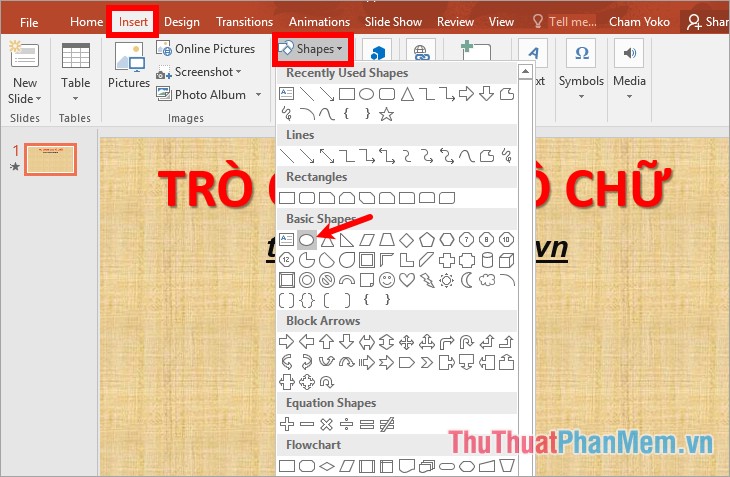
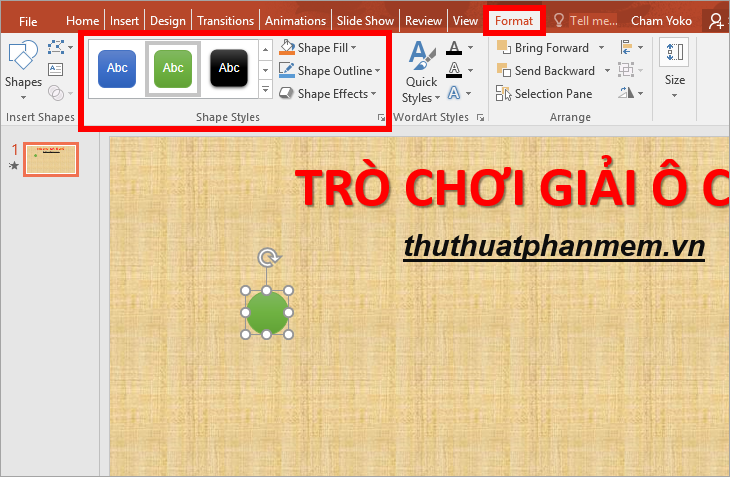
Press Shift to draw a circle, you can also draw shapes for arbitrary questions and resize the image. Next in the Format tab, select the style in the Shape Styles section , fill the background color with the shape in the Shape Fill section , the border color in the Shape Outline section , and the effect in the Shape Effects section .
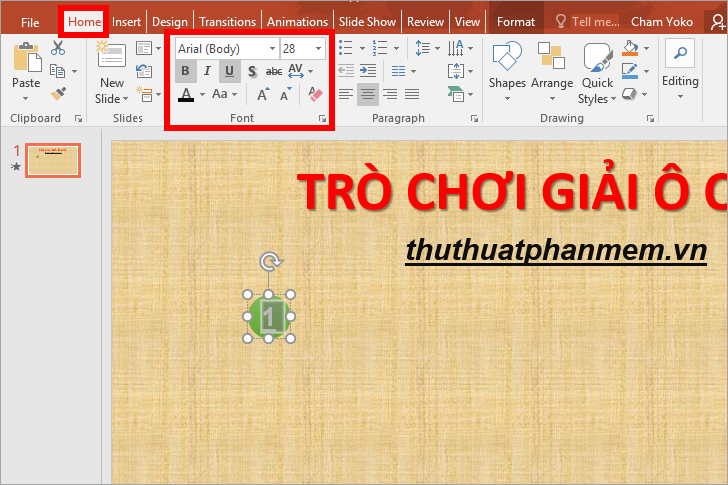
Next, right-click on the image and choose Edit Text then enter the corresponding content (for example, you enter the number 1, corresponding to sentence 1).
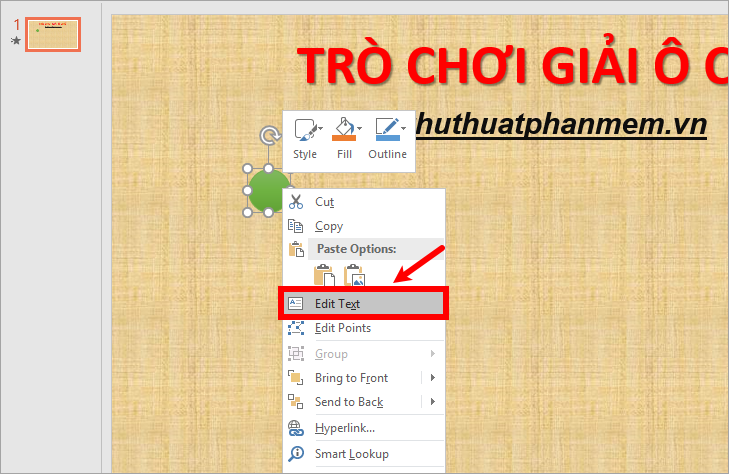
Select the text you enter and edit the font, type and size in the Font section of the Home tab .
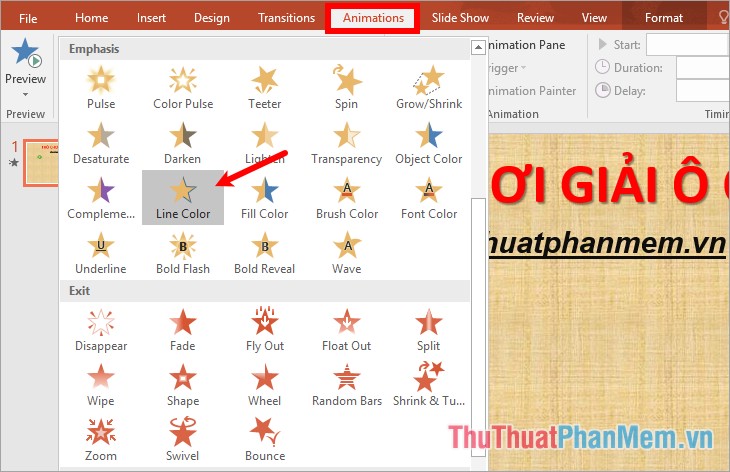
Next select the effect for the image by clicking on the image and select the Animations tab to select the effect in the yellow Emphasis ( Line Color or Fill Color .).
Also in the Animations tab you select Animation Pane , appears Animation Pane section on the right, click the small triangle next to the image name and select Timing .

Appears Fill Color dialog box , on the Timing tab you choose Trigger -> Start effect on click off -> select the image name -> OK. So you create the button for question 1.

Step 4 : You just need to copy and paste more images corresponding to other questions (To copy, right-click select Copy , then select Patse ). How many questions, you copy the number of pictures equal to the number of questions and edit the content in the picture.
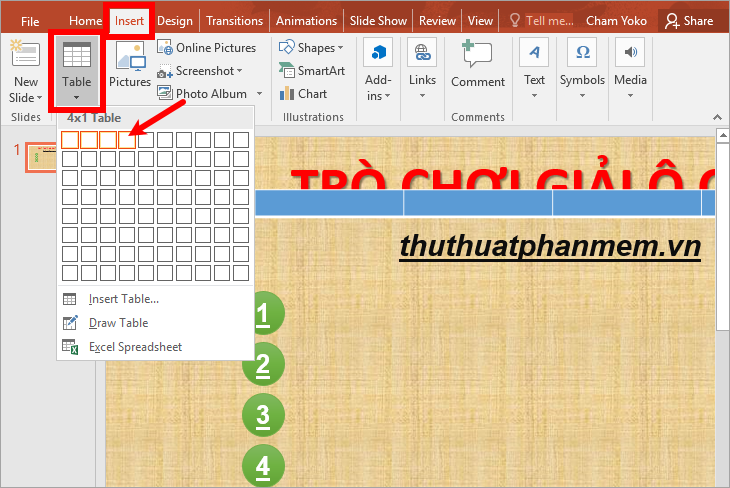
Step 5: Select Insert -> Table -> select the number of cells corresponding to the answer of the 1st question (for example, the answer to question 1 is Game, then select 4 columns one row to create the table).
Select all the cells and adjust the stroke color in Pen Color , the size of the bold border in the upper box. Next choose Borders -> All Borders to fill the cells. Adjust the background color in the Sharing section .
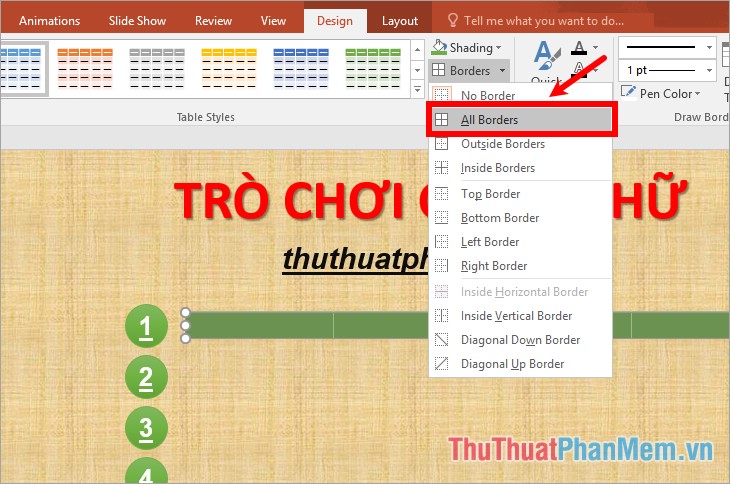
Next in the Layout section, adjust the Height and Witdth dimensions for all cells, and adjust the position of the text in the Almentment section .

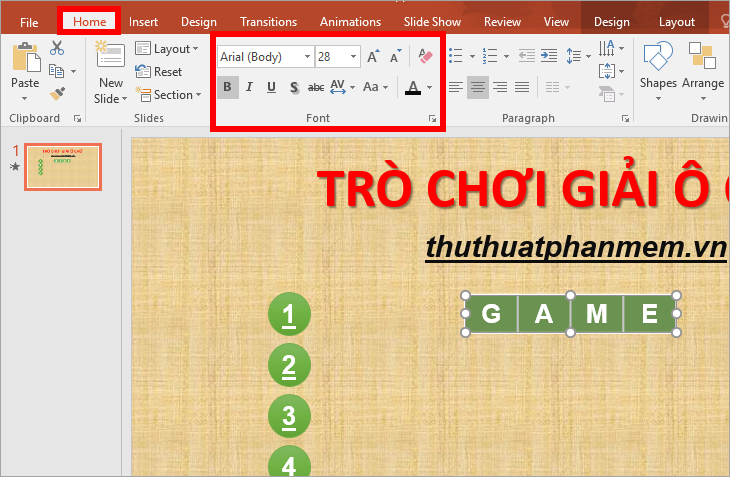
Then you enter the letters in each cell in the answer and edit the text in the Font tab of the Home tab .
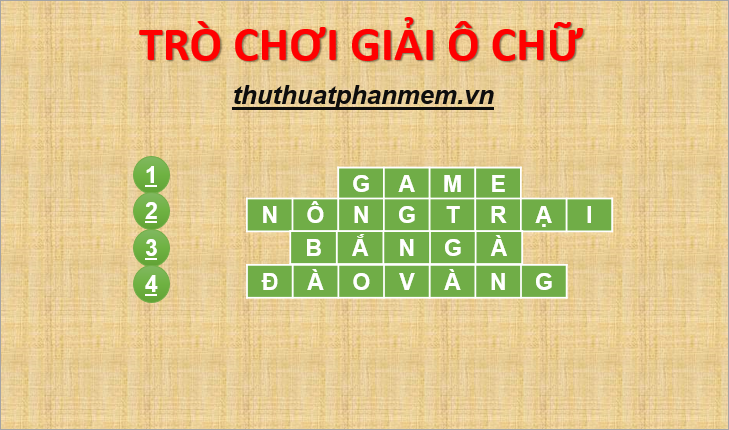
Step 6 : Copy the answer boxes and enter the corresponding answers and arrange accordingly. If redundant cells, then you delete the excess cells, if missing, you add cells by selecting the corresponding command in the Layout tab similar to when you manipulate Table .
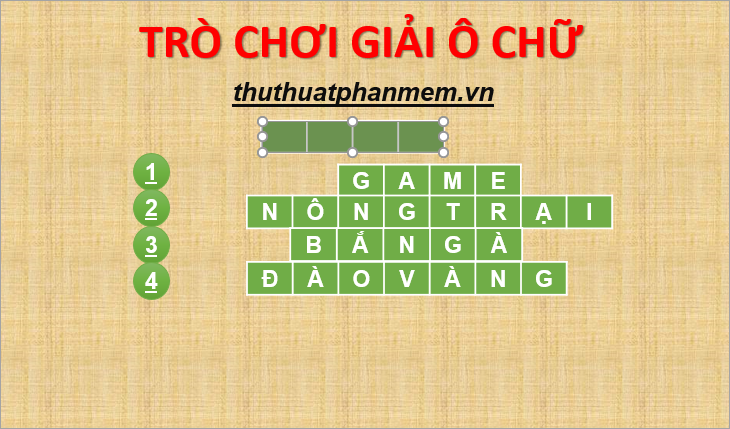
Step 7 : Create a Table with the number of cells equal to the number of cells of the answer to question 1, select all the cells and align like you align in step 5.
Next you select the effect when you click it, it will disappear by selecting the table and selecting Animations -> select the effect in the red ( Exit ).
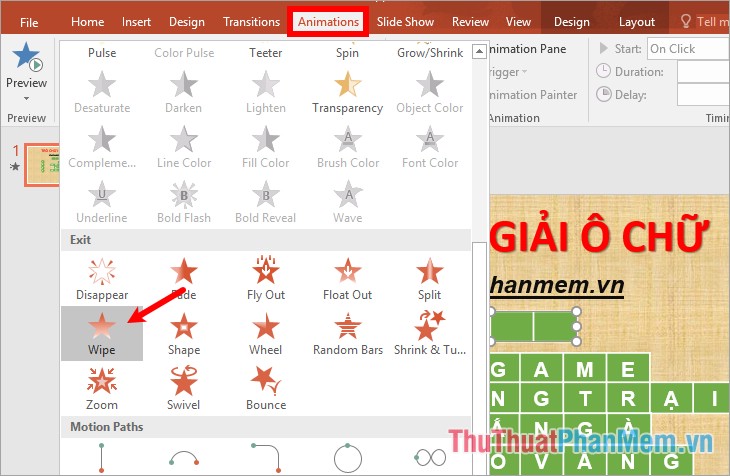
Select Animation Pane on the Animations tab , in the Animation Pane section on the right you select the black triangle icon on the table name -> Timing.
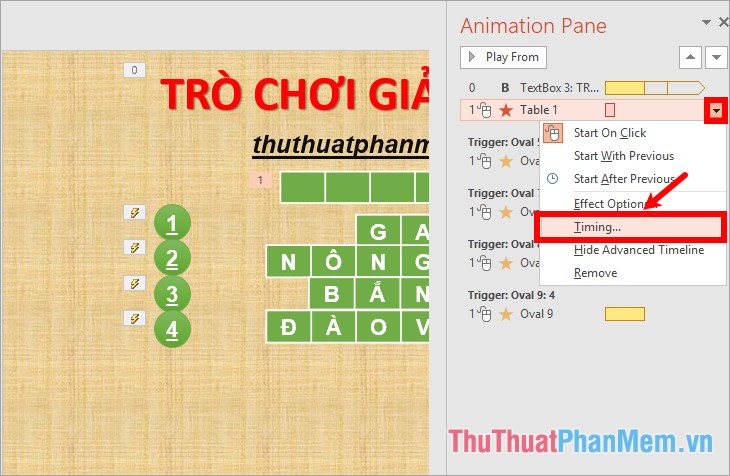
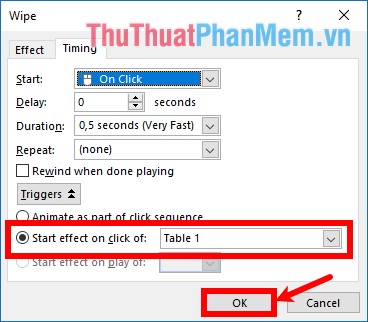
The effect name dialog box appears, select Triggers -> Start Effect on click of the correct table name and click OK to close the dialog box.
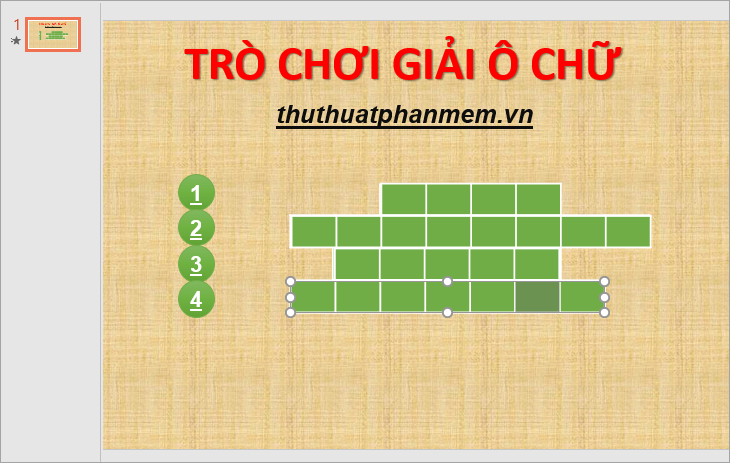
Drag all the table cells and over the board containing the answer to question 1.

Step 8: Copy the Table created in step 7 and overlap the following questions, if there are redundant cells, delete the cells. If it is missing, you add cells to the table. You will get the following:
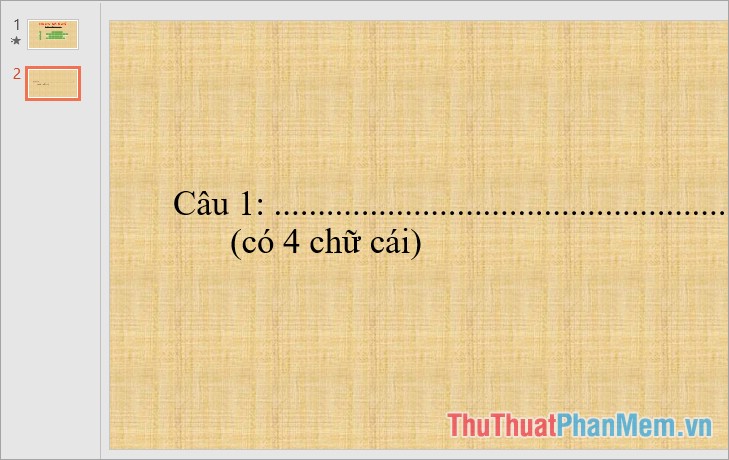
Step 9 : Create a new Slide, on this new Slide you insert a Textbox containing the # 1 question similar to the image below (the content of question 1 is just a demo, you replace the corresponding content).
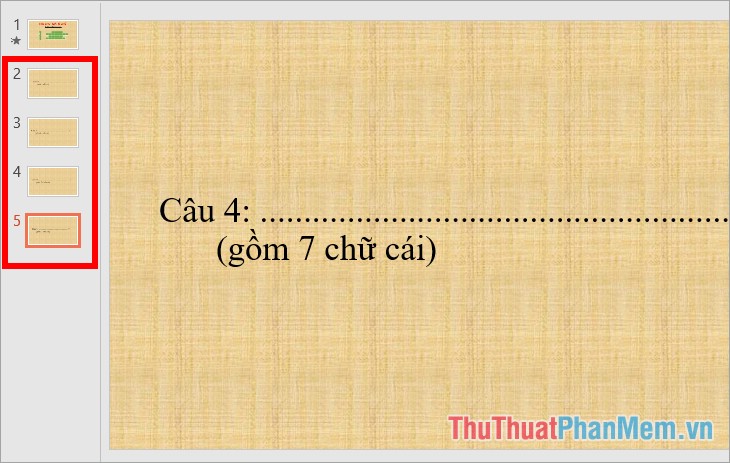
Similarly, you create new slides, each Slide contains 1 corresponding question.
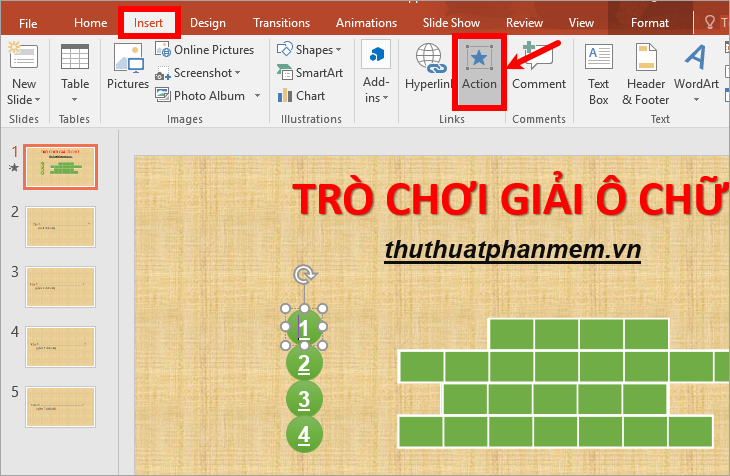
Step 10: Insert the action when clicking on image No. 1 will move to the slide containing question No. 1.
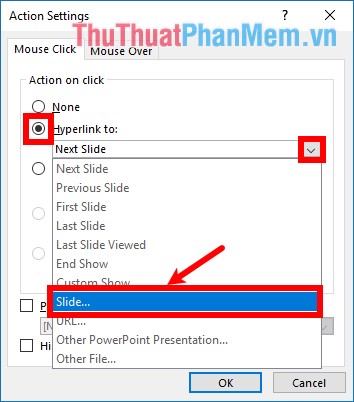
You select the picture 1 and select Insert -> Action.
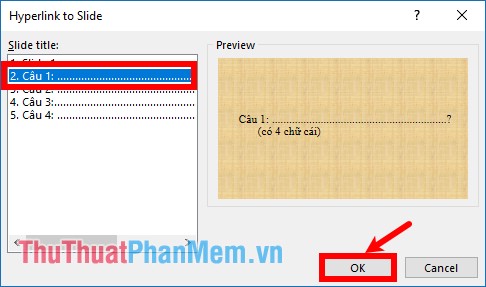
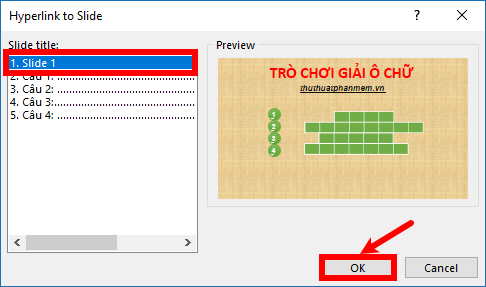
The Action Setttings dialog box appears, select Hyperlink to -> select the triangle icon -> Slides.
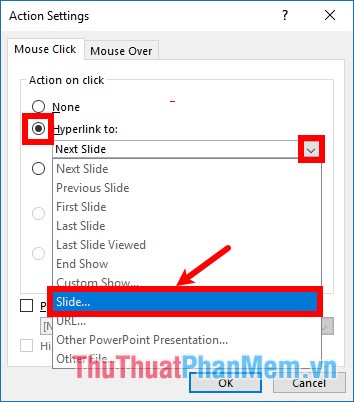
On the dialog box Hyperlink to Slide, select the slide containing question 1 and click OK .
Do the same with the next question shape, for example picture 2 you choose question 2.

Step 11 : Mount the command back to the main interface.
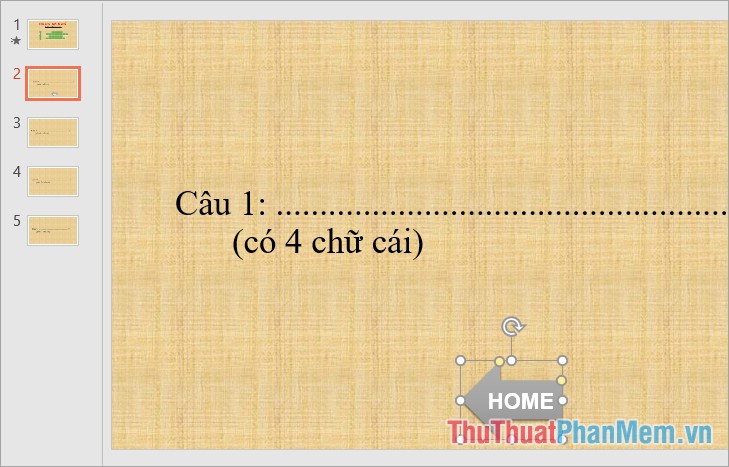
Select Slide containing question number 1, you need to insert a return symbol by selecting Insert -> Shapes -> select the image you want.
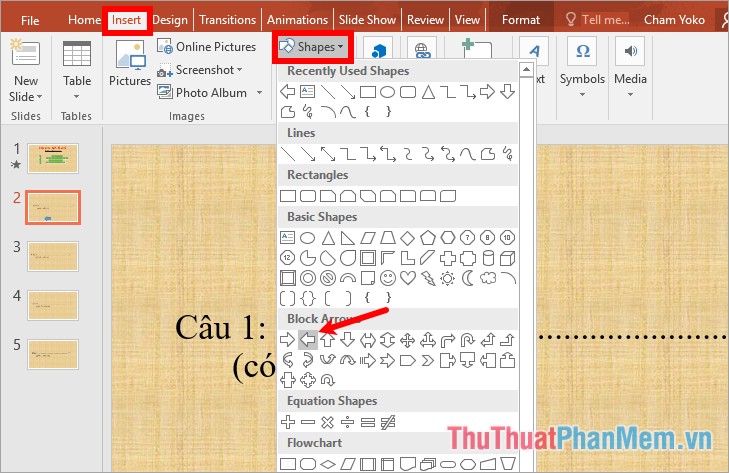
Draw the interface at the position you want, then edit the colors for the image, Edit Text if you want to insert text.
Next, you attach commands to this symbol by selecting Insert -> Action.
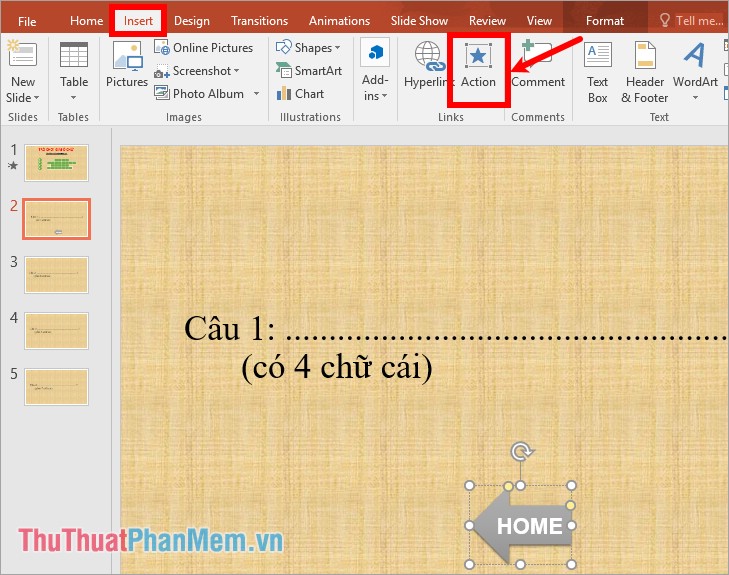
Action Settings appear you choose Hyperlink to -> select the small triangle icon -> Slides.
On the Hyperlink to Slide dialog box, select the first Slide (this slide is the main interface), click OK .
Then you copy this icon to the Slide containing questions 2, 3, . using Ctrl + C and Ctrl + V.

So you've created the game using simple and beautiful crosswords, you can download the PowerPoint crossword template file here.
powerpoint-power-stage-powerpoint-TipsMake.vn.pptx
The article only demo content, if you do it, you need to write more content in Slide questions. Hopefully through this article, you will be able to create many great games yourself in PowerPoint. Good luck!