How to write text on drawings in Word is very easy
In Word there are times when we have to insert drawings to represent diagrams and require content inside. If you do not know how to insert text into drawings in Word, please refer to the following article.
Table of Contents
1. Write text on drawings in Word 2007, 2010
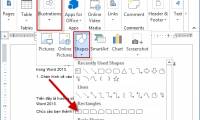
Step 1: You place the cursor in the position where you need to insert the drawing. Then you go to the menu Insert => Shapes (1) => select the desired shape (2) .

Step 2: You click and drag the drawing to create the desired drawing. Next, you double-click the outline of the drawing to open the Format menu option. Then click Shape Fill (1) to change the background color and choose No Fill (2) to set the background color to transparent.

Step 3: You right click on the border of the drawing (1) => Add Text (2) to write text.

Step 4: Then you insert the content you need to enter.

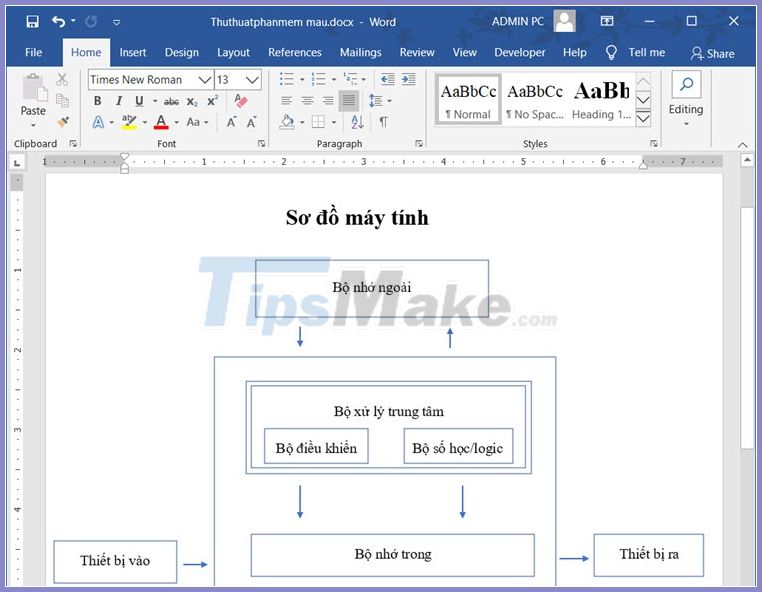
Continue to do the same with the other drawings until you complete the diagram.

2. Insert text into drawings in Word 2013, 2016, 2019
Step 1: Go to the Insert menu (1) => Shapes (2) => choose the shape you like (3) .

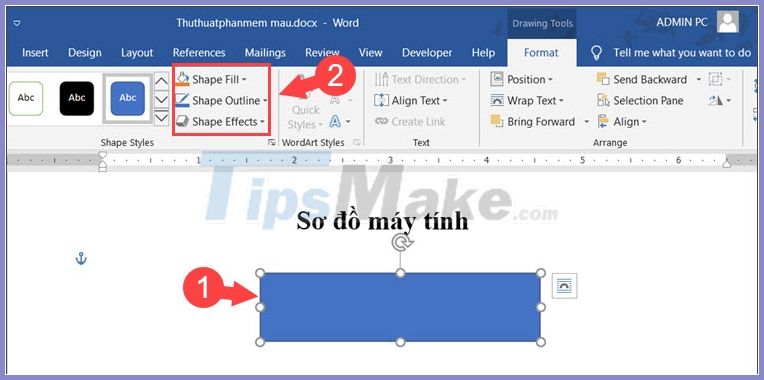
Step 2: Double click the left mouse button on the border of Shapes (1) . Then, you edit the color of Shapes (2) in the Shape Fill , Shape Outline , and Shape Effects .
Step 3: You right click on shapes border (1) => Add Text (2) to write text.

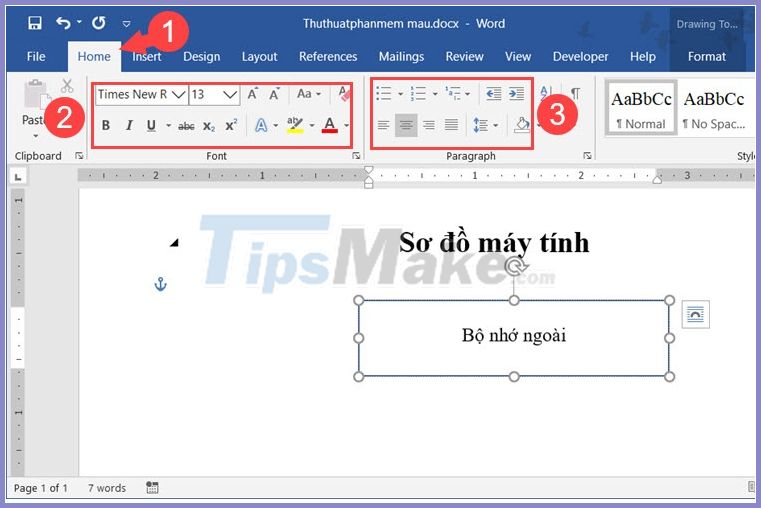
Step 4: Go to the Home menu (1) to open the text editing tool. Next, you edit the font, the font . (2) and align the text in part (3) .
Step 5: After the alignment is complete, you continue to complete and do the same with the other drawings.
Through this article, you can see how to write text in drawings in Word is extremely simple and fast, right? Good luck!
Was this article helpful?
Your feedback helps us improve.
Related Articles
 How to write words on drawings in Word3 minutes read
 Word 2013 Complete Guide (Part 17): Drawings and how to create effects for drawings10 minutes read
 Insert and edit drawings in Word2 minutes read
 Word 2013 Complete Guide (Part 18): How to insert Text Box and WordArt11 minutes read
 Instructions to put Tab in Word2 minutes read
 How to insert text into images on Word4 minutes read
Reader Comments 0
Sign in with email or Google to join the discussion.