How to install Windows 11 on Raspberry Pi 4
You will learn how to bypass Microsoft's strict requirements and install Windows 11 on Raspberry Pi 4.
Table of Contents
Looking to install Windows 11 on your Raspberry Pi 4? Not only is it a fun project to experiment with, but it opens up a huge world of possibilities on a small PC.
With this tutorial you will learn how to bypass Microsoft's strict requirements and install Windows 11 on Raspberry Pi 4. The best part is that you can do the installation from Raspberry Pi or PC without too many commands. or any special skill.
Requirements to install Windows 11 on Raspberry Pi
- Raspberry Pi 4 - Both 4GB and 8GB Pi versions will work. But for a smoother experience, use 8GB. Additionally, you will need to install and set up the Raspberry Pi OS.
- External SSD or USB - This is where you will install Windows 11. The article recommends using an external SSD because it will improve system performance. The drive must be at least 64GB.
- SD Card - If you want to install Windows 11 directly from the Raspberry Pi, you will need a suitable SD card to host the Raspberry Pi OS.
- USB keyboard, USB mouse and HDMI monitor.
- Raspberry Pi software updated.
- Reliable Internet connection, WiFi or Ethernet.
- Windows PC if you want to install Windows 11 from another Windows PC.
Update Raspberry Pi to the latest firmware
To allow Raspberry Pi 4 to boot from USB, you need to make sure it has the latest firmware. So, before doing anything, you will need to update your device to the latest firmware.
Open a Terminal window and enter the following commands.
sudo apt update sudo apt full-upgrade sudo shutdown - rThis will update all installed packages to the latest version and reboot the device.
Install Windows 11 on Raspberry Pi
There are two options when it comes to getting Windows 11 running on Raspberry Pi 4 and the article will detail both in the following section. Let's start with the more convenient way.
Method 1: From Raspberry Pi OS
Installing directly from the Raspberry Pi OS is the easiest way to install Windows on a Raspberry Pi 4. The only drawback is that it is slow compared to installing from a PC. Here's how:
1. WoR (Windows on Raspberry Pi) is a tool to install Windows 11 on USB. To get started, open Terminal then go ahead and install WoR Flasher with the following command.
git clone https://github.com/Botspot/wor-flasher2. Run WoR Flasher with the command below. Press Y when prompted to complete the installation.
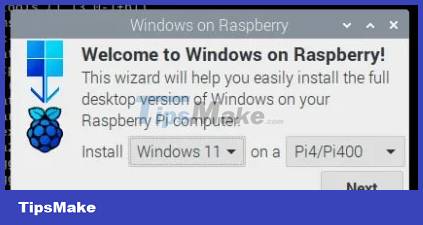
~/wor-flasher/install-wor-gui.sh3. In the WoR window that appears, select Windows 11 and Pi4/400 respectively. Click Next.
4. Select a language, then choose where you want to install Windows 11. Make sure the USB is connected.
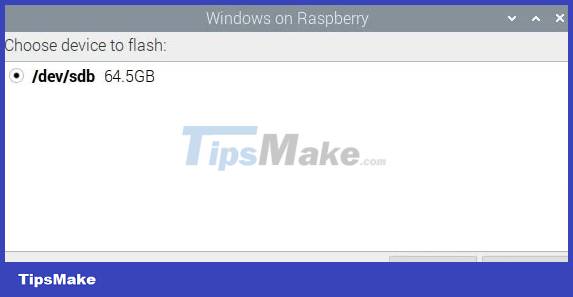
5. Now, select the drive where you want to install Windows 11 and then click Next.
6. On the next screen, press Flash.
Please be patient when WoR Flasher installs Windows. The installation time will depend on the speed of your Internet connection and the USB you are using. Keep the Raspberry Pi turned on during the installation process. If you have problems, see TipsMake.com's guide on how to boot Raspberry Pi from USB.
7. Power off the Raspberry Pi 4 and remove the SD card running the Raspberry Pi OS.
8. Connect the USB you flashed in the previous step to the Raspberry Pi via USB3 before powering on.
9. After the Pi boots, use the Windows Installation Wizard to set up Windows.
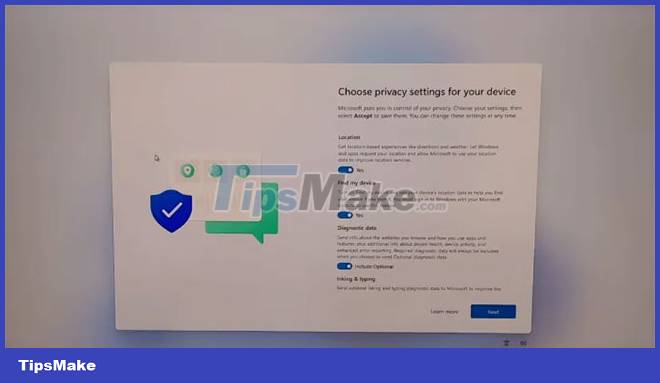
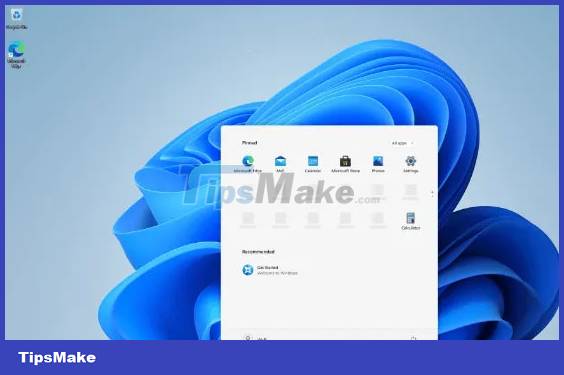
10. Once the setup is done, you will see the Windows 11 user interface.
Method 2: From another Windows PC
Installing Windows 11 to your Raspberry Pi 4 from another PC is much faster than using the Raspberry Pi OS method due to the more powerful processor. Here's how:
1. Go to UUPdump.net and type 'Windows 11 arm' in the search bar.
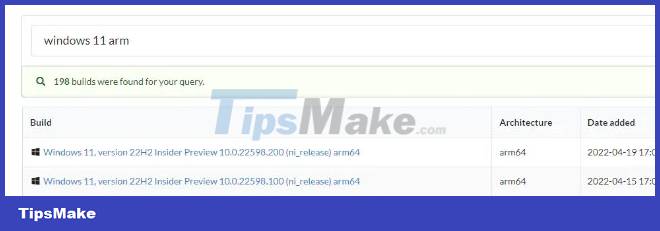
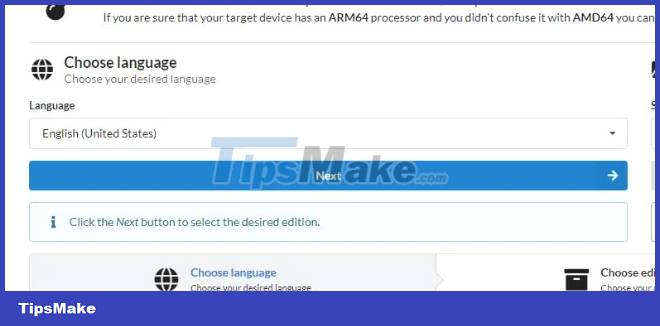
2. Now select the language and version of Windows you want to install (the article selected the latest build for arm64 version). Click Next to continue.
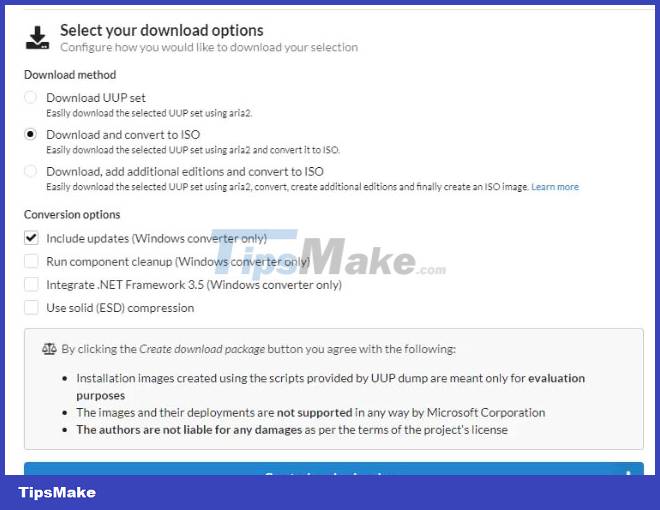
3. Select Download and Convert to ISO and click Create download package. A zip file will download to your PC.
4. Extract the zip file and run the script 'uup_download_windows.cmd' with admin rights.
5. Script will download all Windows components and create Windows 11 ARM ISO file.
6. Download WoR imager and extract the files. Once done, run the file 'WoR.exe' with admin rights.
7. Select the language you want and then click Next.
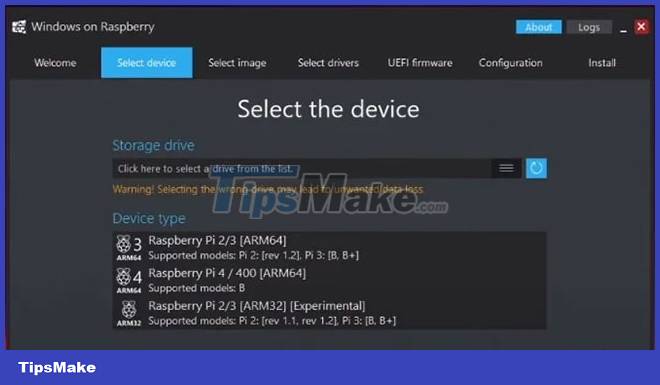
8. Now select the Storage drive (the USB you are installing Windows 11 into) and the Device type (Raspberry Pi 4).
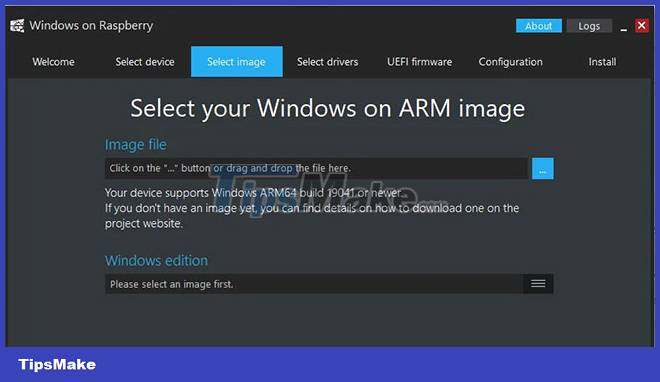
9. Select the Windows 11 ARM ISO file you created. You will find it in the UUPdump scripts folder. The 'Windows edition' field below will then auto-populate. Click Next to continue.
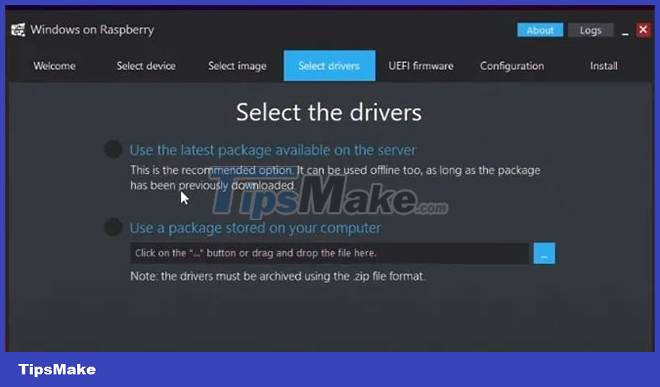
10. Select the drivers to be installed. Select the Use the latest package available on the server option . Read and accept the terms to continue. Click Next.
11. Next, in the UEFI Firmware tab , go to the 'Use the latest firmware available on the server' option .

12. Take a moment to download the drivers and click Next.
13. On the next page you will see an overview of the configuration settings. Click Next.
14. You will be taken to the settings overview screen.
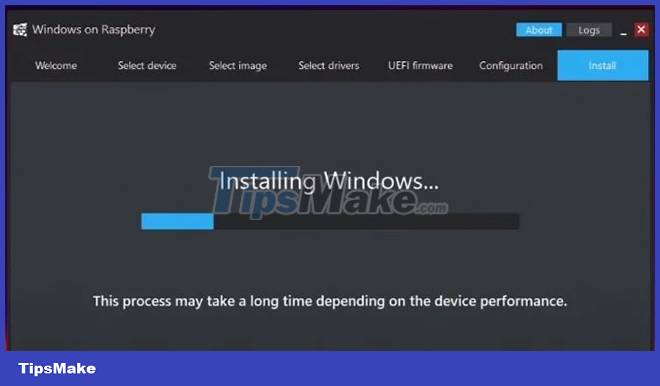
15. Confirm that everything is in order, then click 'Install' to begin the installation. This process will take some time, depending on the speed of your drive.
16. Plug the USB into the Raspberry Pi 4 and then boot it up. The Windows Wizard will guide you through the Windows 11 setup process.

17. Once the setup is done, you can boot into Windows 11.

The process of setting up Windows on Raspberry Pi is quite similar to the process of setting up Windows on a PC.
Was this article helpful?
Your feedback helps us improve.
Related Articles
 How to install Windows 10 IoT Core on Raspberry Pi 45 minutes read
 How to install Windows 10 IoT Core on Raspberry Pi 39 minutes read
 How to use Raspberry Pi Imager to install Raspberry Pi OS9 minutes read
 How to install Android on a Raspberry Pi4 minutes read
 How to start Raspberry Pi 3 from USB8 minutes read
 Learn Pi Imager, How to Use Raspberry Pi Imager4 minutes read
Reader Comments 0
Sign in with email or Google to join the discussion.