50 Registry tricks to help you become a true Windows 7 / Vista 'hacker' (Part 4)
If you use the built-in encryption feature on Windows 7 or Windows Vista, you can add this option to the right-click menu to easily encrypt and decrypt your files, instead of because you have to use the Properties dialog of the files.
14. Disable Windows Mobility Center on Windows 7 or Windows Vista
Windows Mobility Center is one of the extremely useful tools on Laptop Windows 7 or Windows Vista. However, since there are more Windows + X shortcuts, this tool is almost no longer useful for many users. If you want to disable Windows Mobility Center, you can follow the steps below:
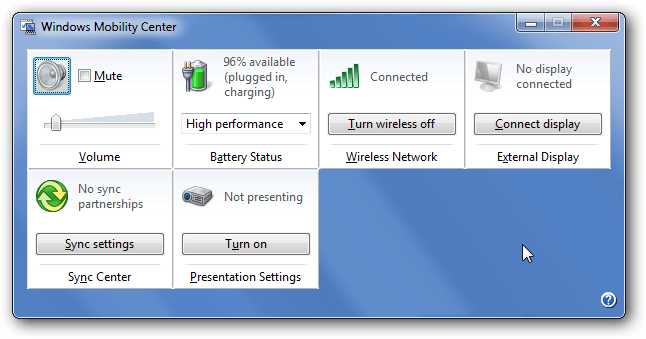
14.1. Edit the Registry manually
Open regedit.exe through the Search Start Menu framework. Then on the Registry interface, navigate to the following key:
Next in the right pane, you create a new 32-bit DWORD value and name this value NoMobilityCenter , then set the value to 1.

14.2. Download the available Registry
Download the ZIP file DisableMobility.zip Registry Hack to the computer then unzip, you will see 2 files are:
- DisableMobility.reg : Disable Mobility Center
- EnableMobility.reg : Enable Mobility Center
Select 1 of these 2 files to disable or enable Mobility Center.
Download DisableMobility.zip Registry Hack to your computer and extract it here.
15. Add Encrypt / Decrypt to Windows 7 or Windows Vista right-click menu
If you use the built-in encryption feature on Windows 7 or Windows Vista, you can add this option to the right-click menu to easily encrypt and decrypt your files, instead of because you have to use the Properties dialog of the files.
To add the Encrypt and Decrypt options to the right-click menu, follow the steps below:
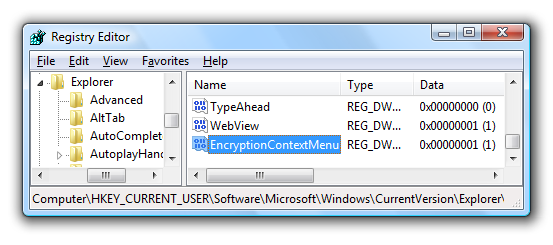
Open Regedit.exe through the Search Start Menu framework. Then on the interface of the Registry you navigate to the key:
In the right pane, you create a 32-bit DWORD value, then name this value EncryptionContextMenu and set the value to 1.
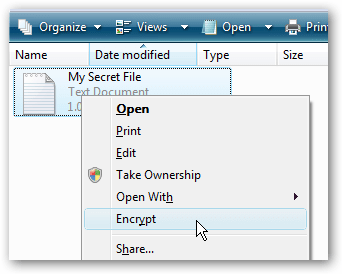
From now on whenever you right-click on a file you will see the Encrypt option.
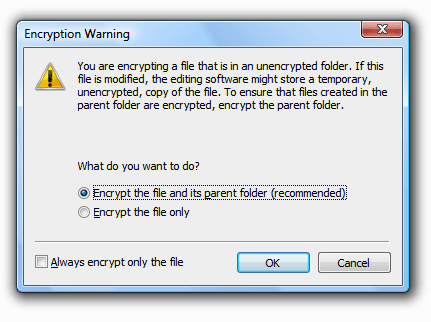
When you click this option, a dialog window will appear on the screen asking you to only encrypt the file or encrypt the file and parent folder of the file. You can choose to encrypt files only by default.
After the file is successfully encrypted, you can see that the file name is now green so that you can identify the encrypted file.
Right-click on it to change to the Decrypt option.
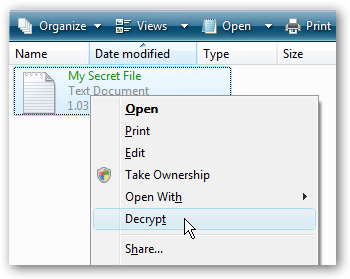
Alternatively, you can download the pre-edited Registry file ZIP to add Encrypt / Decrypt to Windows 7 or Windows Vista right-click menu.
Download the ZIP file AddEncryptionMenu.zip Registry Hack to your computer and install it here.
16. Enable multiple fonts on the Command prompt window
If you pay close attention, you will notice that there are only 2 fonts on the Command prompt window.
But many users, even long-time users, may not be able to activate more alternative fonts, including readable fonts on Windows Vista and Office 2007.
16.1. Change the default font on Command Prompt
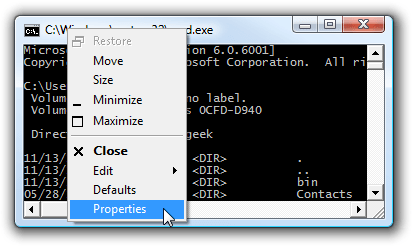
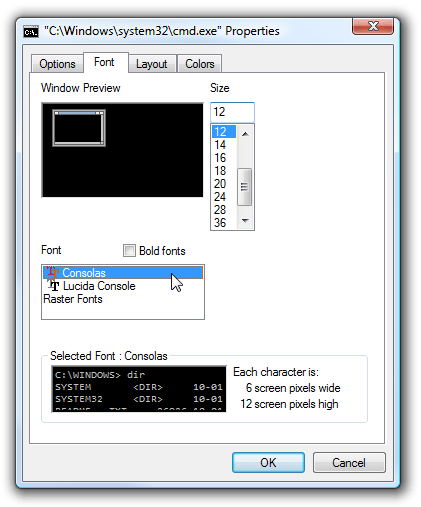
To change the font, right-click the title bar and then select Properties. If you want to set the font by default for all Command Prompt windows, you can select the Defaults option.
Next in the Font tab, you can select any font enabled on the Registry.
16.2. Enable the option of adding fonts to Command Prompt
To enable the option of adding fonts on Command Prompt, first open regedit.exe through the Search Start menu, then on the interface of the Registry you navigate by key:
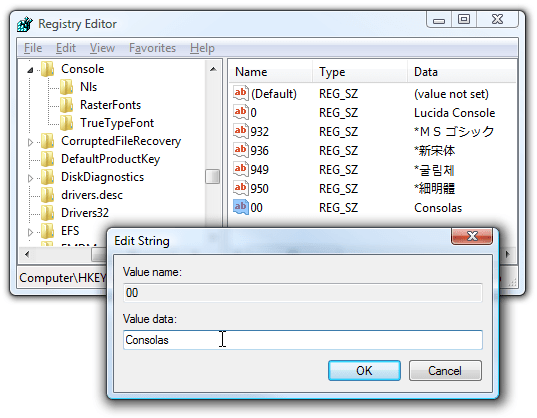
Here you will see a list of True Type fonts enabled in the right pane. To add another font, add a new value string, name it 00 in the Value name frame, and set in the Value data frame the font name you want to activate.
Note:
Restart your computer before using the new font on Command Prompt.
17. Always display "Command Prompt here" for the folder on Windows Vista
To activate the "Open Command Windows Here" option, follow the steps below:
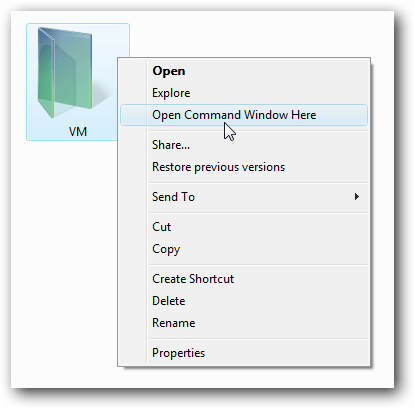
17.1 Edit the Registry manually
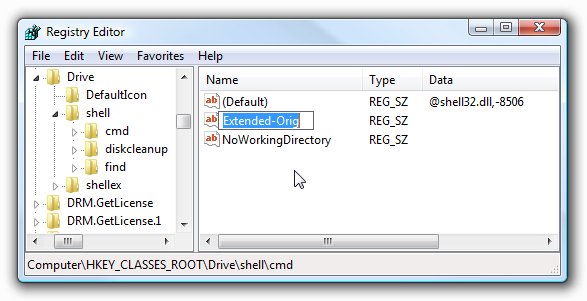
Open regedit.exe through the Search Start Menu pane or via the Run command window. Then on the interface of the Registry you navigate to the key to add the right-click menu to the Drive icon:
Change the "Extended" key name in the right pane to any name, such as Extended-Orig, .
To add a certain item to the Context Menu of the folder, browse the key:
And rename it like the "Extended" key name.
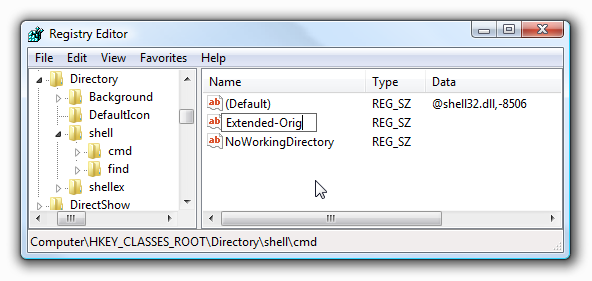
17.2. Use the built-in Registry
Download the EnableCommandPromptHereAlways Registry ZIP file to your computer and unzip, then double-click the EnableCommandPromptHereAlways.reg file to enter the information into the Registry.
Download the EnableCommandPromptHereAlways Registry ZIP file to your computer and install it here.
18. Enable or disable TortoiseSVN
If you are a programmer and you are using TortoiseSVN to manage your Subversion source control project, you may be wondering how to disable items on the Menu without having to uninstall it completely. all. You can refer to the steps below:
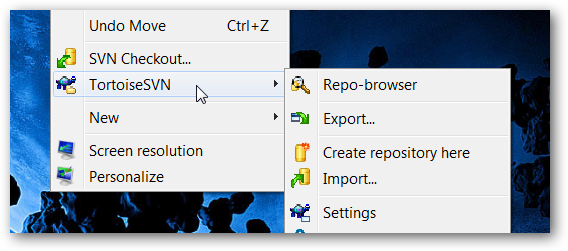
The general idea is to remove the items on the Windows Explorer Context Menu from the Registry with the same scrpit, then add the Registry and other scripts.
To make the process simpler and prevent annoying Regedit messages, what you need to do is create a shortcut regedit.exe, enter the path of the Registry hack file there. Make sure you switch to Silent mode (silent mode).
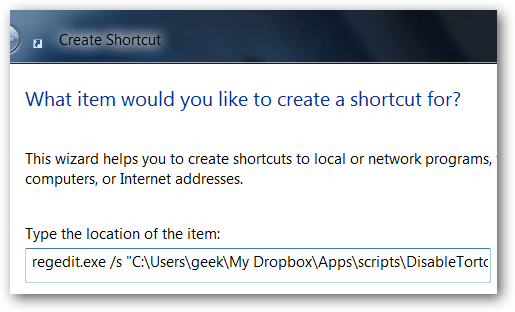
Next move the shortcut to the Start Menu folder so you can search more easily.
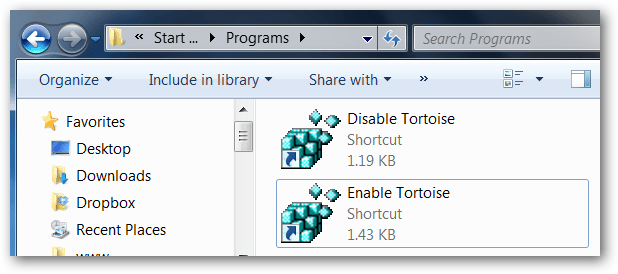
Alternatively you can download the file Enable / Disable TortoiseSVN Registry Hack available for editing to enable or disable TortoiseSVN.
Download Enable / Disable TortoiseSVN Registry Hack on your device and install it here.
Refer to some of the following articles:
- 50 Registry tricks to help you become a true Windows 7 / Vista "hacker" (Part 3)
- 50 Registry tricks to help you become a true Windows 7 / Vista "hacker" (Part 2)
- 50 Registry tricks to help you become a true Windows 7 / Vista "hacker" (Part 1)
Good luck!