How to Install CentOS
Part 1 of 2:
Downloading and Burning the CentOS ISO File
-
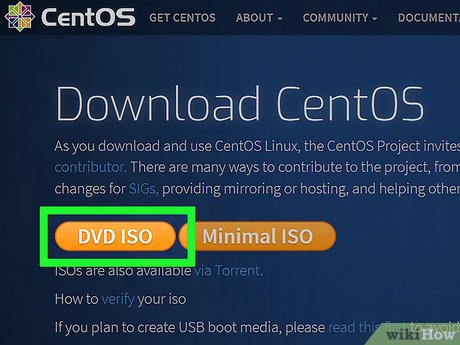
 Navigate to the CentOS downloads page at https://www.centos.org/download/.
 -
 Click on 'DVD ISO.' The Web page will refresh and display a number of ISO files for the latest version of CentOS hosted by users in the CentOS community.
 -
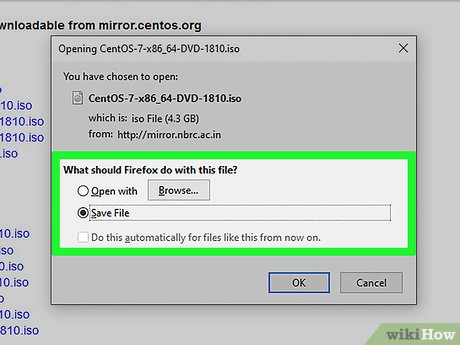
 Click on any ISO link, then select the option to save the file to your desktop. You must burn the ISO file to CD or DVD before you can install CentOS on your system.
 -
 Insert a recordable CD or DVD into the disc drive on your computer.
 -
 Navigate to your desktop and double-click on the ISO file. Your computer will recognize that the ISO file must be burned to disk, and automatically launch your default disk burner software.
- Launch Disk Utility if using Mac OS X, then click on 'File,' select 'Open Disk Image,' and open the ISO file you want burned to CD or DVD.
-
 Click on 'Burn.' Your disk burner software will then burn the CentOS ISO file to your disc.
Part 2 of 2:
Installing CentOS
- Insert the CD or DVD containing the CentOS installation file into the disk drive on your Linux system.
-
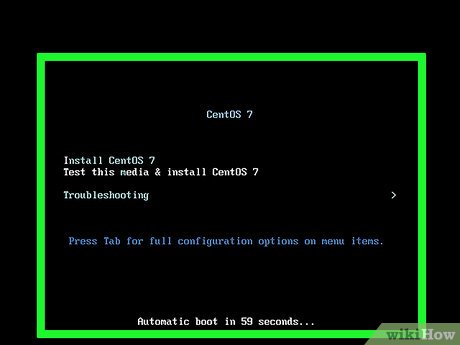
 Power on your computer. Your system will boot from the installation CD and display the CentOS welcome screen.
 -
 Highlight 'Install CentOS 7' then press 'Enter." You can also choose the option "Test this media & install CentOS 7." Selecting the second option will take a relatively long time.
- The second option is not necessary unless you feel that your Installation media is corrupted and not in good shape.
-
 Select your preferred language, then click 'Continue.'
 -
 View the home screen of the Installation Summary. This is the place where you can set all your installation parameters and configurations. Here you again have an option of selecting an Installation Source. You can verify your installation media or you can simply skip this option.
Note: Verifying the installation media is not required to install CentOS, and takes a relatively long time to perform.
-
 Go to 'Keyboard'' options, select your keyboard language and layout, and click 'Done.'
 -
 Go to 'Network & Host Name'' options and type a hostname for your CentOS server. Then, click 'Apply,'' then finally, click on 'Configure."
 -
 Select the appropriate tab for your network type and settings, Select 'IPv4 Settings'' if you need to add IP manually.
 -
 Enter your network information into the required fields. You must enter your IP address, Netmask, Gateway, and DNS Server credentials.
 -
 Turn the Ethernet (ens33) slider switch On, then click 'Done.'
 -
 Go to 'Date & Time'' options and select your timezone, then click 'Done.'
 -
 Go to the 'Installation Destination'' option and select the device, type of installation, or partitioning you want used for CentOS. Select your Hard drive and then choose to configure the partition automatically or manually.
Tip: It is always easier to use automatic partitioning.
-
 After the partitions have been created, click 'Done.'
 -
 Select 'Accept Changes' to confirm for creation and format all the partitions you have created. You will be returned back to installation summary home screen.
 -
 Go to 'Software Selection'' and select the applications you want installed with CentOS, then click 'Done.' You can install an Internet browser, graphics tools, and more. Finally, Click 'Begin installation'' and CentOS will then begin installing itself on your system, which will take several minutes to complete based on the number of extra applications selected.
 -
 While CentOS is installing, Go to 'Root Password'' and enter a root password, then type the password again for confirmation and click 'Done.' The root password will be used for administering CentOS. If needed, you can also add extra users thru 'User Creation'' during installation.
 -
 Remove the CD or DVD from your disk drive when CentOS informs you installation is complete.
 -
 Click on 'Reboot.' Your computer will reboot, and CentOS is now installed on your machine.[1]
Share by
David Pac
Update 04 March 2020


