How to install Microweber CMS on CentOS and Rocky Linux
Microweber is a free, open source drag-and-drop CMS website builder written in the PHP programming language and Laravel 5 framework.
Table of Contents
Microweber is a free, open source drag-and-drop CMS website builder written in the PHP programming language and Laravel 5 framework. With Microweber, you can easily create content and manage multiple screens. Microweber offers an integrated online store feature that allows selling products online. Microweber offers features like live editing, online store, statistics, templates, drag and drop, WYSIWYG HTML editor, etc.
This guide will explain how to install Microweber with the LEMP stack on a CentOS server.
Request
- A server with CentOS 8 distribution.
- Non-root users have sudo permissions.
First steps
Before you begin, you need to update your system to the latest version. You can do this by running the following command:
sudo yum updateOnce the system is updated, reboot to apply the changes.
Install LEMP server
First, it is necessary to install Nginx web server, MariaDB server, PHP and other PHP modules on the system. You can install all of them by running the following command:
sudo yum install nginx mariadb-server php php-fpm php-common php-mbstring php-xmlrpc php-soap php-mysql php-gd php-xml php-cli php-zip unzip wget -yAfter all the packages have been installed, you need to edit the php.ini file and make some changes, such as memory limit, maximum file size on upload, maximum execution time and time zone:
sudo vim /etc/php.iniMake the following changes:
memory_limit = 256M upload_max_filesize = 150M max_execution_time = 360 date.timezone = Europe/BerlinSave and close the file.
Next, start the Nginx and MariaDB services. Enable them with the following command so they are started on boot:
sudo systemctl restart nginx mariadb php-fpm sudo systemctl enable nginx mariadb php-fpmConfigure MariaDB
MariaDB is not backed up by default, so you must back it up first. You can back it up with the following command:
sudo mysql_secure_installationThis command sets the root password, removes anonymous users, disallows remote root logins, clears the test database, and reloads permissions, as shown below:
Enter current password for root (enter for none): ENTER Set root password? [Y/n]: N Remove anonymous users? [Y/n]: Y Disallow root login remotely? [Y/n]: Y Remove test database and access to it? [Y/n]: Y Reload privilege tables now? [Y/n]: YOnce MariaDB is secured, log in to the MariaDB shell:
mysql -u root -pEnter your root password. Then create a database and user for Microweber (replace the word "password" with your own secure password):
MariaDB [(none)]> CREATE DATABASE microweberdb; MariaDB [(none)]> CREATE USER 'microweber'@'localhost' IDENTIFIED BY 'password';Again, replace the word "password" with your own secure password. Next, grant the microweber user all permissions with the following command:
MariaDB [(none)]> GRANT ALL ON microweberdb.* TO 'microweber'@'localhost' IDENTIFIED BY 'password' WITH GRANT OPTION;Remove permissions and exit MariaDB shell:
MariaDB [(none)]> FLUSH PRIVILEGES; MariaDB [(none)]> EXIT;Install Microweber
First, download the latest version of Microweber from the official website to the /tmp directory with the following command:
cd /tmp wget https://microweber.com/download.php -O microweber-latest.zipOnce the download is complete, extract the downloaded file with the following command:
sudo mkdir /var/www/html/microweber sudo unzip microweber-latest.zip -d /var/www/microweberNext, give the Microweber folder the correct permissions with the following command:
sudo chown -R nginx:nginx /var/www/microweber/ sudo chmod -R 755 /var/www/microweber/Run sudo vim /etc/php-fpm.d/www.conf , set user and group to nginx. They are initially set for Apache users and groups.
sudo vim /etc/php-fpm.d/www.conf # user = nginx # group = nginxRestart the PHP-FPM service.
sudo systemctl restart php-fpm.serviceConfigure Nginx for Microweber
Next, you need to create a virtual Nginx server file for Microweber. It can be created with the following command:
sudo vim /etc/nginx/conf.d/microweber.confAdd the following lines:
server { listen 80; server_name example.com; root /var/www/microweber; index index.php; client_max_body_size 100M; location / { try_files $uri $uri/ /index.php$is_args$args; } location ~ .php$ { try_files $uri =404; include fastcgi_params; fastcgi_pass 127.0.0.1:9000; fastcgi_index index.php; fastcgi_param SCRIPT_FILENAME $document_root$fastcgi_script_name; } }Replace example.com in the above configuration with your own domain name. Save and close the file.
Finally, restart the Nginx web service to apply all the changes:
sudo systemctl restart nginxYou can also check the status of the Nginx service with the following command:
sudo systemctl status nginxIf everything is fine, you will see the following output:
? nginx.service - The Nginx HTTP Server Loaded: loaded (/lib/systemd/system/nginx.service; enabled; vendor preset: enabled) Drop-In: /lib/systemd/system/nginx.service.d ??nginx-systemd.conf Active: active (running) since Tue 2018-12-11 15:06:45 UTC; 11min ago Main PID: 1170 (nginx) Tasks: 6 (limit: 1114) CGroup: /system.slice/nginx.service Dec 11 15:06:33 ubuntu1804 systemd[1]: Starting The Nginx HTTP Server. Dec 11 15:06:45 ubuntu1804 systemd[1]: Started The Nginx HTTP Server.Visit Microweber
Microweber is now installed and configured. Now it's time to access the Microweber web interface.
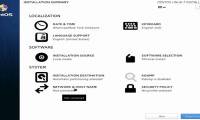
Open a web browser and enter the URL http://example.com. You will then be redirected to the following page:
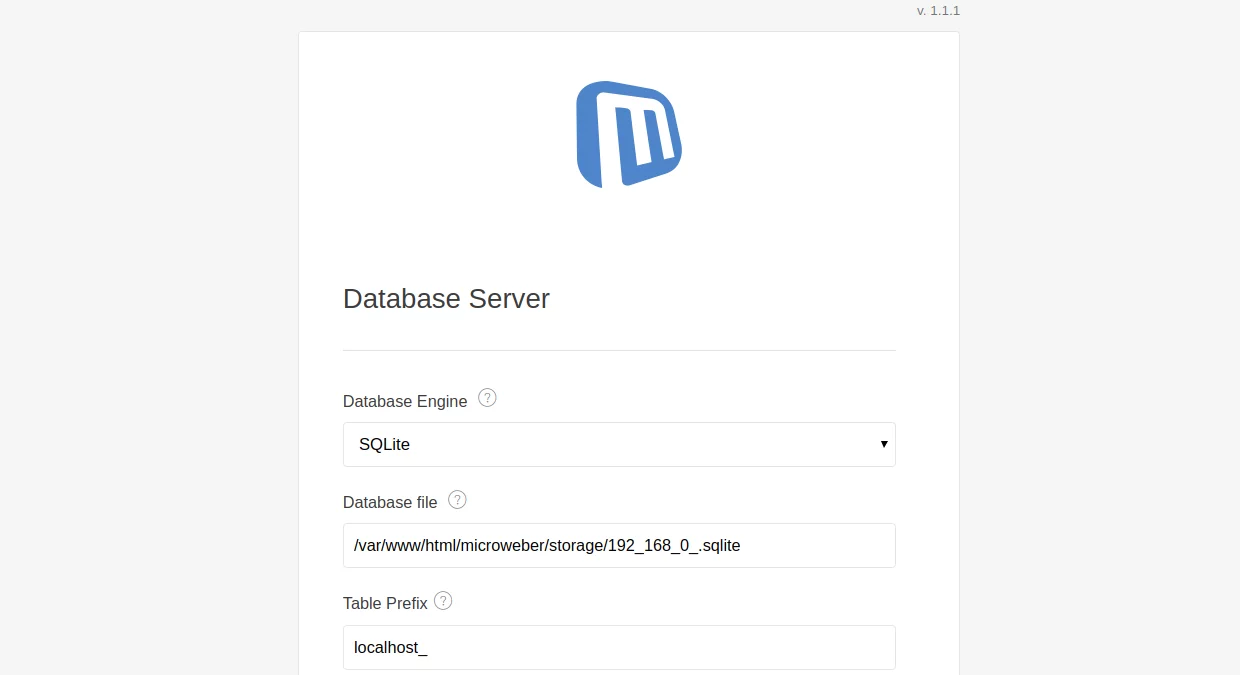

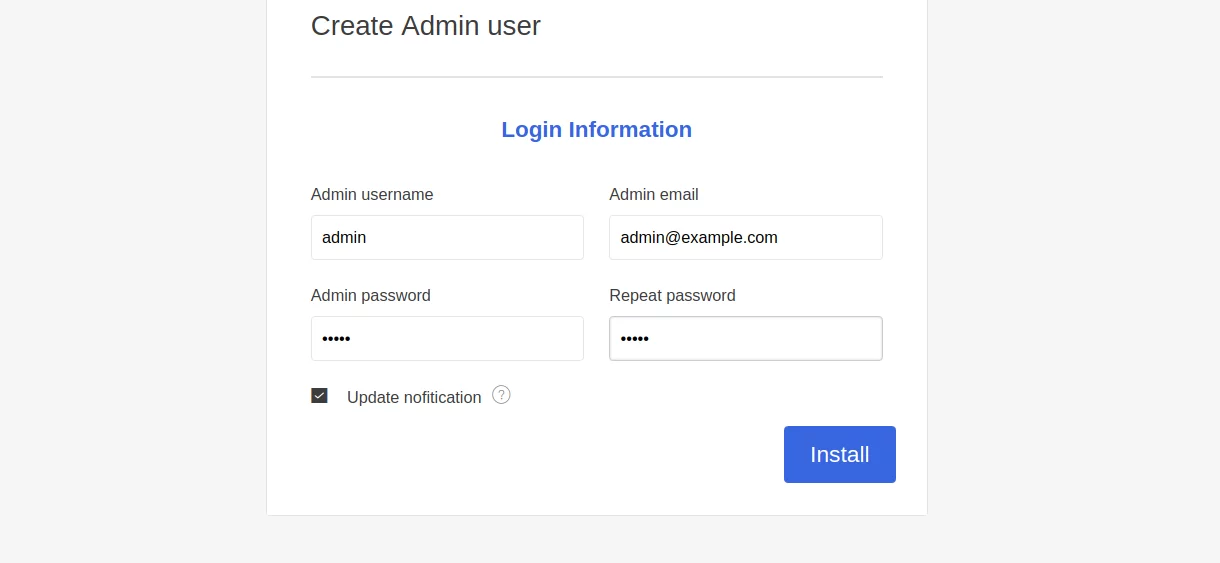
Here you enter all the details, such as database name, username and password for the database, admin username and password. Then, click the Install button. Once the installation is complete, you will be redirected to the Microweber Dashboard on the following page:
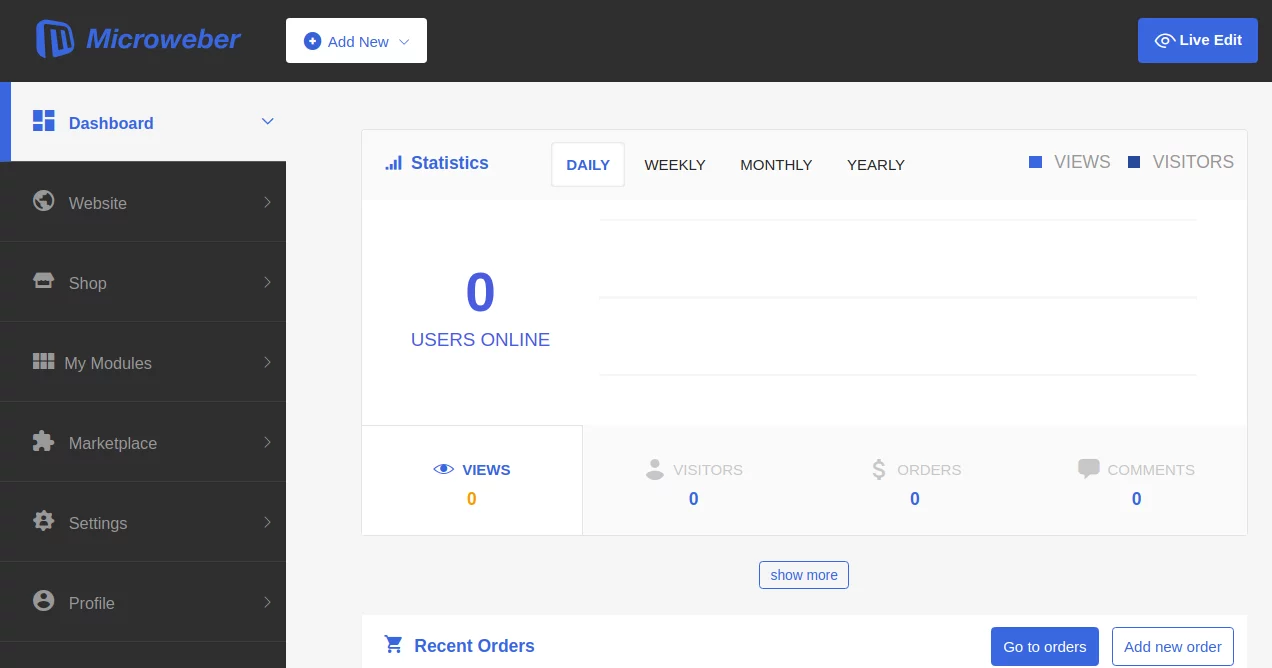
Congratulations! You have successfully installed Microweber on your CentOS 8 server. Now you can easily create your own website with Microweber.
Was this article helpful?
Your feedback helps us improve.
Related Articles
 How to Install CentOS5 minutes read
 How to install VLC Media Player 3 on CentOS 83 minutes read
 Install CentOS on Windows 10 WSL5 minutes read
 How to install OpenLiteSpeed Web Server on Rocky Linux 85 minutes read
 7 best Linux distributions based on Red Hat6 minutes read
 How to install the Arduino IDE on CentOS 84 minutes read
Reader Comments 0
Sign in with email or Google to join the discussion.