Table of Contents
This guide explains how to insert Images in Word 2010, with clear steps, practical tips, and important checks before you begin.

1. How to insert pictures into Word 2010
To insert images into Word 2010, click the Insert ribbon on the toolbar. Ribbon Insert has the function of inserting other things into your Word documents, so to insert images, you need to find this ribbon.
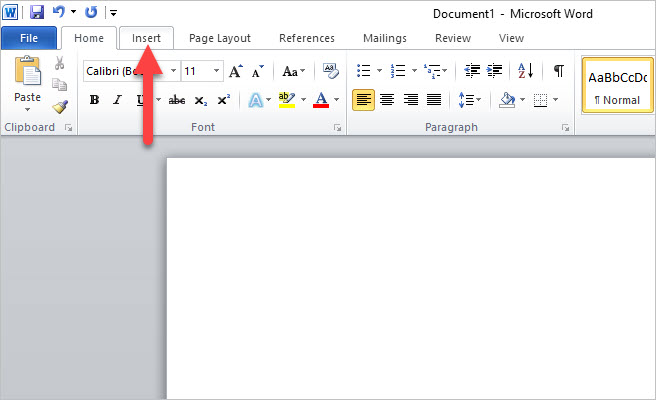
In the Insert ribbon, in the Illustrations section, click the Picture icon.
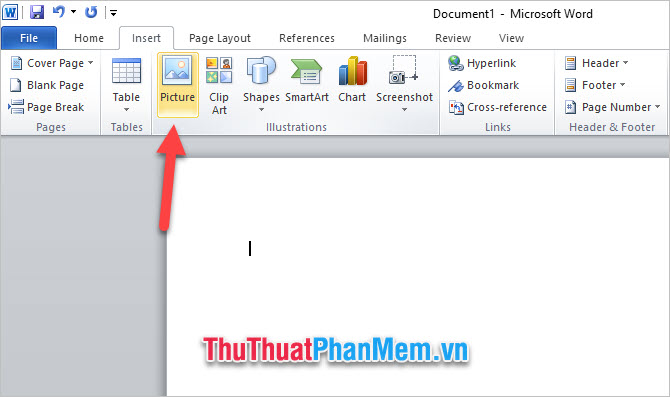
Next, select the image you want to insert into the computer. Click Insert to insert the image into your text.

The inserted image may have an inappropriate size, you can click on the edges and corners of the image to resize it.

2. Edit the image to be inserted into Word 2010
Images inserted into your text can be edited simply by using the Word function itself.
You need to click on the picture to open the ribbon Picture Tools Format .
There are many functions in this ribbon for you to edit your photos.
With the Corrections function, you can adjust the lighting and contrast for the image. There are many different levels already installed for users to choose.
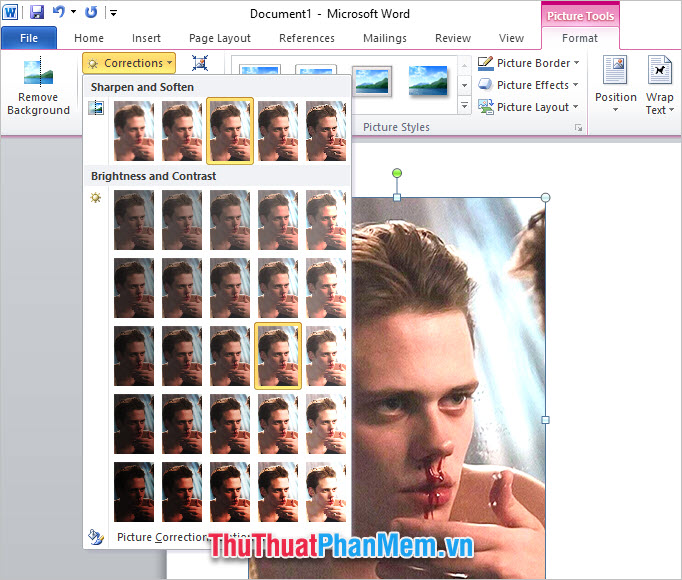
In the Color section, you can use to change the color of the image. There are colors for you to choose from changes to your inserted picture.

Artistic Effects are special effects that you can create for your photos.
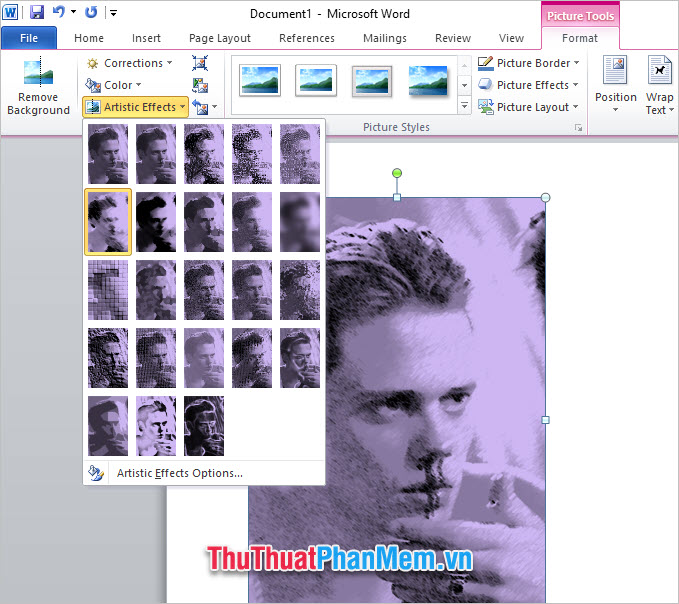
In addition, you can choose the style of the photo in the available styles of Picture Styles .
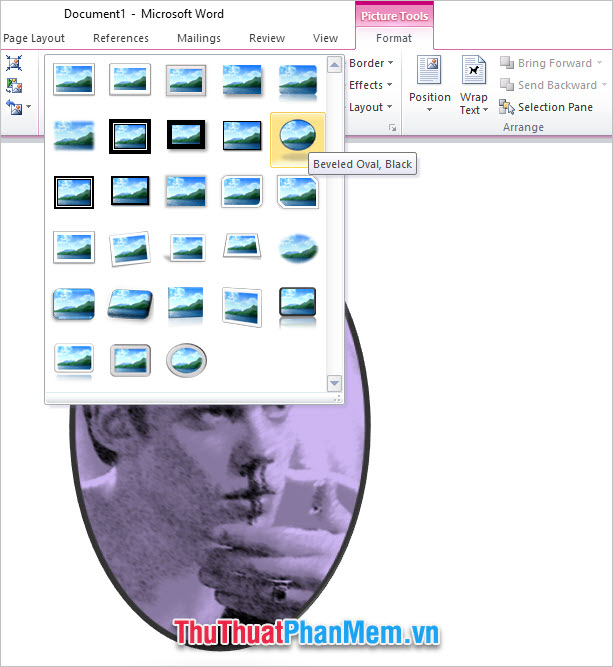
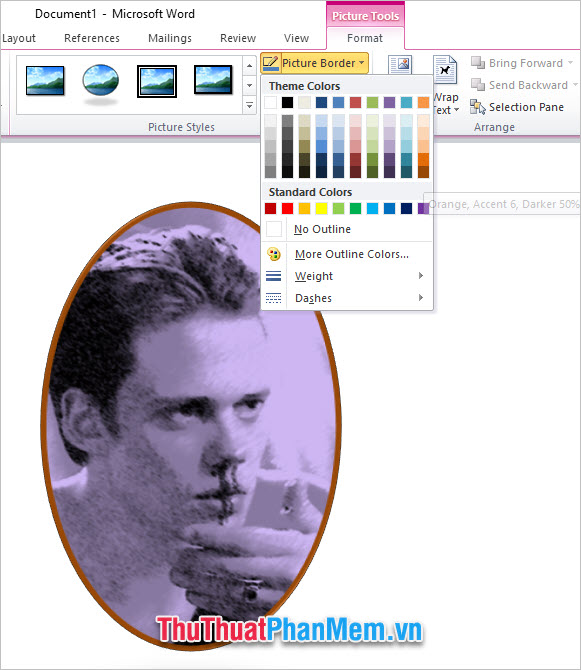
You can customize the style of the photo by changing the color border of the image thanks to Picture Border right in Picture Styles.
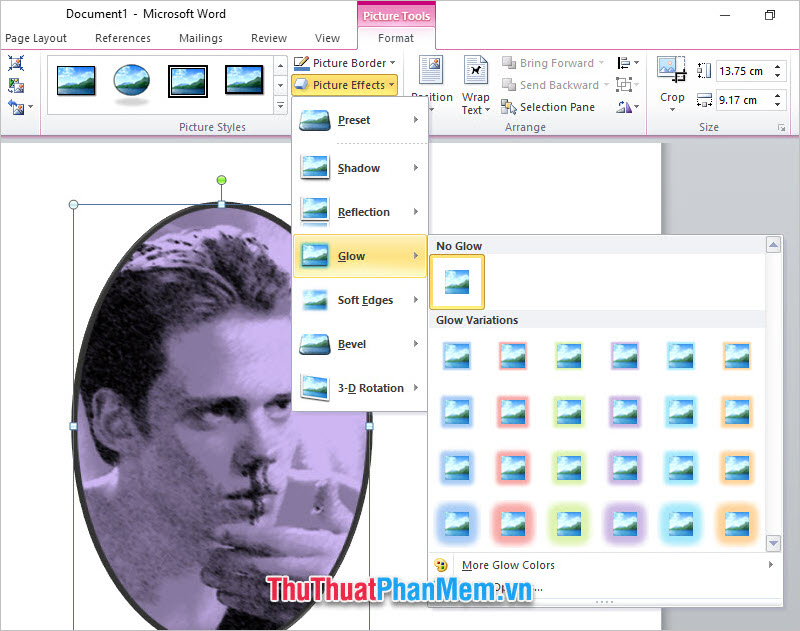
You can change the effect for the style of photos in Picture Effects . There are many options for you to choose from such as Preset , Shadow , Reflection , Glow , Soft Edges , Bevel , 3-D Rotation .
Thank you for reading our article TipsMake. com on how to insert images in Word 2010. I wish you success.
FAQ
What should I know about Insert Images in Word 2010?
Focus on the key features, requirements, limitations, and practical use cases explained in this guide.
How do I get the best results with Insert Images in Word 2010?
Follow the recommended steps, use current software or information, confirm compatibility, and review settings before major changes.
Are there any risks or limitations?
Potential limitations depend on compatibility, data quality, cost, privacy, support, and how the product or method is used.
Related Articles
 Insert Images into Text Content: Add Photos to Word10 minutes read
 Insert Images into Word 2016 and Align Images in Word 20166 minutes read
 How to Insert Pictures into Word, Edit Size and Format9 minutes read
 How to Insert Images into Word 2007: How to Insert Images into Words4 minutes read
 Word 2013 Complete Guide (Part 15): Insert Images and Text Wrapping7 minutes read
 Word 2013 Complete Guide (Part 16): Image Format9 minutes read
Reader Comments 0
Sign in with email or Google to join the discussion.