Table of Contents
This guide explains how to convert Fonts in Excel, with clear steps, practical tips, and important checks before you begin.
1. Change the font in Excel documents
The default font for Excel in the publisher's settings is Calibri .
This is a basic Unicode font that is easy to use but if you use it for a long time you may find it boring and nothing special.

That's why you want to change this font type. To do this, you just need to click on the data box you want to change the font, or you can also do this with a certain data array, just highlight the entire data array is done. Then you click on the icon to expand the functionality font under Font in the ribbon Home .

Then you will see a very long list of fonts that your computer currently has. These fonts can be fonts that are installed in your computer or downloaded and installed on your computer.
You choose to get a satisfactory font pattern.

The end result is that the highlighted data will convert the font you want.

2. Change the default font in Excel
In addition to changing the font During editing Excel, you can also change the default font of Excel. This will help you install the font you want for the entire Excel data box without having to change manually as in Part 1 above.
You need to open the File ribbon on the Excel toolbar.
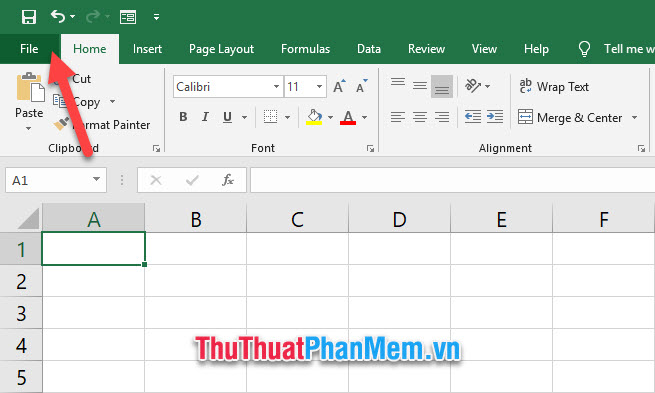
In the options at File ribbon, click on Options .

The Excel Options function window will appear. Leave the General tab open, then look for the When creating new workbooks section .
In this section, you'll see the line Use this as the default font . Click on it to change the default font style for Excel.
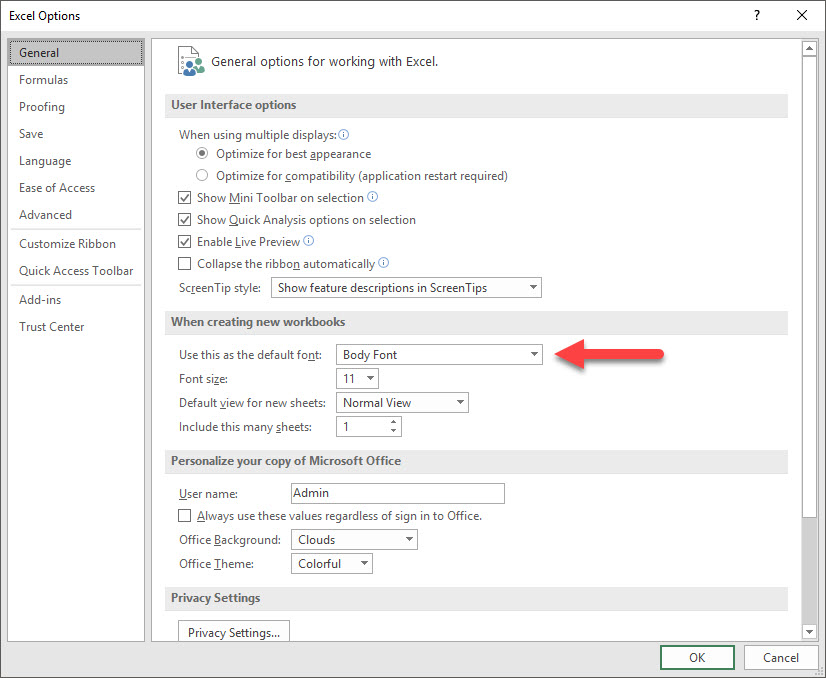
Select a font style that you want to set as the default font for Excel.

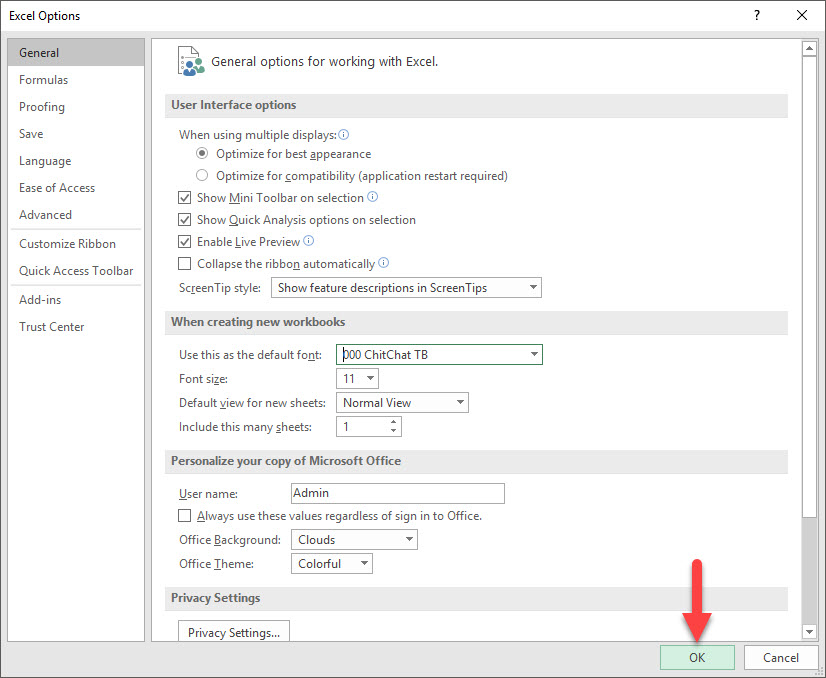
After making your selection, click on OK to confirm your recent change of settings.
You will see a small message for me.
It will ask you to turn off the Excel software and turn it back on so the software system can confirm and change the font.
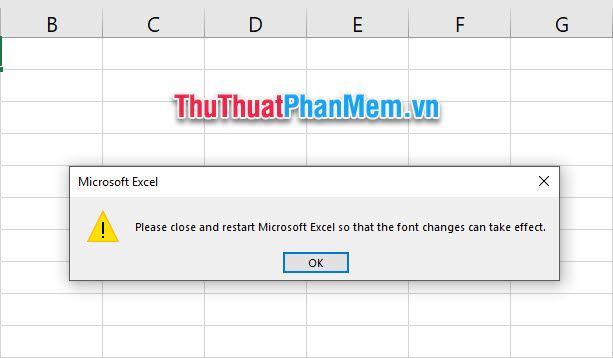
Please follow, turn off the Excel software and then turn it back on. Then you will see all the data cells have the font changed as you have just installed.

Thank you for reading our article TipsMake. com about how to change fonts in Excel. I wish you successful implementation!
FAQ
What should I know about Convert Fonts?
Focus on the key features, requirements, limitations, and practical use cases explained in this guide.
How do I get the best results with Convert Fonts?
Follow the recommended steps, use current software or information, confirm compatibility, and review settings before major changes.
Are there any risks or limitations?
Potential limitations depend on compatibility, data quality, cost, privacy, support, and how the product or method is used.
Related Articles
 Simple Way to Convert Excel Files to PDF: Exel to PDF8 minutes read
 How to Convert Fonts to Unicode: Step-by-Step Guide3 minutes read
 Simple Way to Convert Excel Files to PDF - Convert Directly or9 minutes read
 How to Convert Excel Files to PDF Online Using Google Drive2 minutes read
 Convert Csv to Xls: How to Convert Csv Files to Excel in Bulk6 minutes read
 How to Convert Money into Words in Excel, Without an Add-in4 minutes read
Reader Comments 0
Sign in with email or Google to join the discussion.