How to fix the error The User Profile Service failed the logon. Không thể nạp được người dùng profile
In some cases when the user logs in to the password to access his or her Windows computer but fails to log in and the error message appears on the screen ' The User Profile Service failed the logon. User profile không thể được nạp '.
If the error ' The User Profile Service failed the logon. User profile cannot be loaded ' means that your Profile is broken. There are many causes of Profile errors, such as virus attacks or bugs after updating Windows .
To fix this error, please refer to the following article of Network Administrator.

If you forget your Windows login password, refer to the login steps here.
Method 1: Fix the faulty profile
First, start Windows in Safe Mode. If you don't know how to do this, please refer to the article: Enable Safe Mode in Windows 7.
The solution is to edit the user account profile, which requires you to modify the registry. The following steps should be taken carefully, as incorrect registry modifications can cause serious problems. It is recommended to back up the registry before starting to restore it if something goes wrong. For details, please refer to the article: Backup and restore the registry in Windows 7.
Then follow these steps:
1) Press Win + R key combination. The Run dialog box will open.
2) Enter regedit and click the OK button . The Registry Editor utility will open.
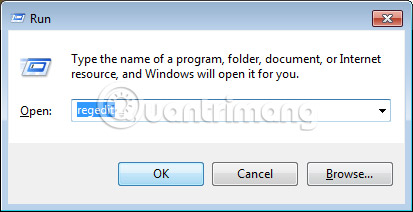
3) In Registry Editor, locate and then expand the following registry subkey:
HKEY_LOCAL_MACHINESOFTWAREMicrosoftWindows NTCurrentVersionProfileList 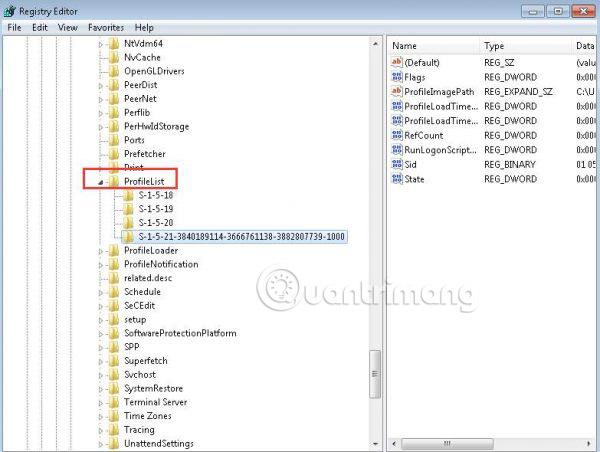
4) In this subkey, locate the folders starting with S-1-5 followed by a long sequence of numbers.
In most cases, there will be two such directories: A directory ends with .bak and another folder without this extension.
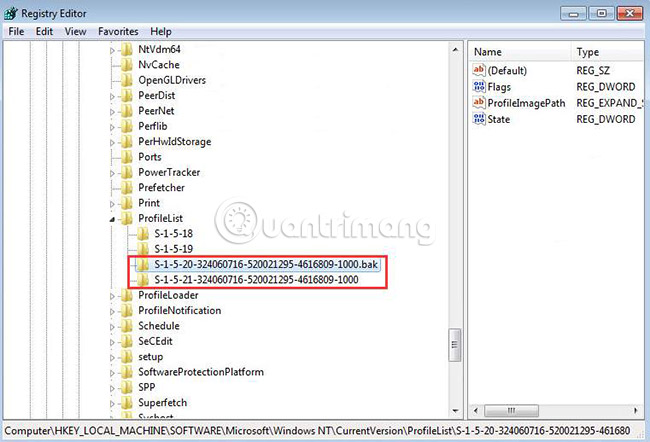
In this case, click on each folder and find the ProfileImagePath entry in the details window on the right.
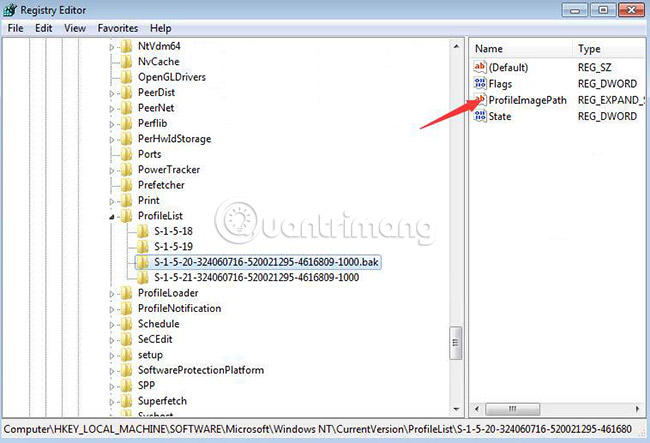
Double-click ProfileImagePath to make sure this is a user account profile with an error. You can use the Value data field to display user accounts.
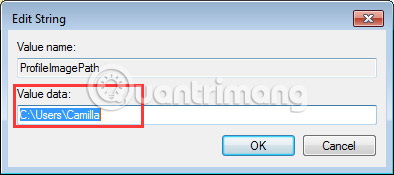
After that, continue to follow these steps:
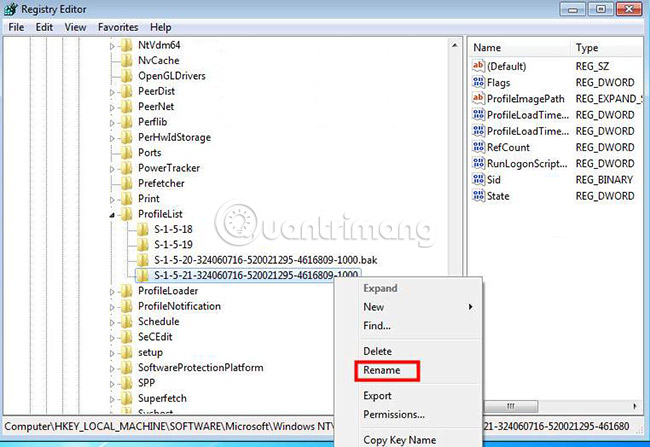
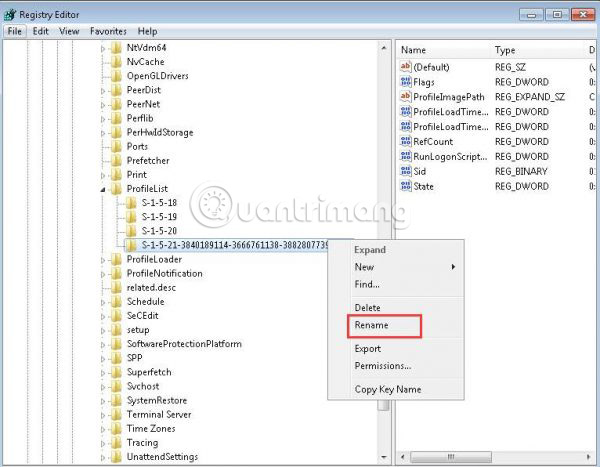
1) Right-click the folder without the .bak extension , then click Rename. Enter .ba at the end, then press the Enter key .
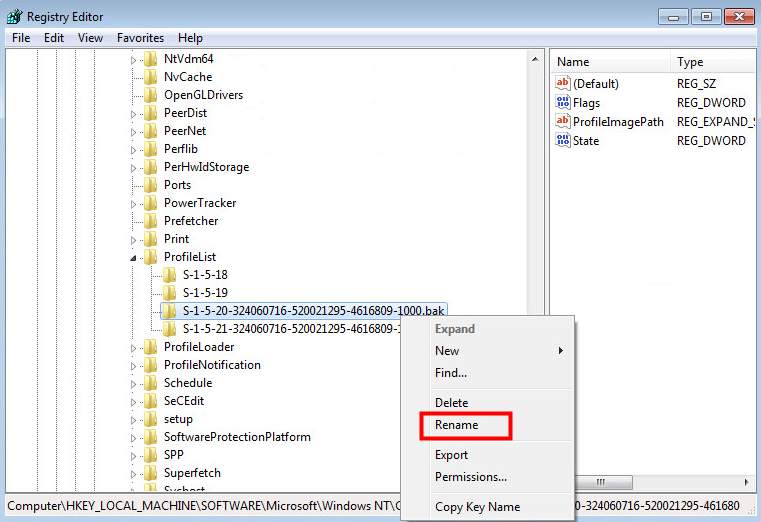
2) Right-click the folder ending in .bak, and then click Rename. Delete the .bak extension and then press the Enter key .
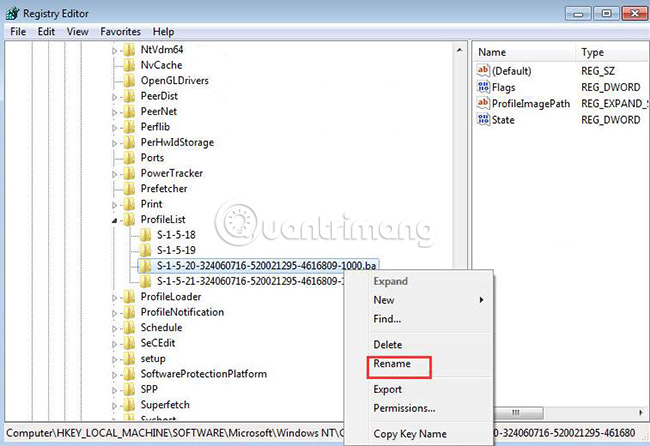
3) Right-click the folder ending in .ba, and then click Rename. At the end of the folder name, change .ba to .bak, then press the Enter key .
4) Restart the PC and see if you can log in to the computer.
If you only have one directory starting with S-1-5, followed by a long sequence of numbers and ending with .bak. Right-click on the folder and select Rename. Delete .bak and then press the Enter key .
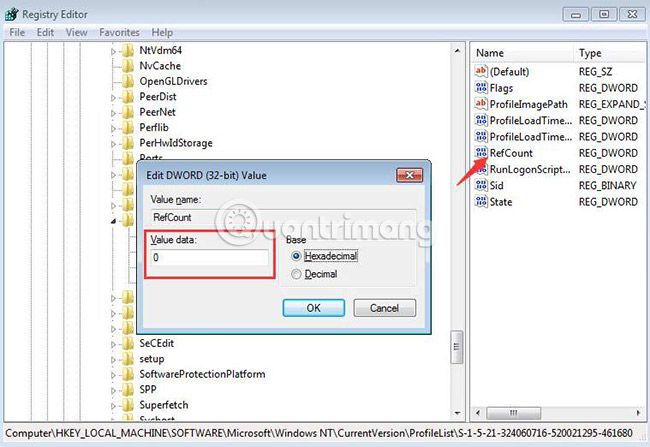
5) Click the folder, double-click RefCount, enter 0 in the Value data box , and then click the OK button .
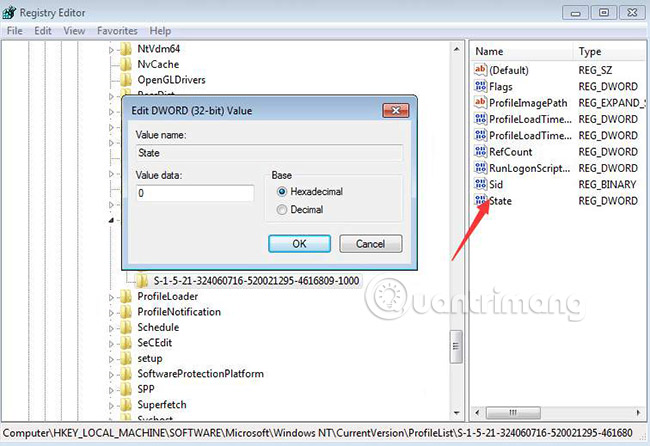
6) Click the folder again, double-click State, enter 0 in the Value data box , and then click the OK button .
7) Restart the PC and the login process will be successful.
Method 2: Restore the system
Step 1: Start the computer in Safe Mode With Command Prompt
To start your computer in Safe Mode With Command Prompt, follow the steps below:
- On Windows 7, Vista & XP:
- Start your computer, press and hold the F8 key while waiting for the Windows logo to appear. If the Windows logo appears or if the operating system starts to load, you need to restart the computer to perform this task again.
- When the Advanced options Menu appears on the screen, use the arrow keys to navigate, select the Safe Mode With Command Prompt option and press Enter .
- On Windows 8 and Windows 8.1:
- Press the Windows + R key combination to open the Run command window.
- Enter msconfig in the Run command window and press Enter.
- Click the Boot tab.
- Next choose Safe Boot and Alternate shell options.
- Click OK and then restart your computer.
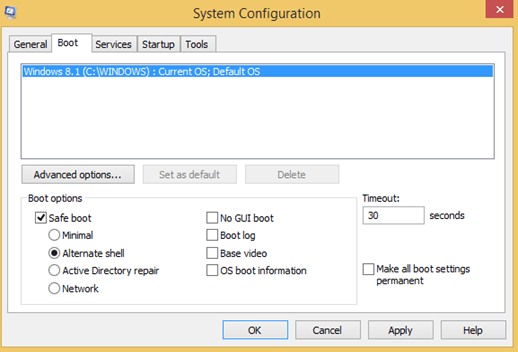
Note: If you want to exit Command Prompt mode and restart your Windows computer in normal mode. On the Command Prompt window, enter msconfig there and press Enter and uncheck the Safe boot option at the Boot tab.
Step 2: Restore your computer to its original state
Note:
System Restore does not affect any of your documents or files. System Restore restores and manages system, installation, and program files.
Next step:
1. In the Command Prompt window, enter the rstrui command and press Enter .

2. At the System Restore information window, click Next .
Note:
1. To see all available restore points, simply type Show more restore points on the System Restore window.
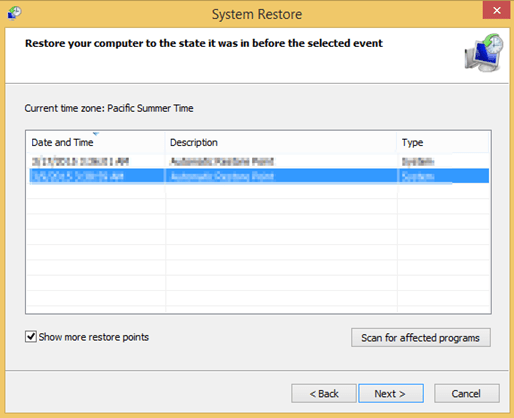
2. If you don't see any restore points, then you can use programs to scan your computer for malware and check.
3. After selecting the restore point, select Next to confirm and then click Finish to begin the recovery process.
4. After the restore process has finished, start your Windows computer again and boot in normal mode. Once completed, proceed to the next step.
Step 3: Clean Malware on your computer with Malwarebytes Anti-Malware
Download Malwarebytes Anti-Malware to your computer and install it here.
- Next run Malwarebytes Anti-Malware tool.
- Update database (database).
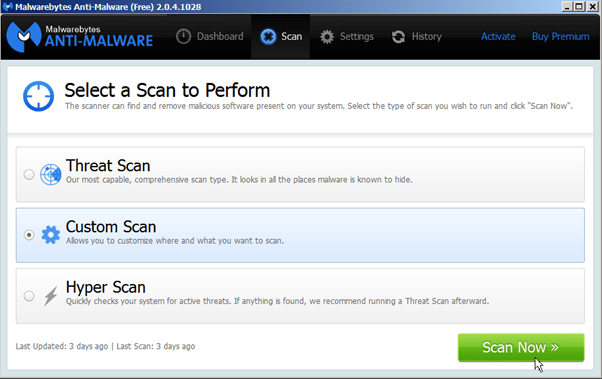
- Select Scan in the top corner Menu.
- On the Select a Scan to perform window: select Custom Scan and then click Scan Now .
- On Custom Scan Configuration window:
- Select all items available under Customs Scanning Options (in the left pane).
- Select the C: drive and select the Start Scan button.
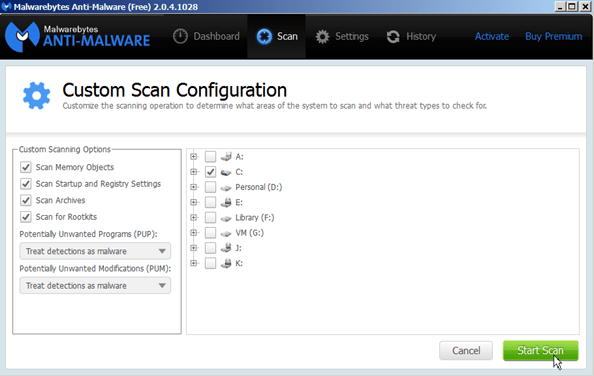
- Wait until the process is finished and click Quarantine All .
- Finally restart your computer.
In addition, you can refer to the video tutorial on how to fix the error The User Profile Service failed the logon. Không thể nạp được người dùng profile below:
Refer to some of the following articles:
- Summary of driver error codes on Windows and how to fix (Last part)
- Windows Defender is disabled or inactive, this is a fix
- Summary of driver error codes on Windows and how to fix them (Part 1)
Good luck!