Simulate the quality of film images in digital photos with Photoshop
Photos taken with a film have a special quality, difficult to express in words. There is no doubt that photos taken with movies bring a different visual effect than existing photos on social networks.
Table of Contents
Photos taken with a film have a special quality, difficult to express in words. There is no doubt that photos taken with movies bring a different visual effect than existing photos on social networks.
Today's article will show you how to reproduce the quality of film photos on a digital photo using Photoshop!
What is the quality of film photos?
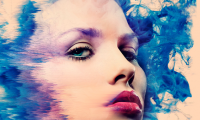
The quality of film photos is an effect many people are interested in editing images. Different image quality - such as shading, saturation, color band and white balance - will "react" differently on the film, creating different effects on the same portrait or style. scene.

This 'reaction' along with random light and Film grain effect (tiny particles on film) are related to the process, creating a unique and impressive overall aesthetic of the film. These are often recreated by image editors to create impressive photos.
But that doesn't conclude that the overall aesthetic quality of film photos is good or worse than digital photos, nor does it say that post-production editing can give the overall picture quality. like when taking photos with film. It's simply a quality that we want to get after taking digital photos.
Film shooting effects are replicated with digital images using film-style color correction and overlay features. Since digital photos are often unable to copy color palettes and shades in film, image data will be edited to simulate the contrast and depth of color film naturally.
Combining the quality of film photos with digital photos
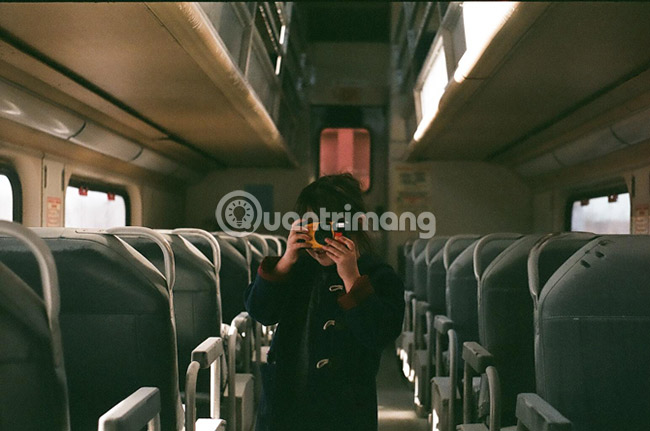
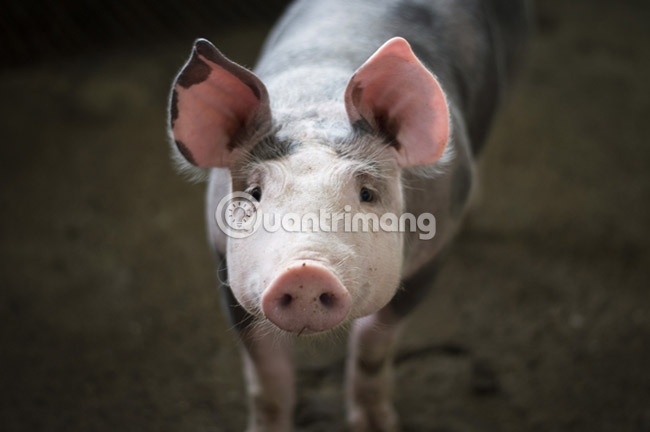
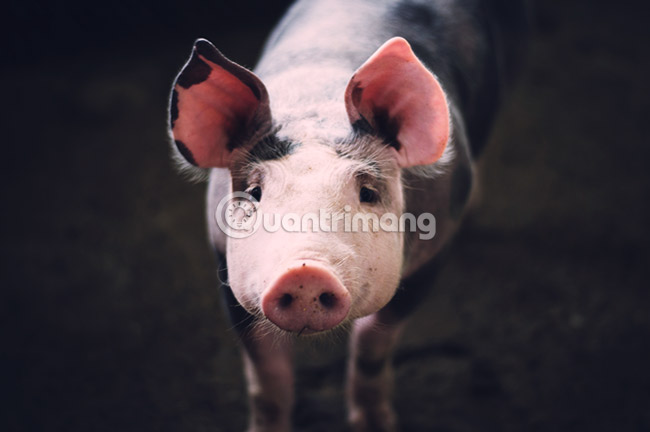
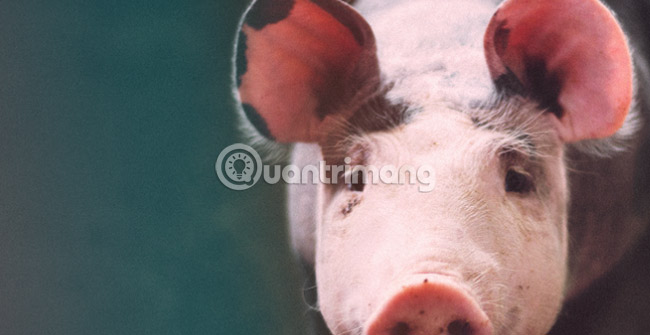
The following method to create film effects helps control many aspects. This method will allow you to 'invest' as little or as much time as possible to get the exact color quality that you want. For example today will adjust the following image, taken with Nikon D3200 digital DSLR camera.
Step 1: Adjust Curves
The first step to reproducing the quality of film shots is to adjust the contrast of the black and white areas in the image. Film images often brighten up black parts and darken the white part of the image, creating a fuzzy, gray feel for the image.
To do this, we'll use the Curves tool . However, first, right-click on the layer and select Convert to Smart Object . This option will allow modifying and controlling any effects set on the image after they are applied. Then open the Curves window in the Image section , then select Adjustments, then Curves.
When the Curves panel is open, click on the points where the squares on the chart intersect in a straight line. This step will create buttons on Curve and then you can manipulate them.
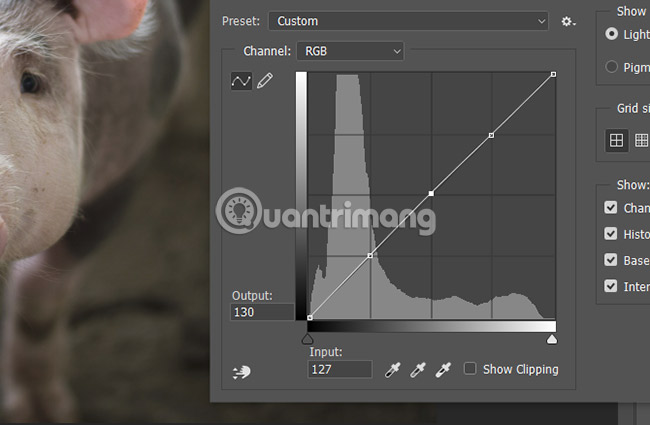
Then drag the bottom left button up and the top right button down slightly, lower the contrast of the shadows (shadow area) and highlight (bright area). Then, try to create an S-shaped curve by lowering the second button below and slightly increasing the second button above. The color tone of the image will be adjusted.
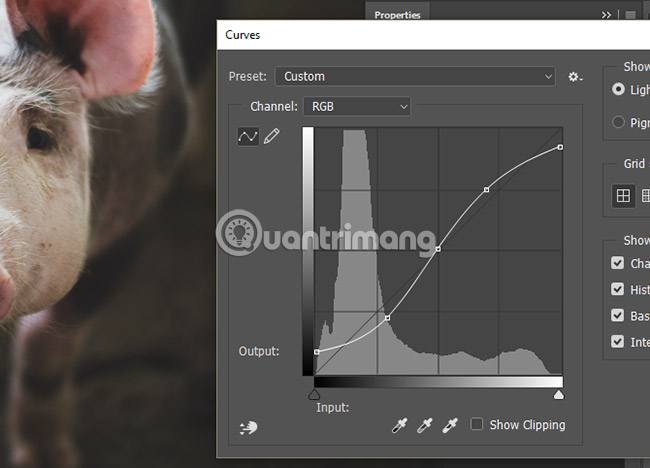
Now you will see the image quality almost immediately like shooting with film.

Spend a lot of time adjusting this curve, making sure not to change the image too much to achieve a natural effect. The contrast is too large to counteract.
Step 2: Adjust the tones to dark and dark
The second step is to make specific colors stand out in the image. To achieve this, add special tones to the shadow, midtone and highlight areas in the image. Go to Image> Adjustments> Color Balance .
There are 3 color balance options and three color sets to apply. The most effective way to use this tool depends on the image being edited. For example, the image above seems too yellow and does not show as much red as desired.
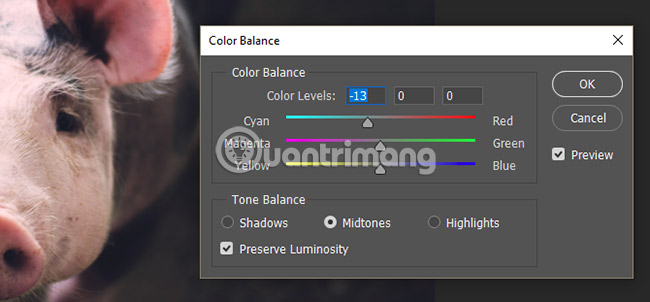
Blue will be added to the Shadows, cyan for the Midtones and red for Highlights to balance the green in the background and red in the foreground.
Step 3: Adjust Hue and Saturation
Next, adjust the Hue ( Saturation ) and Saturation (saturation) of the image. The excellence of film image quality sometimes corresponds to the way some types of films reproduce certain colors. For example, some films can over-saturate certain colors, giving them a light pop effect. Other types of films can add a hint of orange to red, or a little green to give a blue color. This is an important part, making the color of photos taken with film attractive.
Go to the Image section , then select Adjustments, then Hue / Saturation. In the following window, click the drop-down menu with the Master label and choose the color. From the options below, change the Hue, Saturation or Lightness values by dragging left or right.
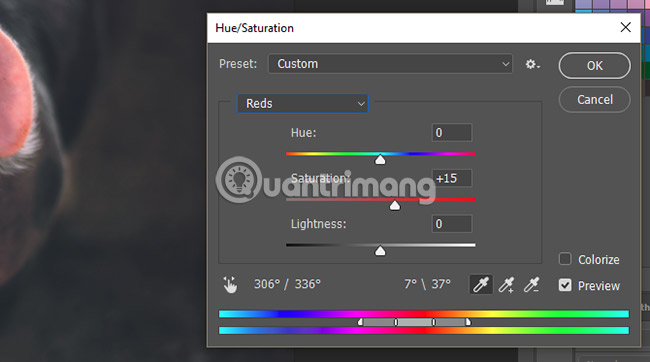
Hue will change the color value, Saturation will add or reduce the vividness for the color, and Lightness will brighten or darken the color. When changing these values, pay special attention to the lower color band. This color range will show how the special color spectrum changes in the image when the values change.
For example, only slightly lower the saturation of blue, increase the saturation for red in the image and not change any other values.
Step 4: Noise and Light Leak (optional)
This last part is optional, since the above adjustments have completed most of the film photo effect. However, this section helps to handle some imperfections often related to film photography.
First, add some noise (noise phenomenon) to the image. Although the default noise in non-regenerative Photoshop is specially created when shooting with film, it gives a little feel to the classic Film grain effect. Go to Filter> Noise> Add Noise . In the Noise window , note some options. Uniform will usually provide a more sophisticated noise output than Gaussian.
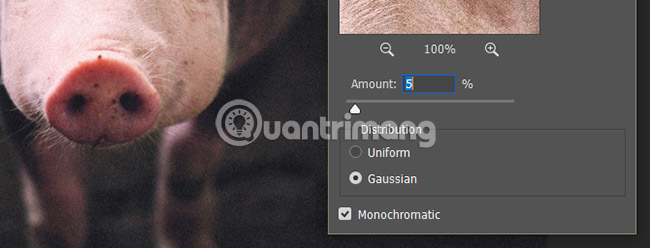
Make sure this value is low so that it doesn't overdo it. Check Monochromatic to create black and white instead of RGB. Next, we will add a Light Leak overlay to the image. Light Leak is the visual side effect of film cameras and is often reproduced with image filters.
Light Leak makes unwanted light 'leak' on film. Because film is sensitive to light, the film will integrate a unique color palette into a photo. The following is an example of Light Leak overlay:

These overlayes, usually consisting of colored lines or gradients, will impose a subtle color change to the image. To apply, add an overlay and place it on top of the Layers panel . Change the layer type to Screen and lower the Opacity of this layer. Change these parameters until the desired effect is achieved.
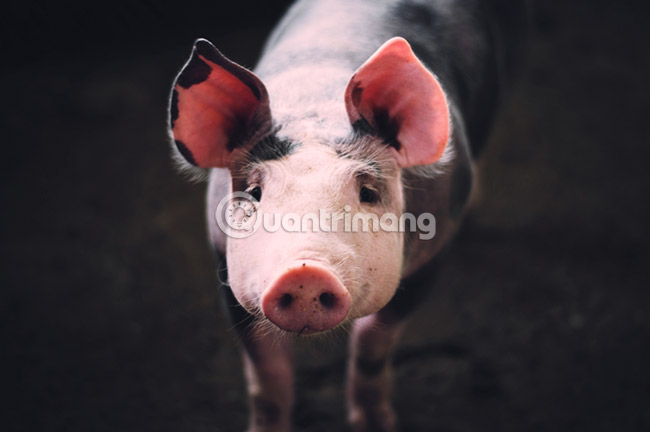
This is the final product.
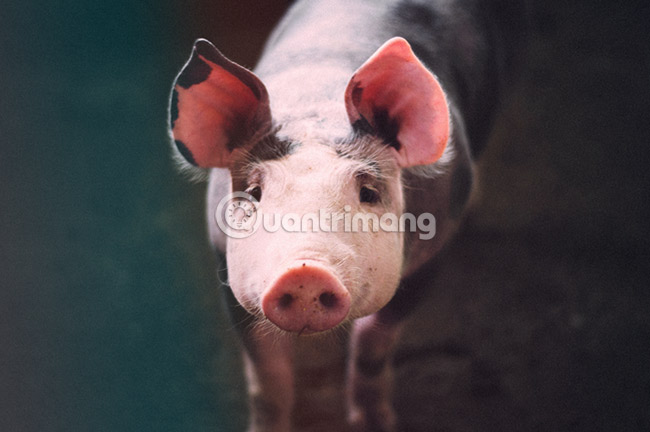
The above techniques will bring a sense of classic aesthetic and impression to any digital photo you can find or take yourself. Remember that the effect quality will correspond to the amount of time you spend to adjust the individual values.
Hope you are succesful.
Was this article helpful?
Your feedback helps us improve.
Related Articles
 How to Add a Vintage Touch to Your Old Photos7 minutes read
 Should you choose a digital camera?6 minutes read
 How to use Photoshop CS5 - Part 6: Digital art8 minutes read
 The 29 impromptu shooting moments are even more 'quality' than Photoshop images4 minutes read
 How to use Photoshop CS6 (Part 2): Create fashion collage images23 minutes read
 How to use Photoshop CS6 (Part 1): Create digital photos10 minutes read
Reader Comments 0
Sign in with email or Google to join the discussion.