Add Take Ownership option to Right-click Menu on Windows 10
Often, users must have ownership of a file on a Windows operating system to edit, rename or delete protected files on the operating system. However on Windows 10 mastering a file or folder is not as easy as on other versions. If before to master a file on the GUI (graphical interface) or Command Prompt, now on Windows 10 can not be done.
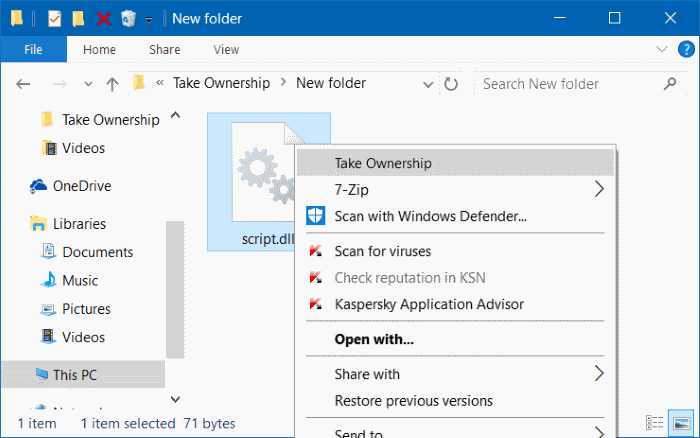
If you regularly use the option to master files to edit or delete files, you can add the Take ownership option to the right-click menu to use it. By adding the Take ownership option to the right-click menu, you can master the files in seconds.
To add the Take ownership option to the right-click menu on Windows 10, you must perform some tweaking on the Windows Registry. However, not all users know how to manipulate the Windows Registry and further editing the Windows Registry poses a high risk to the system.
So to add the Take ownership option to the right-click menu on Windows 10, you can use the TakeOwnershipEx utility.

1. Add Take Ownership option to right-click menu on Windows 10
Follow the steps below to add Take Ownership options to the right-click menu on Windows 10:
Step 1:
Click this link to download Take Ownership.zip Zip file.
Next, extract the Zip file you just downloaded, and now you will see two files called Install Take Ownership.reg and Uninstall Take Ownership.reg .

Step 2:
Right-click the Install Take Ownership.reg file, then click Merge .

Step 3:
Click the Run button if a warning window appears on the screen.

Step 4:
The User Account Control window will appear on the screen, where you click Yes to continue.
Step 5:
In the Registry Editor dialog window, click Yes to add information to the Registry.

Step 6:
Finally click OK to finish.

Step 7:
You should now see the Take Ownership option on the right-click menu when right-clicking a folder or any file on Windows 10.
If you don't see the Take Ownership option, proceed to restart Windows Explorer or your computer.
2. Remove the Take ownership option on the right-click menu
To remove the Take ownership option on the right-click menu, run the Uninstall Take Ownership.reg file that you extracted from the Take Ownership.zip Zip file.
3. Master a file / folder
To master any file or folder, right-click the file and the folder and select the Take ownership option. Click Yes if the UAC window appears.
TakeOwnershipEx is a free tool that allows users to quickly master files on Windows operating systems.
Refer to some of the following articles:
- How to login Windows 10 automatically without entering a password
- Clean up traces of Pagefile every time you turn off your Windows 10 computer
- Instructions for activating Keyboard Backlight on Windows 10
Good luck!
You should read it
- ★ How to change folder ownership in Google Drive
- ★ Add 'Take Ownership' on Windows Vista, 7, 8, and 8.1
- ★ How to Change the Registered Name on a Windows PC
- ★ Add domain authentication authority to WordPress blog
- ★ Moving from Windows to Linux, I understood the difference between 'technology' and 'reality'.