How to enable Battery Saver battery saver mode on Windows 11
When activated, Battery Saver allows you to thoroughly optimize the system's battery life, especially when using laptops and tablets that cannot be plugged in.
What is Battery Saver?
Battery Saver is a special Windows power-saving mode that helps optimize battery life by reducing screen brightness, reducing background activity, and limiting some system notifications. Battery Saver basically works similar to 'Low Power Mode' on iPhone and 'Battery Saver' mode on Android.
By default, Battery Saver will automatically be activated when the battery level of the device drops to 20% or less. However, you can completely set up how this feature works to suit your needs. In addition, Battery Saver can also be activated manually when needed with just a few simple steps, instead of having to wait for the device to drop to 20% battery as default.
Enable Battery Saver from Quick Settings menu
The fastest way to enable Battery Saver is through the Quick Settings menu.
To access the Quick Settings menu in Windows 11, you click on the set of status icons (Wi-Fi, speaker, and battery) in the bottom-right corner of the screen, on the taskbar. Or, you can also press Windows + A .
When the Quick Settings menu opens, click ' Battery Saver '.
(If you don't see a ' Battery Saver ' option in the Quick Settings menu, click the pencil icon at the bottom of the menu, tap ' Add ', then select ' Battery Saver ' in the list that appears).

Battery Saver mode will be enabled immediately.
Follow the same steps to turn off this mode when you don't need to use it.
Enable Battery Saver in Settings app
You can also enable (and configure) Battery Saver mode in the Windows 11 Settings app.
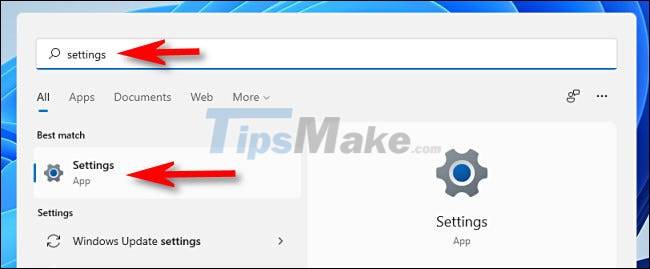
First, open the Settings Windows application by pressing the Windows + i key combination . Or you can search for the keyword ' Settings ' in the Start menu and click the gear icon in the results.

On the Settings application interface that opens, click on the ' System ' item in the list on the left, then select ' Power & Battery '.

On the Power & Battery settings page, scroll down to the ' Battery ' section. You click on the ' Turn On Now ' button located next to the ' Battery Saver ' option.

Battery Saver mode will activate immediately. To turn it off, click the ' Turn Off Now ' button.
On this screen, you can also make a few customizations with Battery Saver mode. For example, you can choose the percentage of remaining battery that Battery Saver will automatically activate under ' Turn battery saver on automatically at '. Alternatively, you can also select ' Always ' to keep Battery Saver on. Otherwise, select the ' Never ' option to completely disable the feature.
You can also set the screen brightness in Battery Saver mode by using the ' Lower screen brightness when using battery saver ' switch . In general, reducing screen brightness will have a big impact on extending battery life.
You should read it
- ★ Instructions for setting up and using 'Battery Saver Mode' on Android
- ★ Do you know how to increase laptop battery life in Windows 10?
- ★ Learn about Chrome's new Memory Saver and Energy Saver modes
- ★ Instructions on how to turn on battery saver feature right in the settings of the iPhone
- ★ 11 tips for maximum battery saving for your phone