How to edit photos on Fotophire software
Photo editing software has become much richer than ever before when you only know Adobe Photoshop. However, for many people to use Photoshop is quite difficult because of the complicated interface. If so, you can try Wondershare's new Fotophire photo editing software.
This software will provide you with basic image editing capabilities so that users can change the style of the image. Fotophire provides 3 professional editing tools, such as cutting, rotating, removing photo backgrounds, deleting objects in photos, restoring old photos, adding effects to images, adjusting colors, . Main features Fotophire brings users including Photo Editor, Photo Cutter (separate photos from the background), Photo Eraser (delete objects in photos). The following article will guide you how to use Fotophire image editing software.
Alternative graphic editing software for Illustrator- Free software to replace Photoshop
- 15 best photo editing apps for Android
Guide to photo editing on Fotophire
Step 1:
First of all, please click on the link below to download Fotophire software to your computer and install. Click Try it Free to download the installation file. The software installer is very light and compatible with all Windows operating systems.
- https://photo.wondershare.com/

Step 2:
Click the .exe file to install the software. At the first installation interface, click Customize Install to add installation options such as selecting the installation language or installation directory. Click the Install button to install.

Step 3:
The installation process will take place shortly thereafter. When finished, press the Start Now button to use the software.

This will be the main interface of the software when you have finished installing. We will see that there are 3 main image editing tools: Photo Editor, Photo Eraser and Photo Cutter.

1. Photo Editor
Step 1:
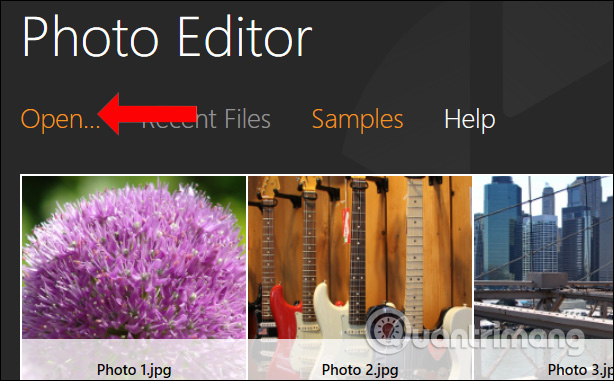
Click on Photo Editor to edit photos. Then click on Open to open the computer folder and select the image to edit. In case you have edited Fotophire, you can click Recent Files to add the edited photos.
Step 2:
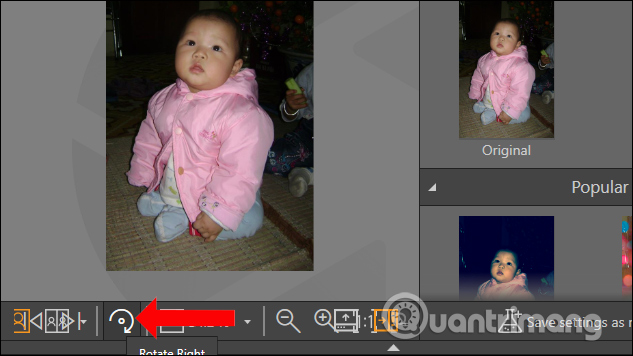
Appearance interface includes image editing tools. First of all, if you want to rotate the image , click on the rotating arrow icon . Turn to what angle you need, stop.
Step 3:
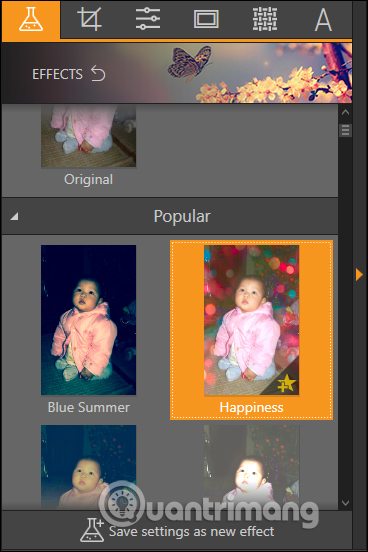
Then go to the step of adding effects and frames to the image. Fotophire will apply effects (Effects) to each image for you to preview, then click on the effect that the image wants.
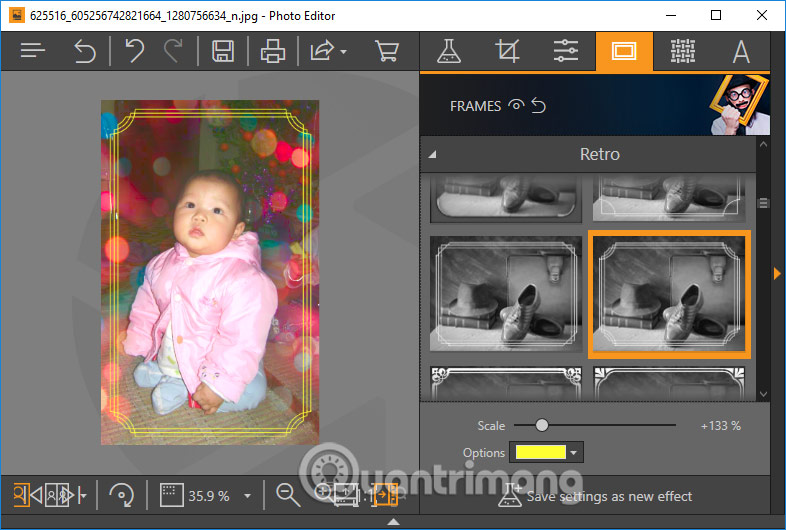
With frames (Frames) is similar. There will be customization for you to increase or decrease the size of the texture for the frame, or choose a color for the frame.
The Textures section will give users additional options for image filters.
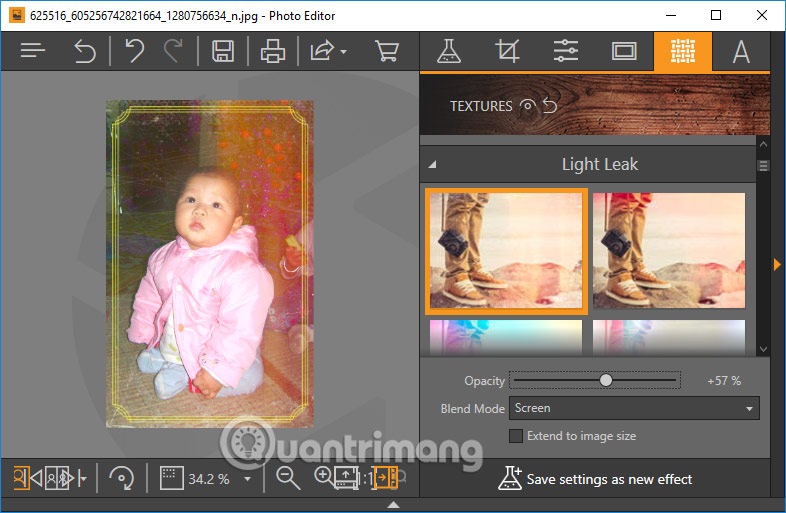
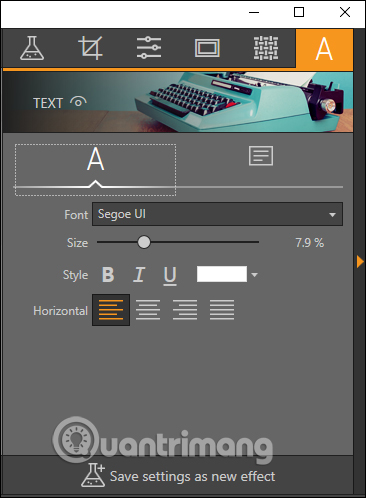
If you want to add text to the image, click on the letter A icon , there will be a lot of options to insert text into the image.
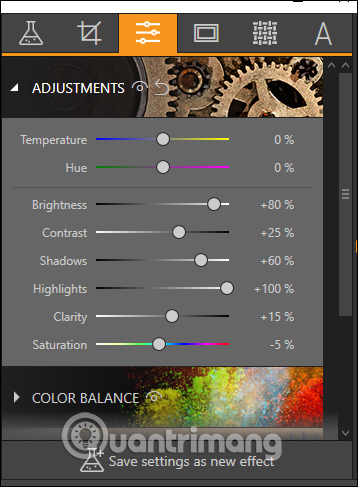
The Adjustment section will be an option to change the color, white balance, brightness . of the image.
2. Photo Cutter
This tool will help you to extract photos from the wallpaper and then merge them into another wallpaper if you need it.
Step 1:
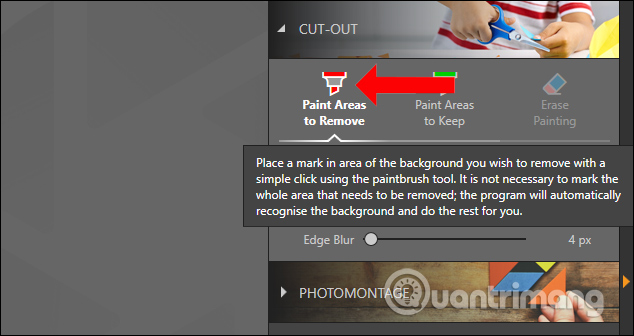
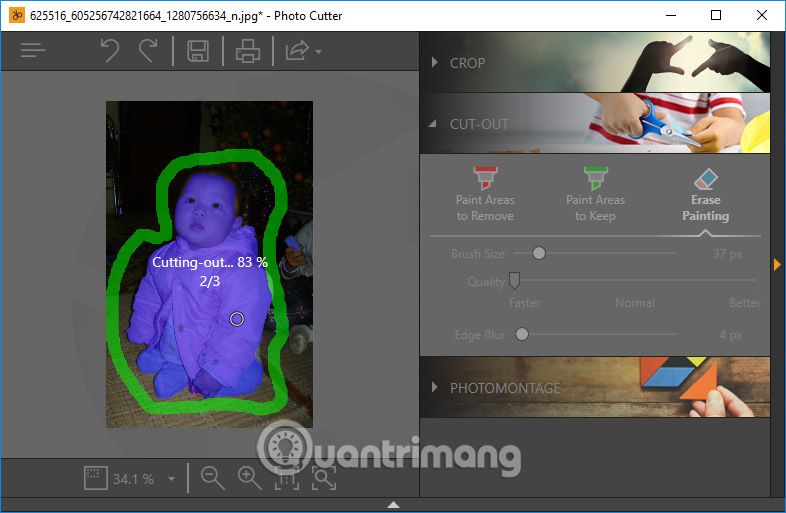
You also open the tool and click Open to select the image to edit. In Photo Cutter's main interface, click on Paint Areas to Remove to circle the wallpaper you want to remove.
Or click Paint Areas to Keep to select the image area to keep.
Step 2:
Fill around the subject to delete or keep and wait for Fotophire to complete the action. In case of wrong selection, press Erase Painting to delete the highlighted areas. If done incorrectly, press the arrow above to return to the original image, or previous operation.
Step 3:
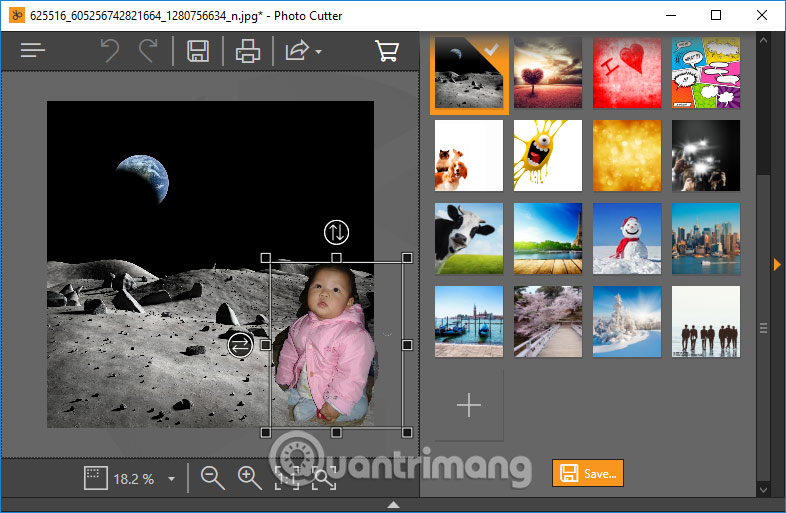
After the background has been extracted, click on the Photomontage item to select another image for the image. When you press the plus sign, you can select the wallpaper available in the computer.
Collage can be small or zoomed in to match the wallpaper. Finally click the Save button below.
3. Photo Eraser
This feature will help users delete objects in photos, or duplicate a certain subject.
Step 1:
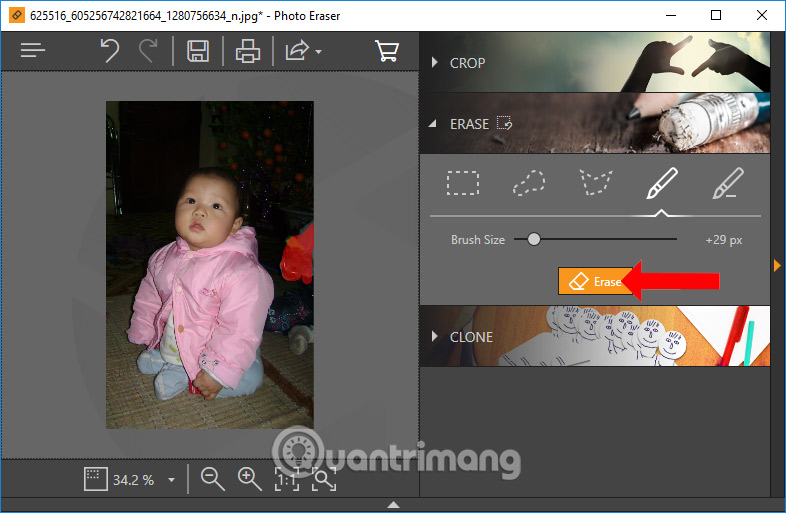
In the Erase section, circle the object with rectangle, lasso, polygon or brush tools, with sizes from 1px to 250px.
Select the tool you want to use, then select the area you want to delete and press the Erase button to delete . If the object to delete is large, you should delete each part. If mistakenly deleted, press the arrow icon to return.
Step 2:
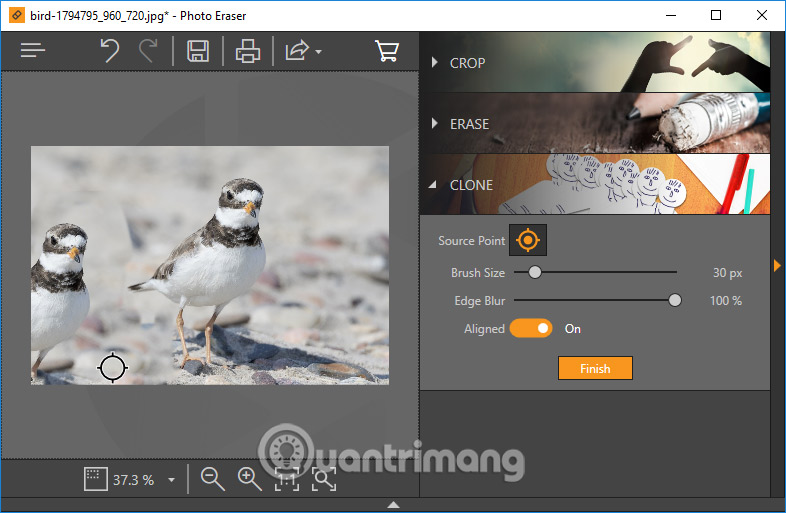
In the Clone section, the Source Point tool is used to copy additional objects. Choose the size at the Brush from 1px to 250 px to surround the object you want to copy. Increase Edge Blur to make the image transition smoother.
Once you have filled the object, click and hover over the object where you want to appear. We will see an additional object in the image as shown below.
Step 4:
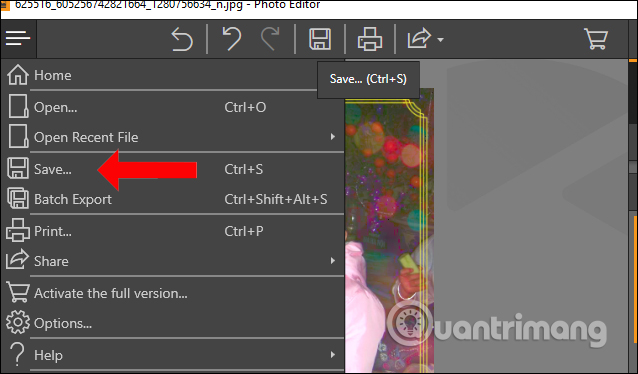
To save the image when editing is complete, press Ctrl + S or click the Save icon, or open the options menu from 3 horizontal dots on the screen.
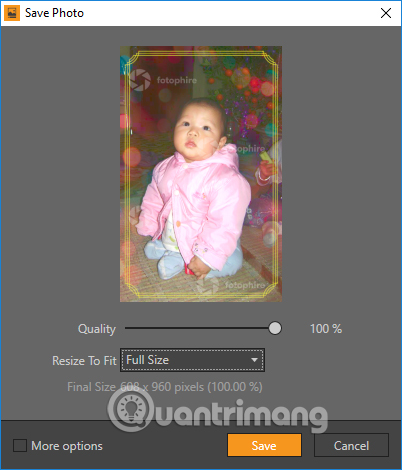
Then you select the image quality, the size you want to save and click Save . Due to the trial version, the image has a logo of Fotophire.
Overall, Fotophire offers a full range of basic image editing features. You can crop images, change colors, add effects, or add objects in the image if you want. If you are afraid to install more software on your computer, you can use Photoshop online to edit photos online in your browser.
See more:
- Tips for using contrast in Photoshop
- How to combine photos in Photoshop from 2 different images
- Simple photo compositing on Microsoft Paint
I wish you all success!