Table of Contents
This practical guide explains how to edit live video on windows with clear steps and useful context. It also covers common requirements, potential problems, and the details that can help you get better results.
I. Basic Video Editing on Windows 10
Step 1: Open the Start Menu and enter Video Editor to open the Video editing application.
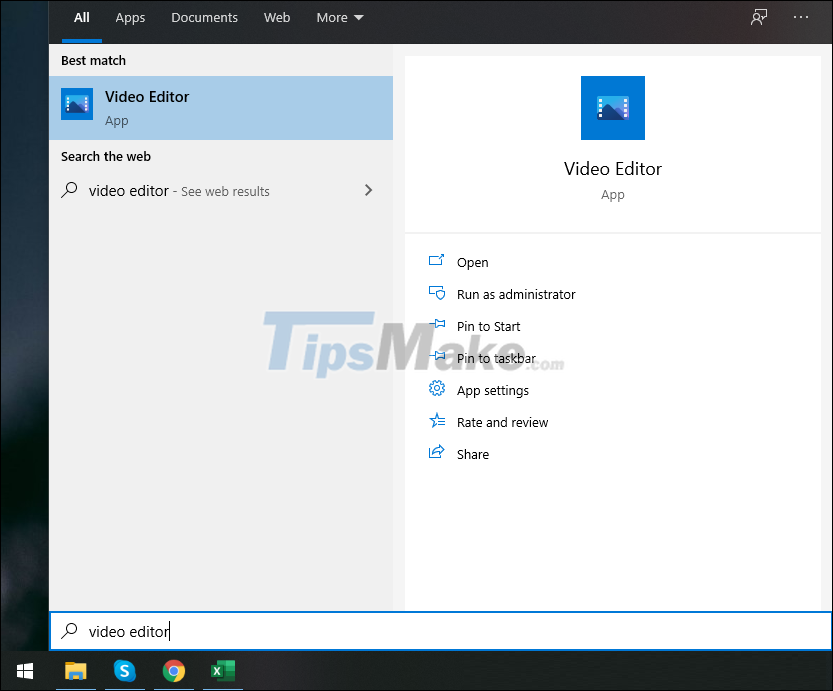
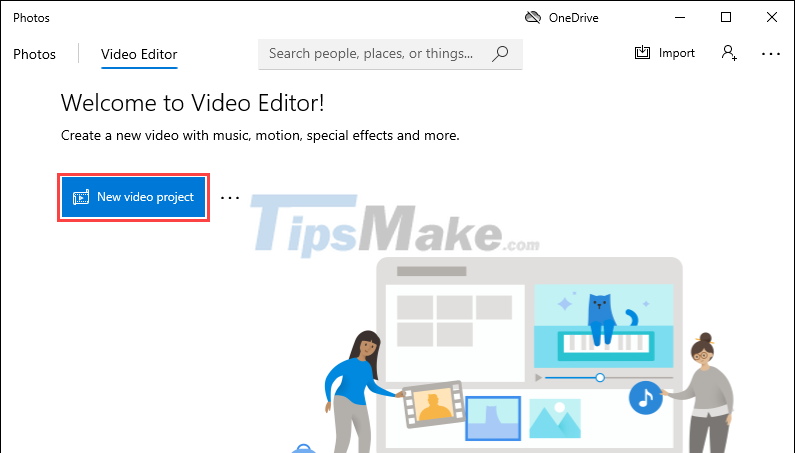
Step 2: Then, select Video Editor and select New video project to create a new project.
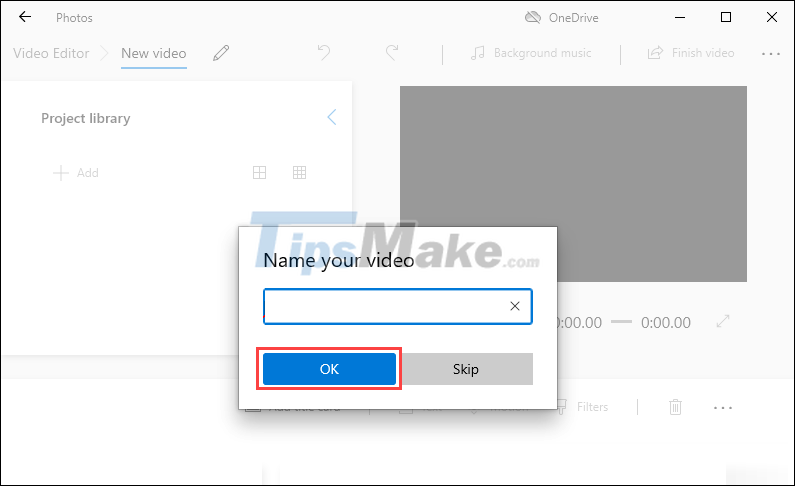
Step 3: Before you start, give the name of the Video content you want to edit and click OK.
Step 4: At the main interface of the Video editing software on Windows 10, select the Add item to add the Video to be edited to the system.
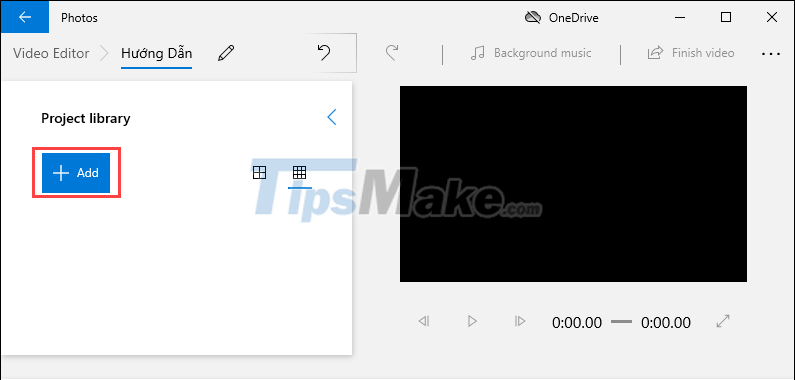
Step 5: Once Videos have been added to the system, you just need to drag them down to the Timeline bar to proceed with editing the content.
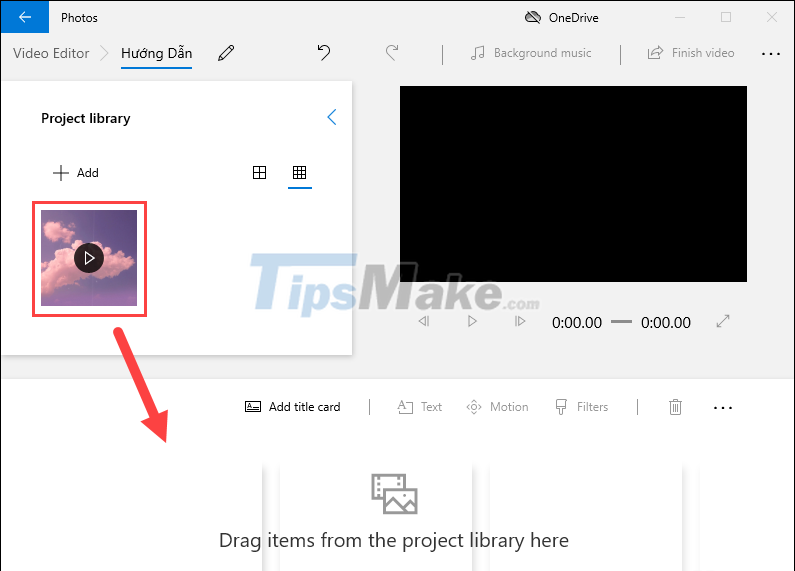
Step 6: So you have finished adding Video, now we will move to Video editing tools on Windows 10.
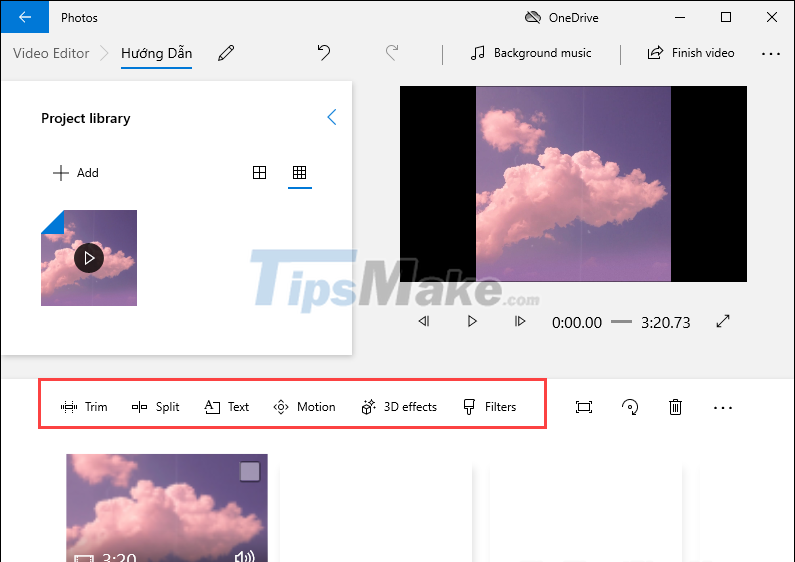
II. Features, Video Editing Tools on Windows 10
After finishing adding data to the Video editing system, you will be opened with a lot of editing features and now we will learn about them.
1. Video Cutter
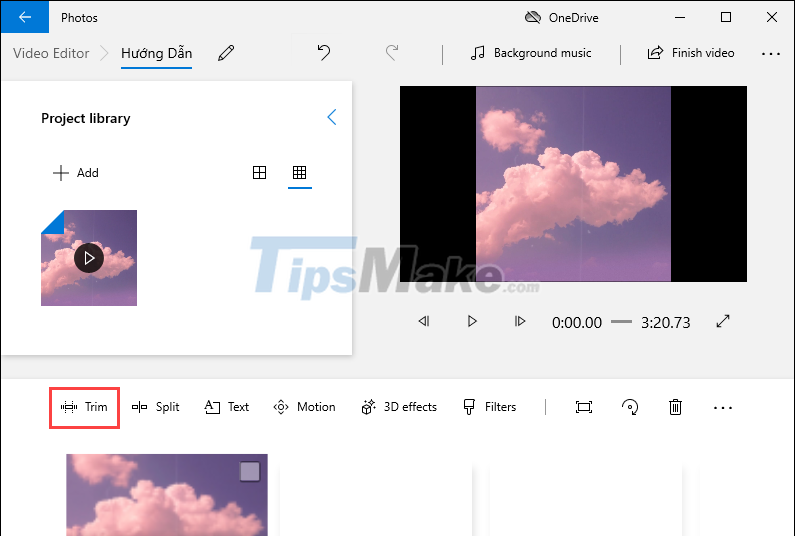
Video cutter is one of the most basic tools and every Video editing software has them. To use the Video cutter, select the Trim item.
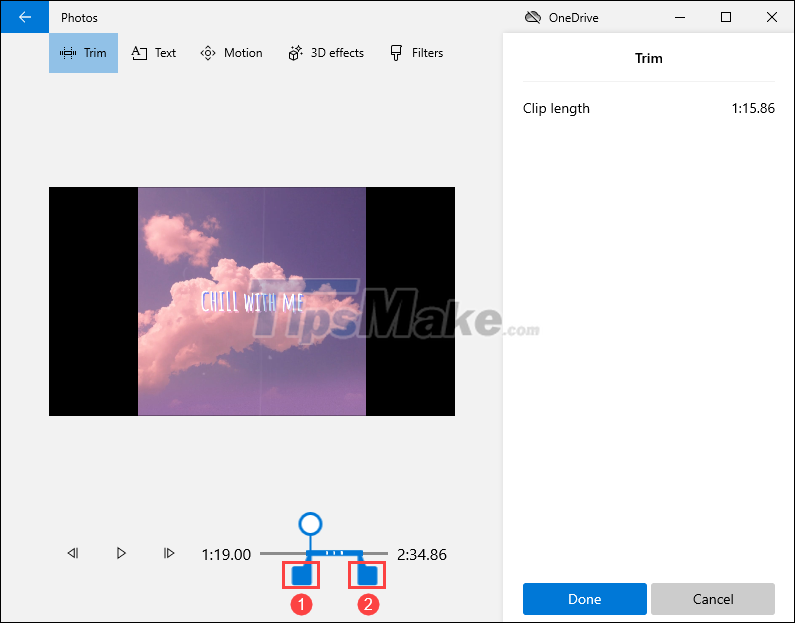
In Video Trim mode, adjust the Start bar (1) and End bar (2) to suit the length you want. When you're done, click Done to finish.
2. Video Splitter Tool
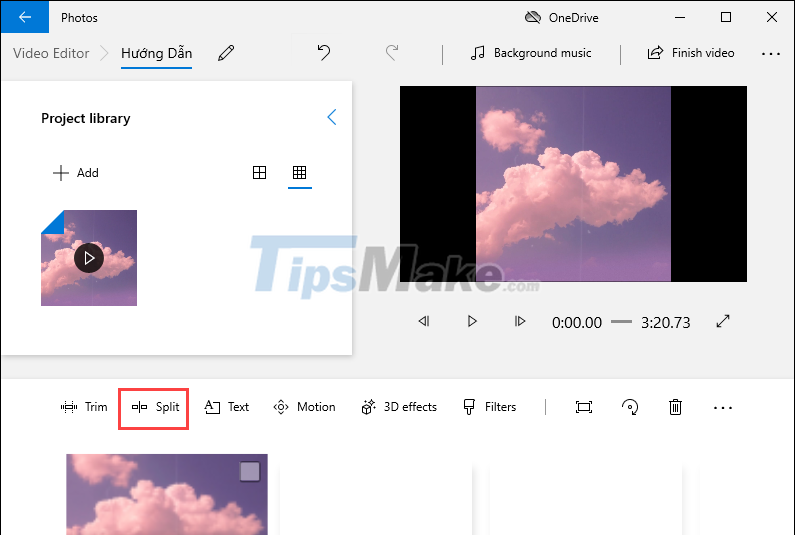
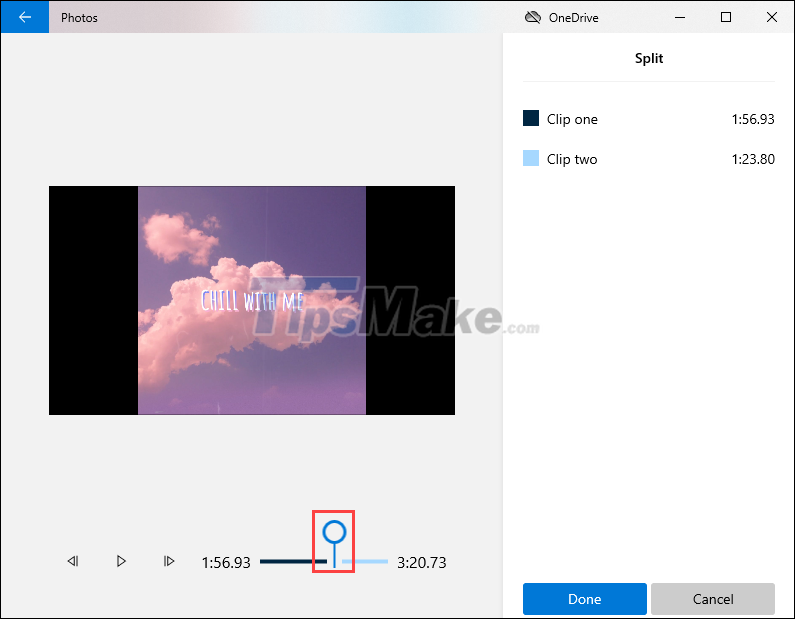
Split Video and Cut Video are two completely different tools. If you cut the Video to shorten the Video, then splitting the Video in half will help you split 01 Video into 02 Videos and keep the same length.
Step 1: To split the Video in half on the editing software, select the Split item.
Step 2: Then, move the bifurcation marker to the position to be cut and press Done to finish.
3. Insert Text into Video
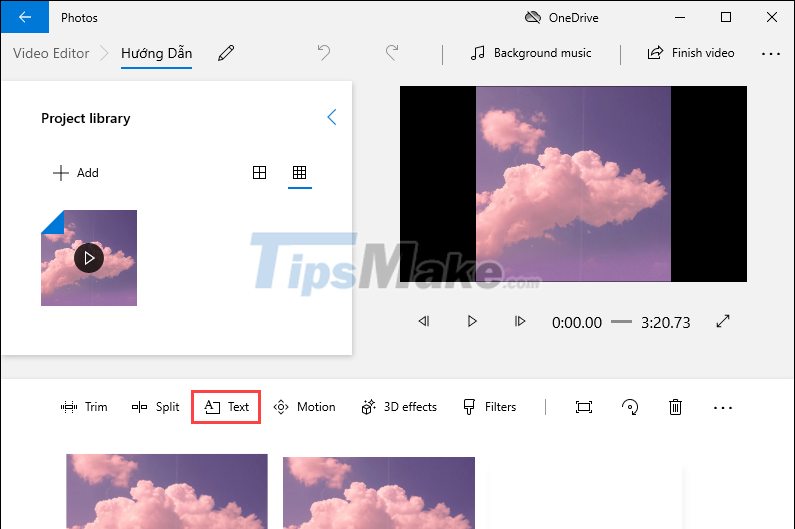
Inserting text into Video is one of the basic features and any software has it. To insert text into Video in Windows 10's Video editing tool, select the Text item.
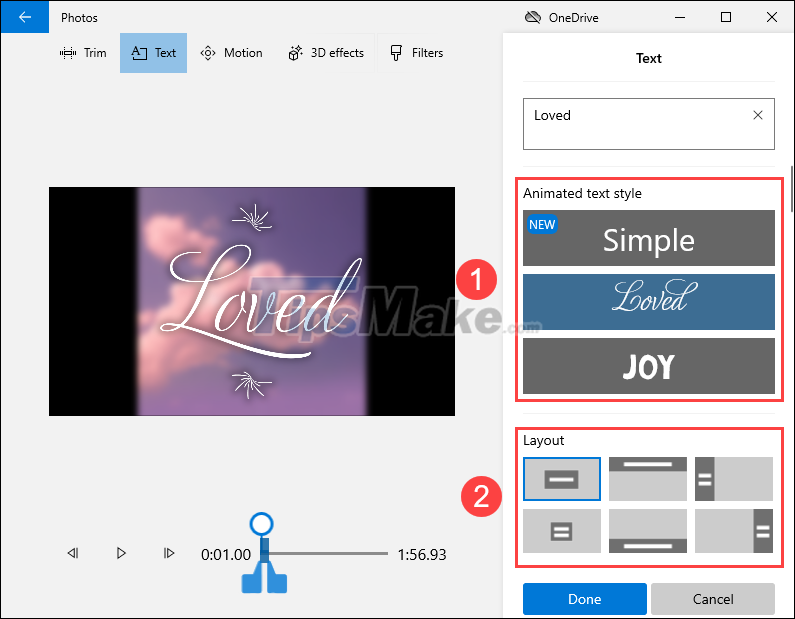
In the new window that opens, enter the text, continue to select Typeface (1) and Placement of text (2).
4. Effect Mode
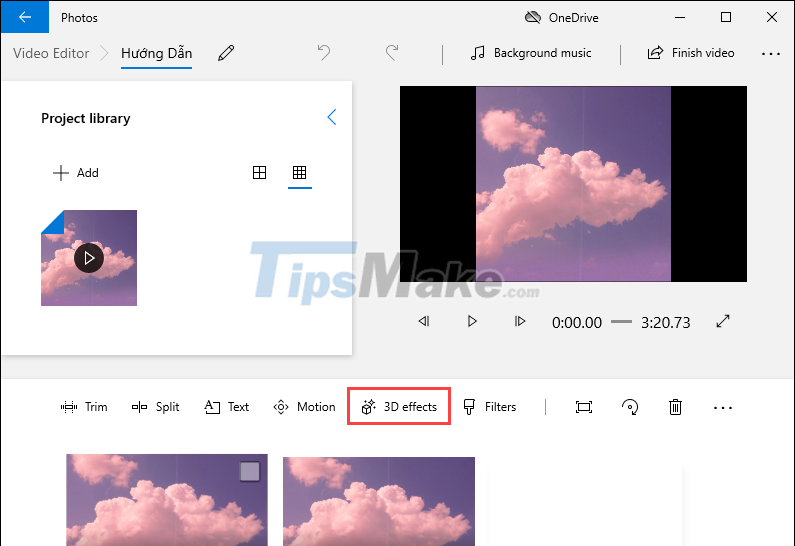
On the Windows Video editing tool, the system also supports modern 3D effects and they can rotate the Model eyes to create the best viewing angle for the Video.
Step 1: Select the 3D Effects item on the toolbar.
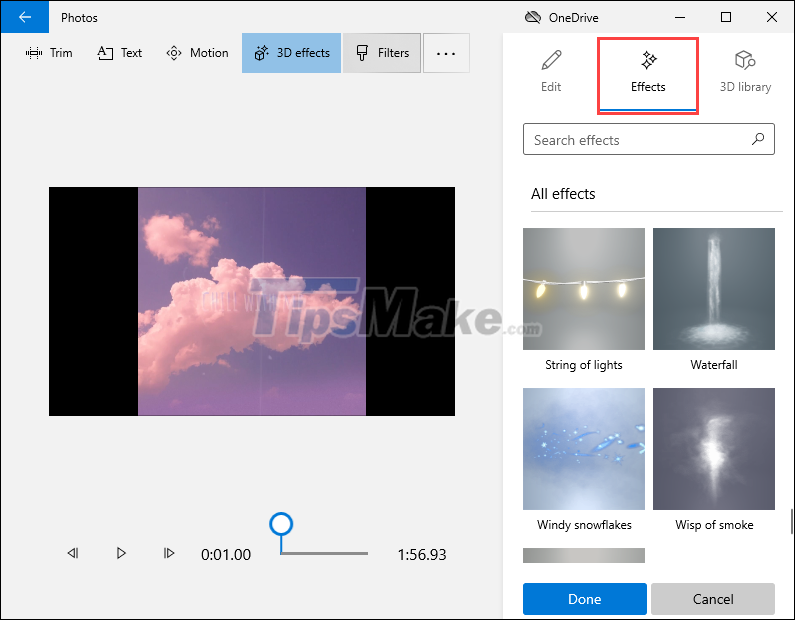
Step 2: Then, select Effects to see the effects available on the system and choose an effect to use.
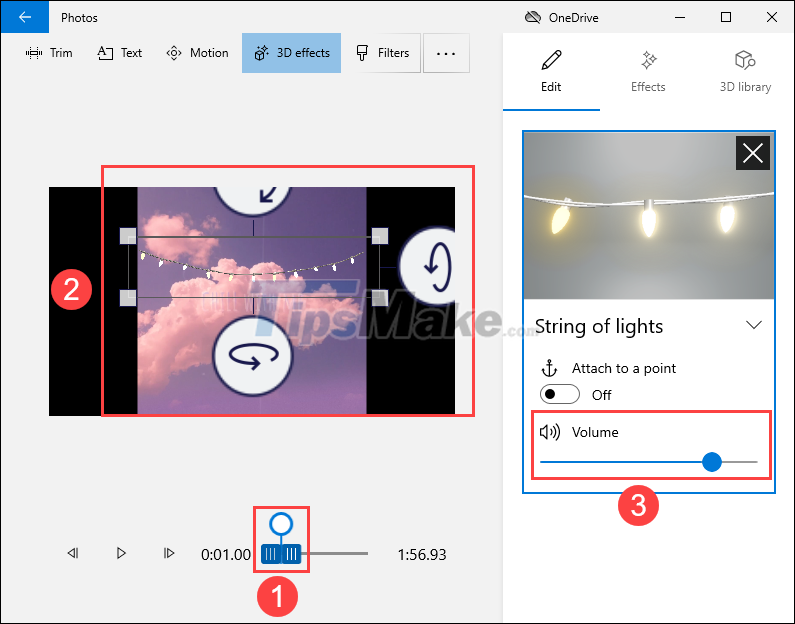
Step 3: Once the effect is added to the Video, you will have to adjust the Length of the Effect (1) accordingly.
Next, use the rotate tool (2) to adjust the directions of the effect for the best fit.
Finally, you will have to adjust the sound level (3) of the effect so that it makes the most of the background music.
5. Color Filter Mode
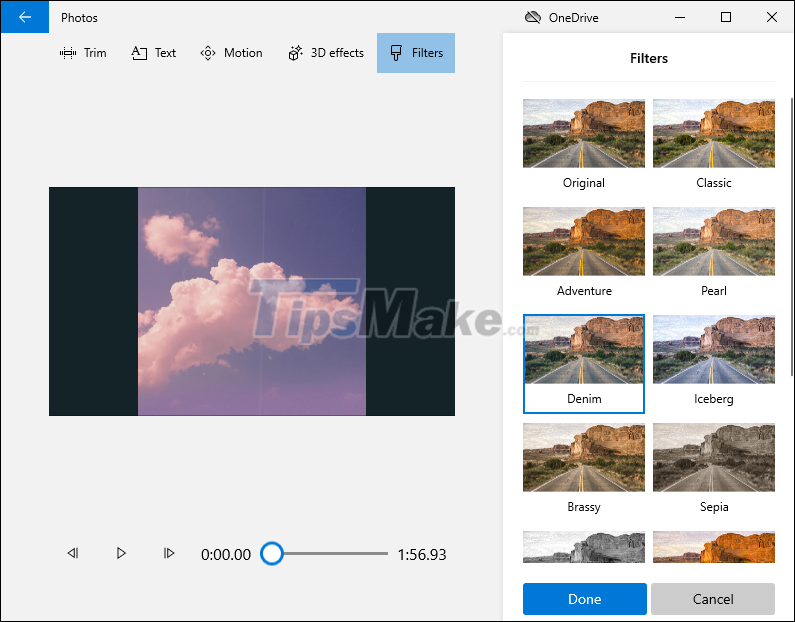
Not only providing editing tools, Video Editor software on Windows 10 also has many different color filters to serve users.
Step 1: Select the Filter mode on the toolbar.
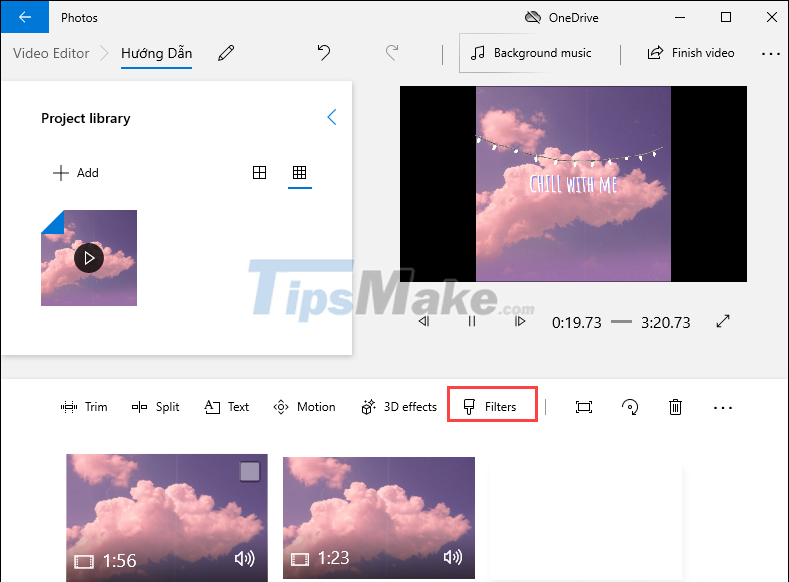
Step 2: In edit mode, select the filters to preview their effects and press Done when done.
6. Add Background Music to Video
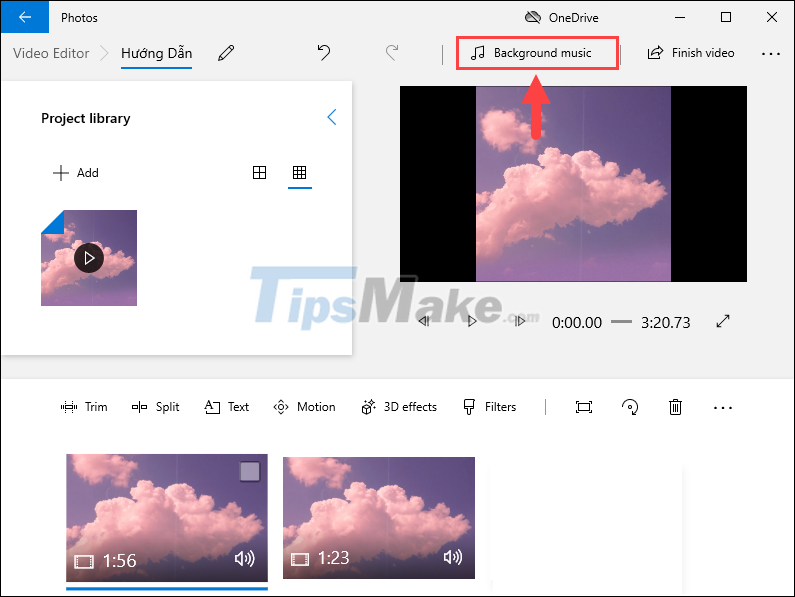
You select the Background Music item to add background music for the Video. Background music you can choose songs available on your computer or some songs available in the editing tool.
7. Export Video When Done
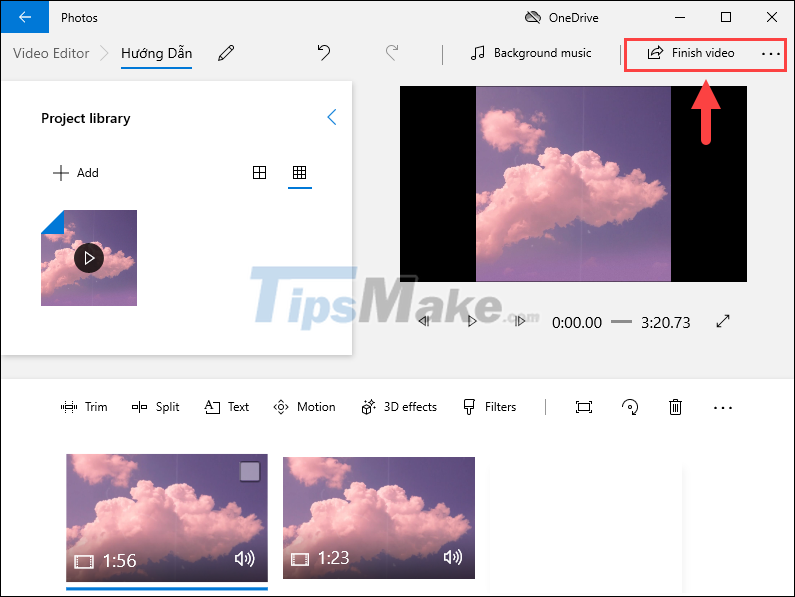
When you have finished editing, select Finish Video to proceed to export the completed Video.
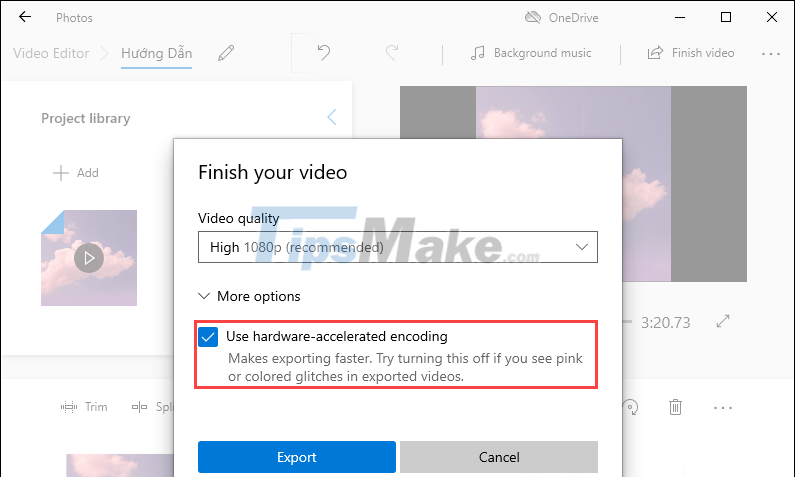
When exporting video, you can choose the highest quality and quality is High 1080P (Full HD) and when exporting Video, choose Use hardware-accelerated encoding to make full use of your computer's hardware to increase processing speed.
In this article, TipsMake has shown you how to edit Videos directly on Windows without downloading software. Have a nice day!
Conclusion
Understanding Video Editor makes it easier to compare options, avoid common mistakes, and apply the information in this guide more effectively. Review the relevant requirements before making changes or choosing a solution.
FAQ
How do you edit live video on windows?
Follow the steps in this guide in order, confirm the required settings or tools, and verify the result before making additional changes.
Is it safe to edit live video on windows?
It is generally safe when you follow the recommended instructions, use trusted tools, and avoid changing settings you do not understand.
What should you do if the process does not work?
Recheck the requirements, restart the device or application when appropriate, and review each step for missed settings or compatibility issues.
Related Articles
 How to Use the Facebook Creator Live Stream, Record Facebook Videos6 minutes read
 Reveal Some Tricks When Live Video Is on Facebook4 minutes read
 Instructions for Setting up Live Stream Feature Facebook Videos on8 minutes read
 Instructions for Creating V LINE Account: V LIVE7 minutes read
 How to Live Stream with BIGO LIVE6 minutes read
 How to Live Stream on Facebook, Broadcast Live Video on Facebook15 minutes read
Reader Comments 0
Sign in with email or Google to join the discussion.