How to Delete Files That Cannot Be Deleted
Method 1 of 7:
Deleting Files in Safe Mode on Windows
-
 Click the Start button. It's the button with the Windows logo in the bottom-left corner of the screen. The Start menu will pop up.
-
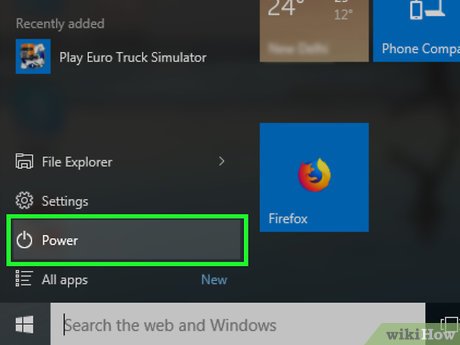
 Click Power. It's in the bottom-left corner of the Start menu. A pop-up menu will appear.
-
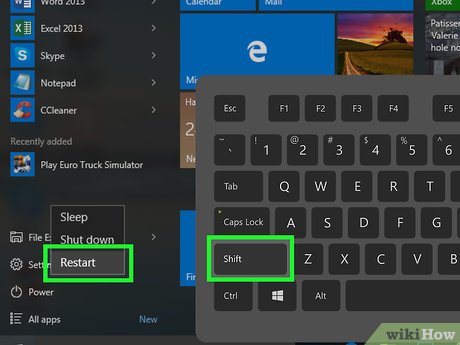
 Hold down ⇧ Shift while clicking Restart. Your computer will begin to restart like usual, but don't release the Shift key until the next step.
 -
 Release ⇧ Shift when the blue screen appears. Once the blue screen appears, you can release the Shift key and proceed.
 -
 Click Troubleshoot. It's in the middle of the screen next to an icon that resembles tools.
 -
 Click Advanced options. You'll find this in the middle of the screen next to an icon with three lines next to checkmarks.
 -
 Click Startup Settings. This option is on the right side of the page next to an icon that resembles a gear.
 -
 Click Restart. It's the button in the lower-right corner of the screen.
 -
 Press the "Safe Mode" key. This key is usually 4. Check which number "Enable Safe Mode" is listed next to in the "Startup Settings" menu.
- If 4 doesn't work, try pressing F4 (you may need to hold down Fn while pressing F4).[1]
-
 Press ⊞ Win+E to open File Explorer. Once Windows boots up in Safe Mode, open File Explorer.
-
 Find the file you want to delete. Use File Explorer to navigate to the folder that contains the file that you want to delete. Double-click a folder to open it.
 -
 Select the file. Click once the file to select it. This will highlight it in blue.
- If there are multiple files hold "Ctrl" and click them to select multiple files.
-
 Press the Del key. Doing so will move the file into the Recycle Bin.
- If you're still unable to delete the selected files, you may need to repair your PC's hard drive before attempting to delete the files again.
-
 Empty the Recycle Bin. Once you've moved the correct files into the Recycle Bin, you can proceed with removing them from your PC for good:
- Right-click the Recycle Bin icon.
- Click Empty Recycle Bin in the resulting drop-down menu.
- Click Yes when prompted.
-
 Restart your computer. Do the following to exit Safe Mode:
- Click Start.
- Click Power.
- Click Restart.
Method 2 of 7:
Using the Command Prompt on Windows
-
 Click the Windows Start menu. It's the icon with the windows logo. By default, it's in the lower-left corner.
-
 Type cmd. This displays the Command Prompt in the Windows Start menu. |
 -
 Right-click the Command Promptand click Run as administrator. This opens the Command Prompt with administrative privileges.
- You must be signed in to an Administrative account on Windows to run the Command Prompt as an administrator.
-
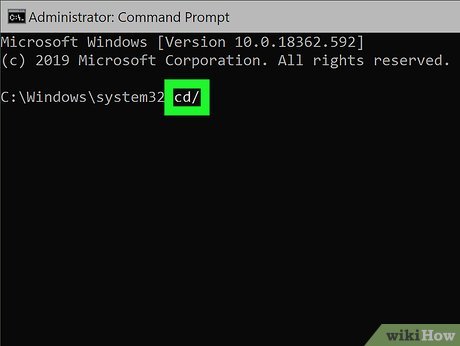
 Type cd/ and press ↵ Enter. This command returns you to your root directory in the Command Prompt.
- If you to need to change drives in the command prompt, simply type the drive letter followed by a colon (i.e. "D:")
-
 Type cd followed by the file location and press ↵ Enter. This navigates to the folder the file is located in. Separate each folder with a "". For example "cd usersusernamedocuments".
- To see a list of files and folders in a directory, type "dir" and press Enter.
-
 Type del followed by the file name and press ↵ Enter. For example, "del testfile.txt". This deletes the file.[2]
- If the file name has spaces in it (i.e. File Name.txt") place the file name in quotations (i.e. del "File Name.txt")
Method 3 of 7:
Repairing Disk Errors on Windows
-
 Close any open files. When repairing disk errors on Windows, it's wise (though not strictly necessary) to close any open files to prevent further issues. Be sure to save any work you have and close a program by click the "X" icon in the upper-right corner, or use the following steps to close programs in the Task Manager:
- Press "Ctrl + Shift + Esc" to open the Task Manager.
- Click an app that is open.
- Click "End Task' in the lower-right corner.
-
 Press ⊞ Win+E to open File Explorer. File Explorer has an icon that resembles a folder with a blue clip.
-
 Click This PC. It's in the sidebar menu to the left in File Explorer. It has an icon that resembles a computer monitor.
 -
 Right-clck your computer's hard drive. It's usually the one marked (C:), below the "Devices and drives" heading. It may be named "OS (C:)" or have your computer name or drive name. Right-clicking it will display a drop-down menu below it.
- You can double-click the "Devices and drives" heading to expand it if you don't see any hard drives listed there.
- If your computer has more than one hard drive, click the hard drive on which the file you want to delete is stored.
-
 Click Properties. It's in the drop-down menu. A pop-up window will open.
 -
 Click the Tools tab. This is at the top of the pop-up window.
 -
 Click Check. It's near the top of the window in the box labeled "Error Checking".
 -
 Click Scan drive when prompted. Doing so allows Windows to begin scanning your hard drive for errors.
- If Windows finds any errors, they will be repaired automatically if possible.
-
 Allow the scan to run. This can take several minutes to several hours depending on your selected hard drive's size and number of errors.
 -
 Try deleting your file again. Now that you've repaired any issues with your hard drive, you should be able to delete any files which were locked due to hard drive issues. Use File Explorer to navigate to the file and click it to select it. Press the "Del" key to delete it.
- You may still have to use Safe Mode to delete your file if the file is being used by a program or service.
- If you still can't delete the file in question, the file is most likely either locked by another user or reserved as a system file. Either way, you won't be able to delete the file.
Method 4 of 7:
Deleting Files in Safe Mode on Mac
-
 Open the Apple menu. It's the icon with the Apple logo in the top-left corner of the screen in the menu bar. A drop-down menu will appear.
-
 Click Restart…. It's in the drop-down menu below the Apple icon.
 -
 Click Restart when prompted. Doing so causes your Mac to begin restarting.
 -
 Hold down the ⇧ Shift key. Make sure you do this immediately after clicking Restart, and don't stop until the next step.
 -
 Release the ⇧ Shift key at the login window. This ensures that your Mac starts in Safe Mode rather than using regular boot settings.[3]
 -
 Open the Finder. It's the icon that has a blue and white smiley face. You can find it in the Dock at the bottom of your screen.
-
 Navigate to the file you want to delete. Use the Finder to navigate to the folder containing the file you want to delete. Double-click the folder to open it.
 -
 Select the file. Click once the file you want to delete. This highlights the file in blue
- If there are multiple files you want to delete from one location, you can hold down "Command" while clicking each file you want to delete.
-
 Click File. It's at the top of the screen. A drop-down menu will appear.
 -
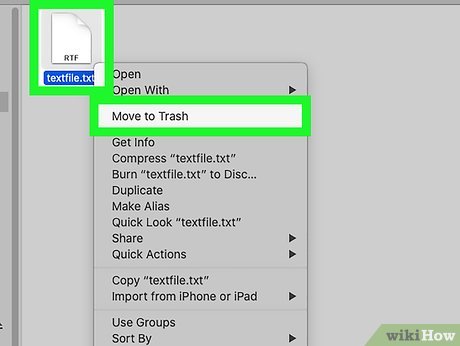
 Click Move to Trash. This is in the drop-down menu. Doing so should move the files to the Trash.
- If you're still unable to delete the selected files, you may need to repair your Mac's hard drive before attempting to delete the files again.
-
 Empty the Trash. Once you've moved the correct files into the Trash, you can proceed with removing them from your Mac for good:
- Click and hold the Trash app icon.
- Click Empty Trash in the resulting menu.
- Click Empty when prompted.
-
 Restart your Mac. Do the following to exit Safe Mode:
- Click the Apple menu.
- Click Restart....
- Click Restart when prompted.
Method 5 of 7:
Using The Terminal on Mac and Linux
-
 Open the Terminal. The Terminal has an icon that resembles a black screen with a text cursor. Use the following steps to open the Terminal on Mac:
- Click the Magnifying Glass icon in the upper-right corner.
- Type Terminal in the search bar.
- Click the Terminal icon.
-
 Type cd and press ↵ Enter. This navigates to the root directory on your computer.[4]
 -
 Type cd ~/ followed by the file location and press ↵ Enter. This navigates to the folder(s) the file is located in. Be sure to separate each folder with a "/". Make sure you use the correct capitalization. For example, "cd ~/documents"
- You can also type "ls" and press Enter to see a list of folders and files in the current directory.
-
 Type rm followed by a space and the file name and press ↵ Enter. For example, "rm textfile.txt". This deletes the file.
- If the file name has spaces in it, place the file name in quotations (i.e rm "text file.txt")
-
 Type y and press ↵ Enter. If the file is write-protected, you will need to confirm that you want to delete the file. To confirm, type "y" and press Enter. [5]
- Alternatively, you can type "rm -f" followed by the file name to force delete the file name.
Method 6 of 7:
Repairing Disk Errors on Mac
-
 Open the Apple menu. Click the Apple logo in the top-left corner of the screen. A drop-down menu will appear.
-
 Click Restart…. It's in the drop-down menu.
 -
 Click Restart when prompted. Doing so causes your Mac to begin restarting.
 -
 Hold down the ⌘ Command+R keys. Do this immediately after hearing the Startup chime.
 -
 Release the keys when the Apple logo appears. This loads the Recovery menu.
- The Recovery menu may take a few minutes to appear.
-
 Click Disk Utility. It's next to an icon that resembles a hard disk drive with a stethoscope.
 -
 Click Continue. This is in the lower-right corner of the screen. The Disk Utility window will open.
 -
 Click View. It's a menu item at the top of the screen. A drop-down menu will appear.
 -
 Click Show All Devices. This is in the drop-down menu. You should see a list of your Mac's available storage locations appear on the left side of the screen.
 -
 Select your Mac's hard drive. It's in the sidebar menu to the left.
- If your Mac has more than one hard drive, make sure you click the one on which the file you want to delete is stored.
-
 Click the First Aid icon. It's a tab which resembles a stethoscope at the top of the window.[6]
 -
 Click Run when prompted. Doing so allows Disk Utility to begin scanning and repairing your Mac's hard drive.
 -
 Delete files if asked. If Disk Utility reports an "overlapped extent allocation" error, you will be asked to take action; in this case, you can delete any damaged or corrupted files in a related list. If you see the file you want to delete in this list, do so before proceeding.
 -
 Restart your Mac. Once Disk Utility finishes running, you can use the following steps to restart your Mac:
- Click the Apple Icon.
- Click Restart...
- Click Restart when prompted.
-
 Try deleting the file again. Now that you've repaired any issues with your hard drive, you should be able to delete any files which were locked due to hard drive issues. Open the Finder and navigate to the file and click it. Then drag it to the Trash to delete it.
- You may still need to use Safe Mode to delete the file if it's used frequently by a default program.
- If you still can't delete the file in question, the file is most likely either locked by another user or reserved as a system file. Either way, you won't be able to delete the file.
Method 7 of 7:
Using SD Maid on Android
-
 Download and install SD Maid. SD Maid is a system cleaning app for Android. It can help you delete some files that you cannot delete in the My Files app. Be aware that some files on Android can't and shouldn't be deleted because they are part of the root system or a specific app. Use the following steps to download SD Maid:
- Open the Google Play Store.
- Type "SD Maid" in the search bar at the top.
- Tap Install below SD Maid.
-
 Open SD Maid. SD Maid has an icon that resembles the Android robot wearing a maid's uniform. Tap the icon on your home screen or apps menu or tap Open in the Google Play Store to open SD Maid.
 -
 Tap ☰ to open the menu. The icon with the three horizontal lines is in the upper-left corner. This opens the menu.
 -
 Tap Storage analyzer. It's near the bottom of the list of options below "Tools" in the menu.
 -
 Tap theicon. It's the green button with a circular arrow in the lower-right corner. This searches your file system on your Android device.
- The first time you use this feature, you may be asked to grant SD Maid permissions to access your internal storage and SD card. If you receive a prompt asking if you would like to allow SD Maid to access your system, tap Allow to continue.
-
 Tap the storage drive with the file you want to delete. The public storage drive labeled "Primary" is the internal storage for your phone or tablet. The public storage labeled "Secondary" is the SD card. Tap the storage that contains the file you want to delete.
 -
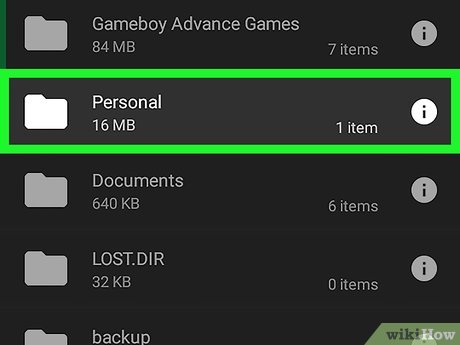
 Navigate to the file you want to delete. Tap the folders on the screen to open the folder. Files associated with a specific app are usually in a folder with the app's name. Pictures can be found in a folder called "DCIM" or "Pictures". Files downloaded from the internet can be found in "Download" and random files can be found in the "Documents" folder.
 -
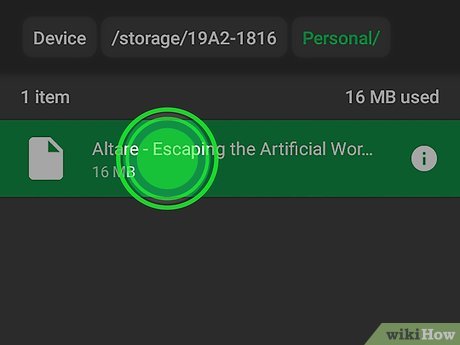
 Tap and hold the file or folder you want to delete. This selects the item. A bar will appear at the top of the screen.
 -
 Tap the trashcan item. It's in the upper-right corner of the app. This deletes the file.
- After deleting the file in SD Maid, you may want to check to make sure it is deleted in the My Files or Files app. If it hasn't been deleted, try deleting it in the SD Maid app. You may be able to delete it after removing it using SD Maid. [7]
-
 Back up and reset your Android phone or tablet. Unfortunately, no solution is going to work in every instance on Android. If you cannot delete a file, you can try to back up your Android phone or tablet, and then reset it. You can restore your Android phone from the backup during the initial setup process. This should only be done as a last resort, and only if you really need to get rid of the file.
Share by
Lesley Montoya
Update 04 March 2020
You should read it
- ★ Delete the SkyDrive Pro command in the right-click menu
- ★ 2 simple ways to remove SkyDrive Pro option in Windows 10 Right-click Menu
- ★ How to delete and improve the right-click menu
- ★ How to delete options in the Windows context menu
- ★ What is Take Ownership? How to add Take Ownership to right-click Menu


