How to Crop a Picture in Word
This wikiHow teaches you how to crop a picture that's inserted into a Microsoft Word document. Open your Microsoft Word document. Double-click the document that contains the picture you want to crop. This will open the document in....
Method 1 of 3:
Using a Standard Crop
-
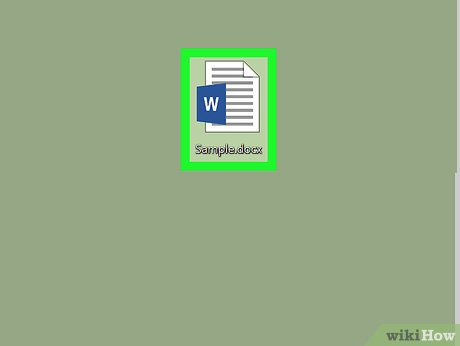 Open your Microsoft Word document. Double-click the document that contains the picture you want to crop. This will open the document in Microsoft Word.
 -
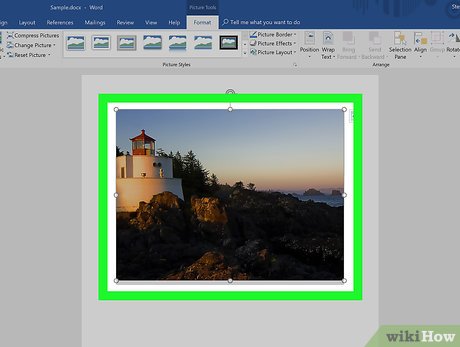
 Select a picture. Scroll through your document until you find the picture you want to crop, then click once the picture to select it.
 -
 Click Crop. It's in the "Size" section on the right side of the Format toolbar. A drop-down menu will appear.
- On Mac, it's in the toolbar at the top of the "Picture Format" tab.
-
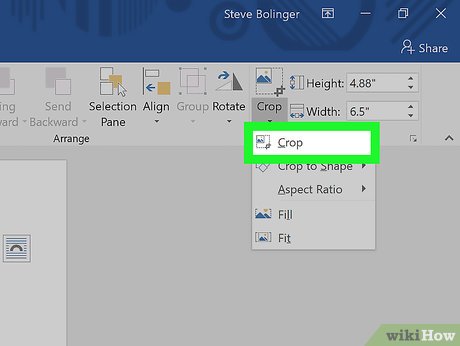 Click Crop. This is in the drop-down menu. Clicking it prompts a set of black bars to appear on the edges and in the corners of the selected picture.
 -
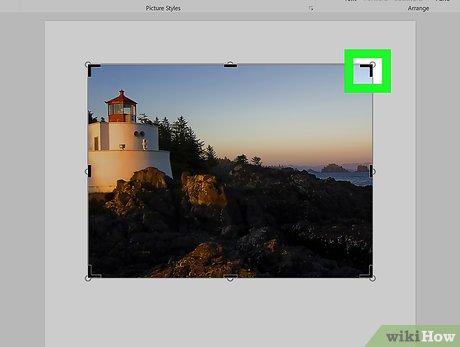 Adjust the picture's crop. Click and drag inward any of the black bars on the edges or in the corners of the picture to do so.
 -
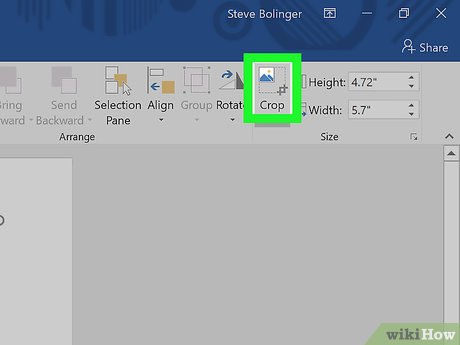 Click the "Crop" icon. It's the box with a line through it above the Crop drop-down icon. This will remove any section of the picture that falls outside of the black bars' limits.
 -
 Save your changes. Press Ctrl+S (Windows) or ⌘ Command+S (Mac) to do so.
Method 2 of 3:
Using a Shaped Crop
-
 Open your Microsoft Word document. Double-click the document that contains the picture you want to crop. This will open the document in Microsoft Word.
 -
 Select a picture. Scroll through your document until you find the picture you want to crop, then click once the picture to select it.
 -
 Click the down arrow next to the "Crop" button. It's in the "Size" section on the right side of the Format toolbar. A drop-down menu will appear.
- On Mac, it's in the toolbar at the top of the "Picture Format" tab.
-
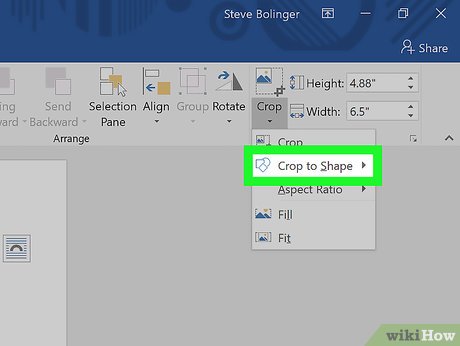 Select Crop to Shape. This is in the drop-down menu. Doing so prompts a pop-out menu with shapes.
 -
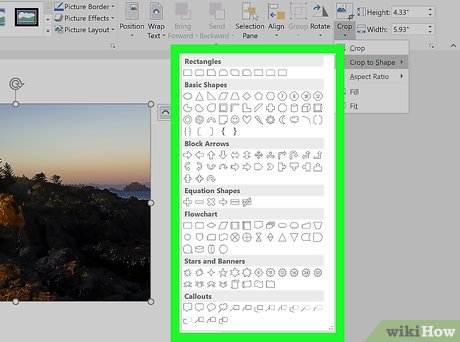 Select a shape. Click the shape in which you want your picture to appear. This will immediately apply the shape to the picture.
 -
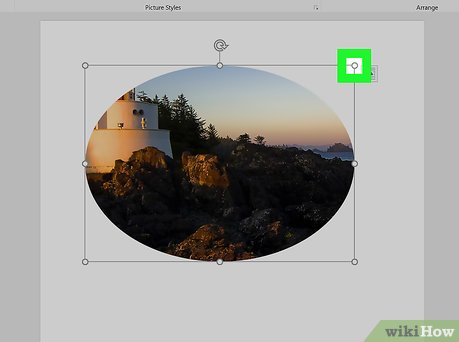 Adjust the shape's size. Click and drag inward or outward any of the circular points around the picture's outline to decrease or increase the picture's size.
 -
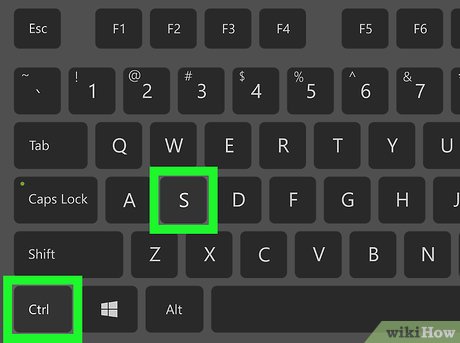 Save your changes. Press Ctrl+S (Windows) or ⌘ Command+S (Mac) to do so.
Method 3 of 3:
Using an Aspect Ratio Crop
-
 Open your Microsoft Word document. Double-click the document that contains the picture you want to crop. This will open the document in Microsoft Word.
 -
 Select a picture. Scroll through your document until you find the picture you want to crop, then click once the picture to select it.
 -
 Click the down arrow next to the "Crop" button. It's in the "Size" section on the right side of the Format toolbar. A drop-down menu will appear.
- On Mac, it's in the toolbar at the top of the "Picture Format" tab.
-
 Select Aspect Ratio. This option is in the drop-down menu. Doing so prompts a pop-out menu to appear.
 -
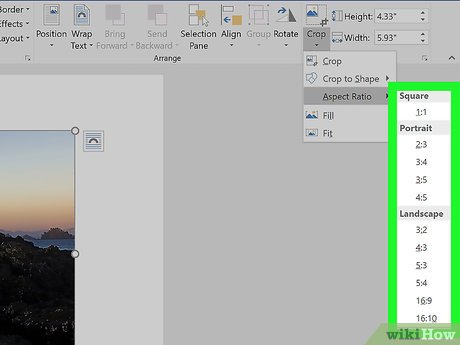 Select a ratio. In the pop-out menu, click one of the aspect ratios you'd like to use to crop your picture.
 -
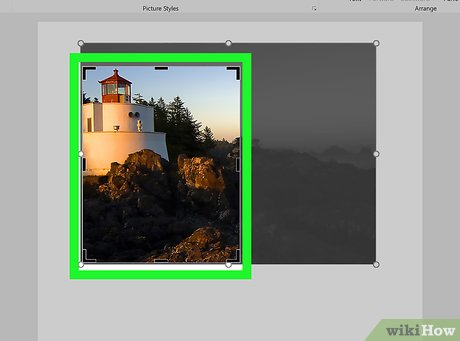 Adjust the crop selection. Click and drag your picture around until you've centered the section you want to keep in the aspect ratio's square or rectangle.
 -
 Click the "Crop" icon. It's the box with a line through it above the Crop drop-down icon. Doing so will crop your picture according to your selected aspect ratio.
 -
 Save your changes. Press Ctrl+S (Windows) or ⌘ Command+S (Mac) to do so.