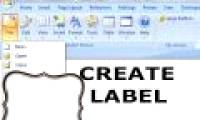
How to Create Labels in Microsoft Word
This wikiHow teaches you how to set up and print a template for a single label or multiple labels in Microsoft Word. Obtain the labels you need. Labels come in different sizes and for different purposes, for everything from regular, no. 10...
Table of Contents
Method 1 of 2:
Printing a Single Label or a Sheet of the Same Label
-
 Obtain the labels you need. Labels come in different sizes and for different purposes, for everything from regular, no. 10 envelopes to legal-sized mailings and CD covers. Get the labels that are best-suited for your project.
 -
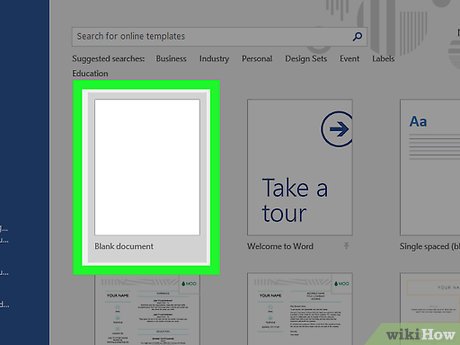 Create a new Microsoft Word document. Double-click the blue app that contains or is shaped like a "W", then double-click Blank Document" in the upper-left part of the opening window.
 -
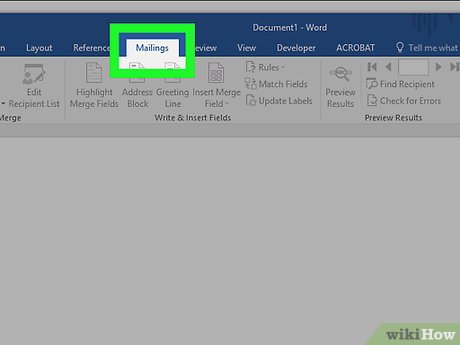 Click the Mailings tab. It's at the top of the window.
 -
 Click Labels under the "Create" menu. It's at the far-left of the toolbar.
- If prompted, click OK to grant Word access to your contacts.
-
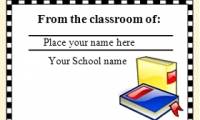
 Add text to the label. Do so by typing a recipient's address, name badge text, CD label, etc., in the Delivery Address field or by clicking the address book icon to the right of the field, selecting a recipient and clicking Insert.
 -
 Click Font…. This dialog box allows you to customize the look of the labels by selecting a font, text size, text color, and style.
 -
 Customize the label text and click OK.
 -
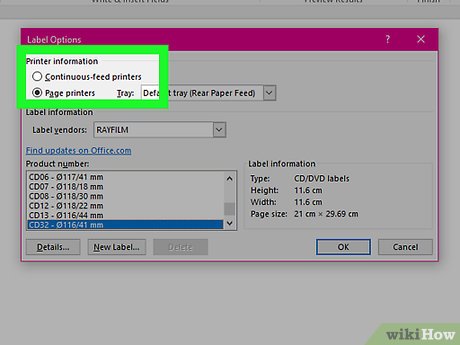
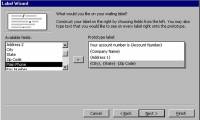
 Click Options…. It's a button in the Label section of the dialog box.
 -
 Click the radio button next to your printer type.
 -
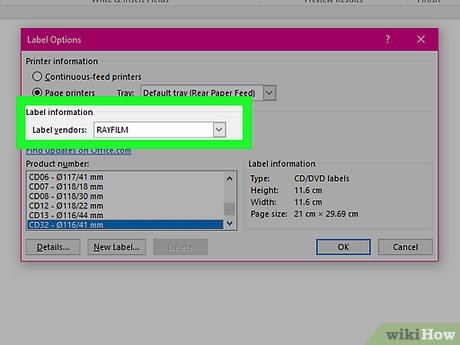
 Click the "Label products" drop-down menu.
 -
 Select your label manufacturer.
- If your manufacturer isn't listed, examine the label packaging for the label dimensions and the number per sheet. With this information, you can select an equivalent product.
-
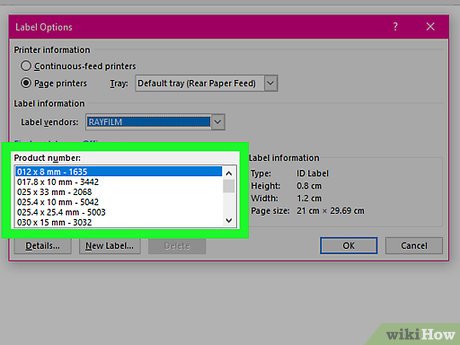
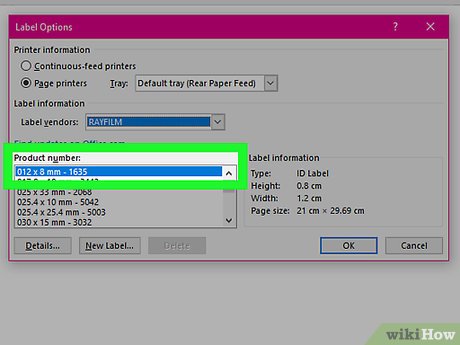
 Click the "Product number" drop down.
 -
 Click the product number for your label. It should be clearly marked on the packaging.
 -
 Click OK.
 -
 Select the number of labels you're printing.
- Click Full page of the same label to print a full sheet of the label
- Click Single label and then identify the row and the column on the label sheet where you'd like the label to be printed.
-
 Insert the blank label sheet into your printer. Make sure you have them aligned correctly for your printer.
 -
 Click Print….
- Make sure the print preview of the labels looks the way you want it to.
-
 Click Print. Your label(s) will print.
- Click File in the menu bar and Save if you want to save this label template for future use.
Method 2 of 2:
Printing Labels from an Address List
-
 Obtain the labels you need. Labels come in different sizes and for different purposes, for everything from regular, no. 10 envelopes to legal-sized mailings. Get the labels that are best-suited for your project.
 -
 Prepare your mailing list. Word can pull names and addresses from an Excel spreadsheet, an Access database, your Outlook contacts, or on Mac, your Apple contacts or a FileMaker Pro database. You can also type a new mailing list during the merge, if you prefer.
 -
 Create a new Microsoft Word document. Double-click the blue app that contains or is shaped like a "W", then double-click Blank Document" in the upper-left part of the opening window.
 -
 Click the Mailings tab. It's at the top of the window.
 -
 Click Start Mail Merge and Labels…. It's at the far-left of the toolbar.
- If prompted, click OK to grant Word access to your contacts.
-
 Click the radio button next to your printer type.
 -
 Click the "Label products" drop-down menu.
 -
 Select your label manufacturer.
- If your manufacturer isn't listed, examine the label packaging for the label dimensions and the number per sheet. With this information, you can select an equivalent product.
-
 Click the "Product number" drop down.
 -
 Click the product number for your label. It should be clearly marked on the packaging.
 -
 Click OK.
 -
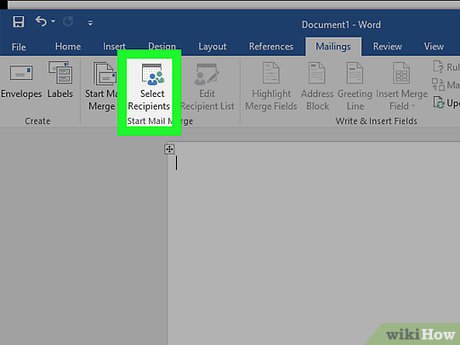 Click Select Recipients…. It's at the left of the toolbar.
 -
 Select your mailing list. Click on the source of the addresses you want to put on the labels.
- If you want to create a new list at this point, click Create a new List….
- If you don't want to create labels for your entire mailing list, click Edit Recipient List and select the recipients you want to include.
-
 Click Address Block.
- On Mac, click a line near the top of the first label, and click Insert Merge Field, then select a field you want to include, such as "First_Name." Repeat this process for each field you want to include, adding the appropriate spacing and address formatting.
-
 Select the elements you want to include on the labels. These include name format, business, name, etc.
 -
 Click OK.
 -
 Click Update Labels. It's an icon in the toolbar with a green "refresh" symbol.
 -
 Click Preview Results in the toolbar. Make sure the labels look the way you want them to.
 -
 Insert the blank label sheets into your printer. Make sure you have them aligned correctly for your printer.
 -
 Click Finish & Merge and Print Documents…. It's at the far right of the toolbar.
 -
 Click Print. Your label(s) will print.
- Click File in the menu bar and Save if you want to save this label template for future use.
Was this article helpful?
Your feedback helps us improve.
Related Articles
 Instructions on how to create Labels, mailing labels in Word 20102 minutes read
 How to create labels, mailing labels in Word 2007 simply2 minutes read
 How to make your own baby stickers on Microsoft Word4 minutes read
 Instructions for creating Labels and mailing labels on Word 2013 quickly3 minutes read
 Create Label in Word 20103 minutes read
 MS Access 2003 - Lesson 33: Creating Mailing Labels (mailing labels)9 minutes read
Reader Comments 0
Sign in with email or Google to join the discussion.