How to create HDR photos in Photoshop with Camera RAW
HDR photos are often eye-catching, have depth, and are used more often than you think. Your iPhone probably has automatic HDR settings in the camera, and you can also create fake HDR photos in Photoshop.
So how do you create true HDR images? Let's find out through the following article!
What do you need to create HDR photos?
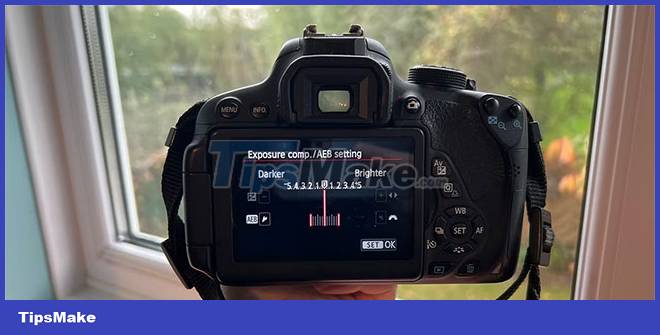
You need to take 3 or more photos using Exposure Bracketing - this setting is included with most DSLR cameras. Basically, you take three or more photos at different exposures and the photo is in RAW instead of JPEG.
You also need to use software that opens RAW images. The article is using Photoshop. To open RAW images in Photoshop, you need the Camera RAW plugin, which is included with countless Adobe Creative Cloud software.
Now you have all you need. You can create HDR using Camera RAW.
How to Create HDR Photos in Photoshop
To open RAW images in Photoshop, you need to import them using Camera RAW, a Photoshop plugin. The Camera RAW plugin works very similarly to Lightroom, so if you are a Lightroom user, getting familiar with this plugin will be very easy.
Step 1: Open the image in Photoshop
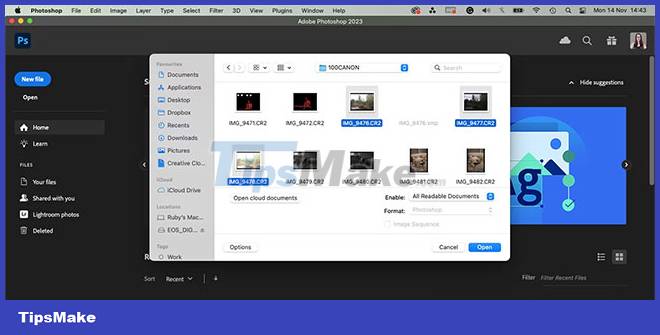
Open Photoshop. From the homepage, select Open. Find your RAW images in the dialog box and select the ones you want to use. RAW images use the CR2 file format, so any images in that format will open with Camera RAW via Photoshop. Once selected, click Open.
Step 2: View photos in Camera RAW
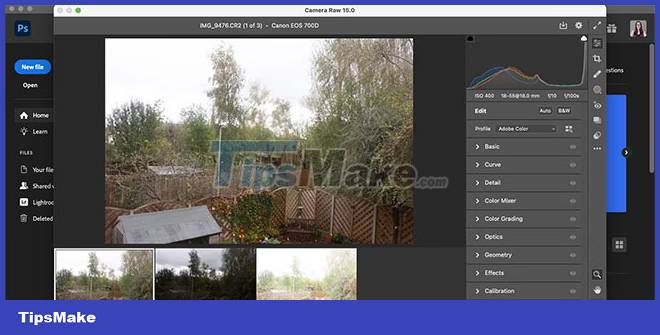
Camera RAW is located as a dialog box inside the Photoshop window, it is not a separate software or application. Any photos you choose to open will appear in the film reel at the bottom of the Camera RAW window.
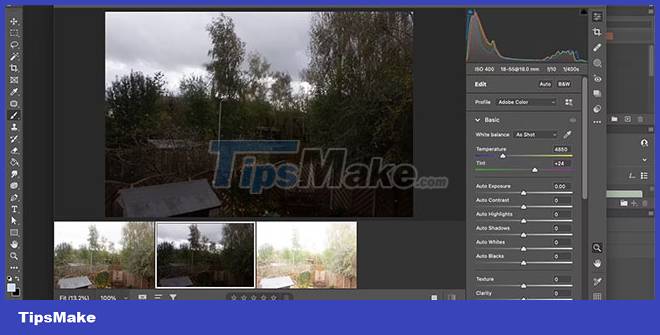
When 3 exposure-compensated images are opened, the film reel displays the images in the following order: The correctly exposed image on the left, then the underexposed image, followed by the overexposed image on the right.
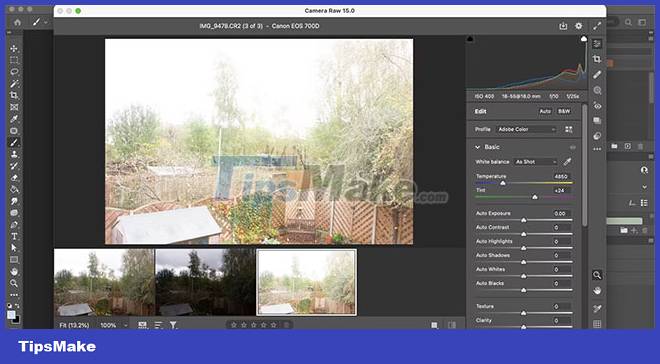
On the right side of the dialog box, there is a histogram that you can use to see the shadows and highlights of each differently exposed image. Below the chart are your other photo settings.
Step 3: Pre-edit the photo
This step is optional. You can use the settings below the histogram to edit any individual image before performing the HDR process. You can increase or decrease the exposure if you want to add more drama to your HDR photos.
It's best to edit the image after you've created the HDR, but if there's anything you'd like to change before that, you can do it now.
Step 4: Create an HDR photo
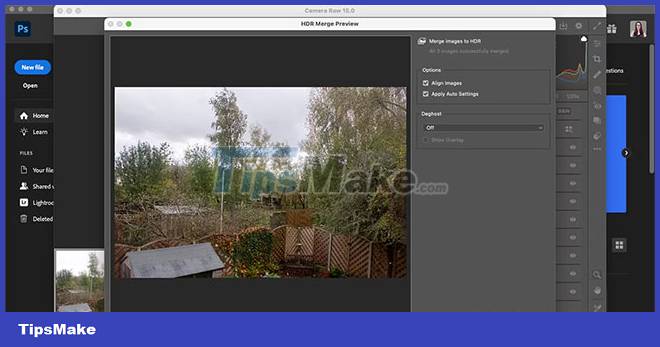
Select the image on the left, hold the Shift key, then select the image on the right. This will select all images. With all three photos (or more) selected, it's easy to create an HDR photo.
Right click on any selected image and select Merge to HDR . This immediately displays a new dialog box with a preview of the finished HDR photo. If you're happy with the preview, select Merge. If you're not satisfied, you can cancel and edit any of your images to see if it helps, then try again.
Step 5: Save the HDR photo
After selecting Merge on the preview box, a dialog box will appear to save the HDR on your system. Select a folder to save, rename and select Save. HDR photos save as DNG format images.
When returning to Camera RAW, the finished HDR is now in the fourth image to the right of the film reel. HDR now contains information from previous RAW images. This makes editing much easier if you want to.
If you can't create HDR this way because you don't use RAW images or don't have the option to apply different exposures to your photos, you can create a fake HDR image in Photoshop.
Step 6: Return HDR to Photoshop
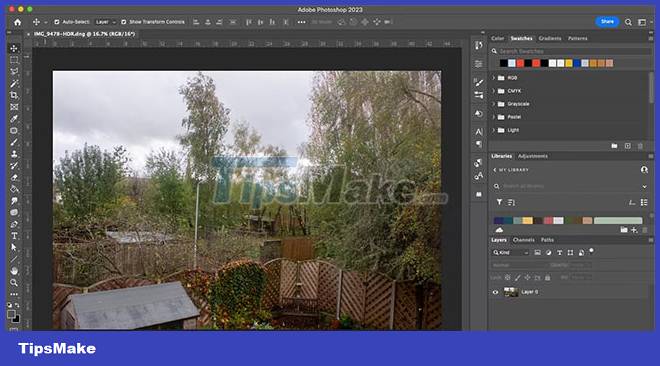
From the Camera RAW dialog box, there are three options: Cancel, Done , and Open. Then Open has three more options: Open, Open as Object and Open as Copy .
Selecting Cancel exits Camera RAW and returns you to a blank Photoshop window. If you edited your HDR after merging, undoing will not save those edits. Select Done to save the edits and exit Camera RAW.
The three Open options allow you to open and edit HDR in different ways. Open opens HDR like a normal Photoshop project, allowing you to edit it as usual. Open as Object applies the Smart Object to your new HDR, so you can treat it like any other Smart Object. And Open as Copy will open your HDR as a copy, not the original, so you can work on the image separately from your saved HDR.
Shooting in RAW allows your images to shine and express depth and color not found in JPG. Creating HDR images from your RAW files gives photos even more depth.
It's a simple process that many phones or cameras can automate, but now you know how easy it is to do it manually. You can override the editing settings to get perfect HDR using Photoshop and Camera RAW.
- How to create a border for photos in Photoshop
- How to use Photoshop CS6 (Part 1): Create digital photos
- 42 photos that capture the magical moment that looks like Photoshop but are 100% real
- How to split photos with Photoshop
- How to create film effects, scratched photos in Photoshop
- How to crop photos in Photoshop


 How to change SDR and HDR light balance in Windows 10
  Learn the O1 Ultra Vision image enhancement feature on Find X2 series, turn SDR into HDR and every frame-rate to 120Hz
  Get Aurora HDR 2018, professional HDR photo editing software for Windows and Mac OS, royalty free for life
  Instructions on how to pair HDR photos on Lightroom
  What is the difference between HDR and 4K?
  What is HDR? What is the difference between HDR formats?