Table of Contents
This guide explains how to create GIF Animations in Photoshop, with clear steps, practical tips, and important checks before you begin.
I. Theory
For creating GIFs in Photoshop, there will be many steps and a little difficult because you must know how to link the layer into the Timeline.
1. For a GIF file will be a combination of multiple images to form a short video repeatedly. The image part in Photoshop we will have to control in the layer part of Photoshop.
2. The image content to create GIF you must proceed to add in Photoshop. You do not arrange in order, just put them into layers and name them easily
3. The layers for creating GIFs must have the same resolution and size so that they won't be cropped.
II. Practice
In this article, the trick will make a sample on the GIF change the font color. For other content, you proceed to do the same.
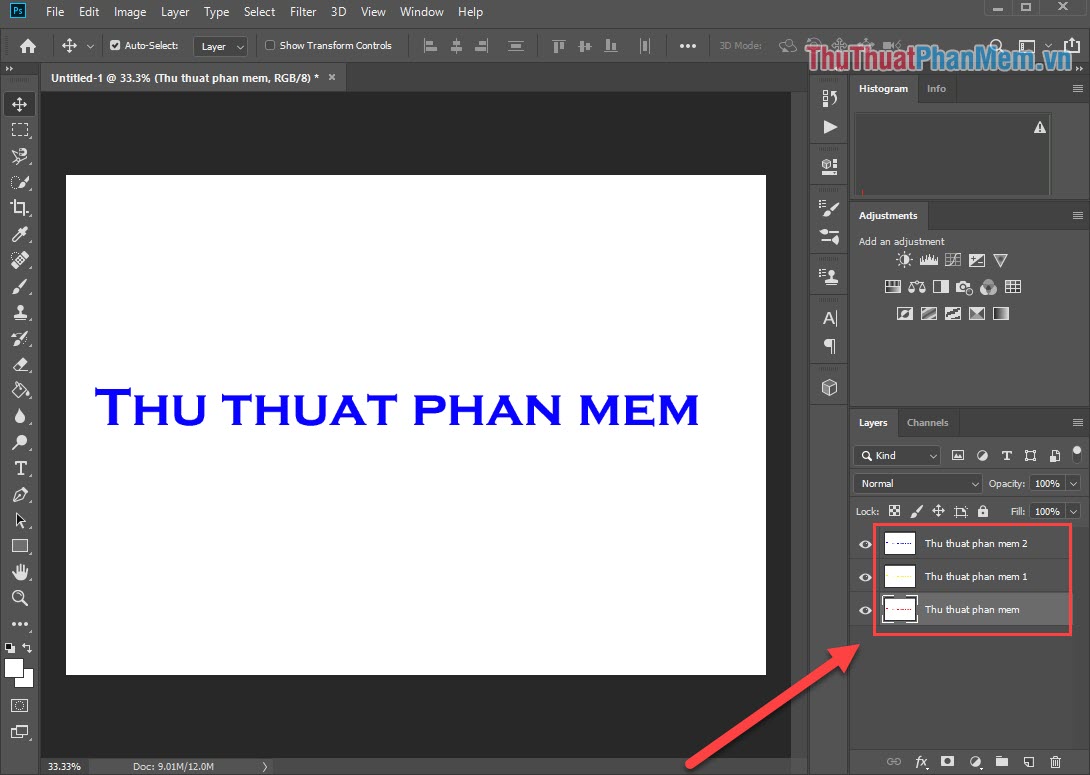
Step 1: First we need the content for the GIF.
In this article, the software trick will change the color, so 3 layers with THU THUAT PHAN MEM are prepared with 3 different colors (red, yellow, blue) and the same size.
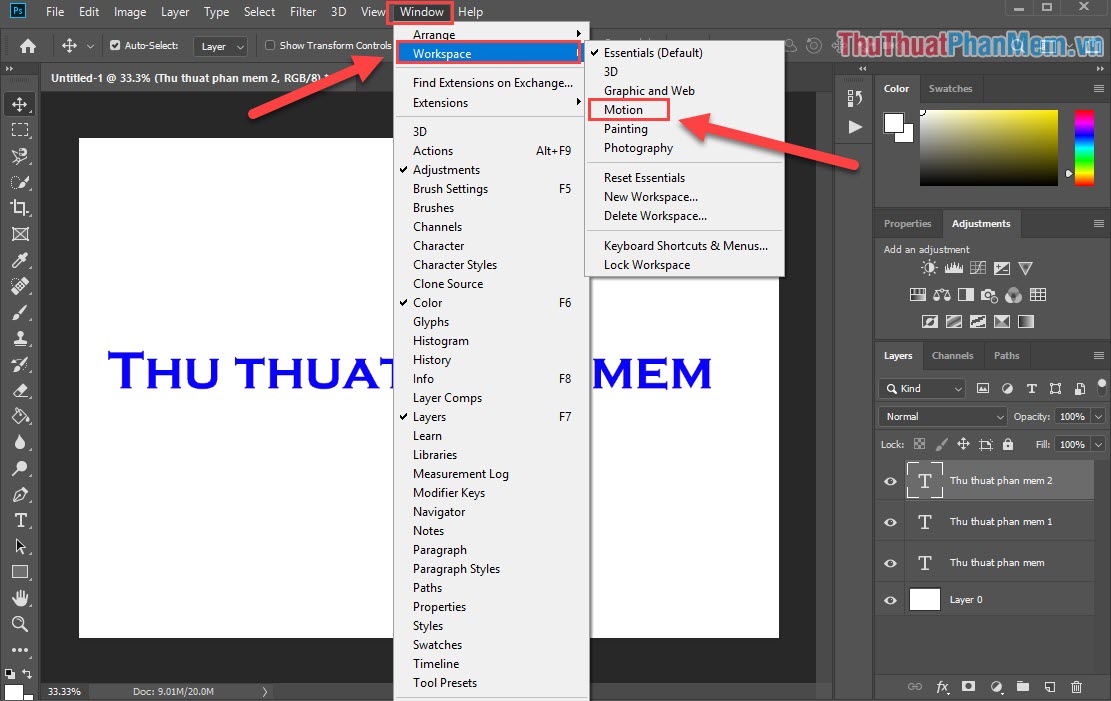
Step 2: You proceed to select Windows -> Workspace -> Motion to open the motion mode.
(If someone has inverted the Motion mode and made them no longer the default of Photoshop, then select Reset Motion in the Workspace tab!)
Step 3: Now on the software will appear the Timeline bar of Motion .
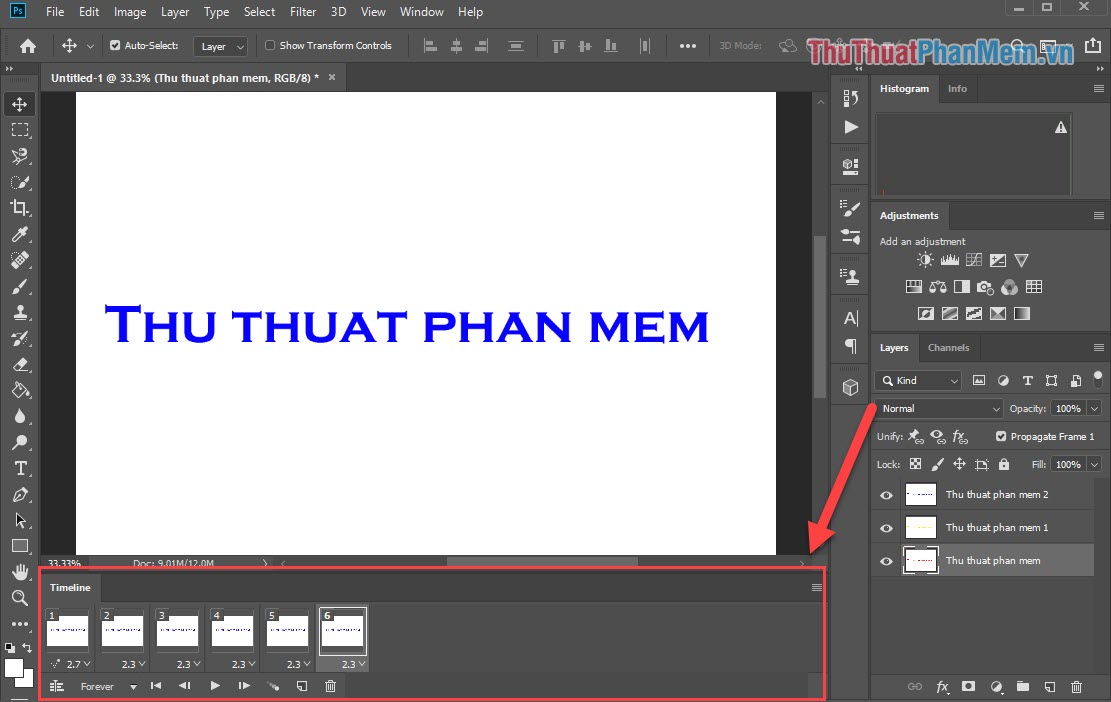
Step 4: Each image with numbered under the Timeline bar represents a frame of GIF. The order of GIF runs from 1 to 99+ .
Initially when we open the Motion mode we only have 1 frame. You need to click on the New icon to create additional frames.
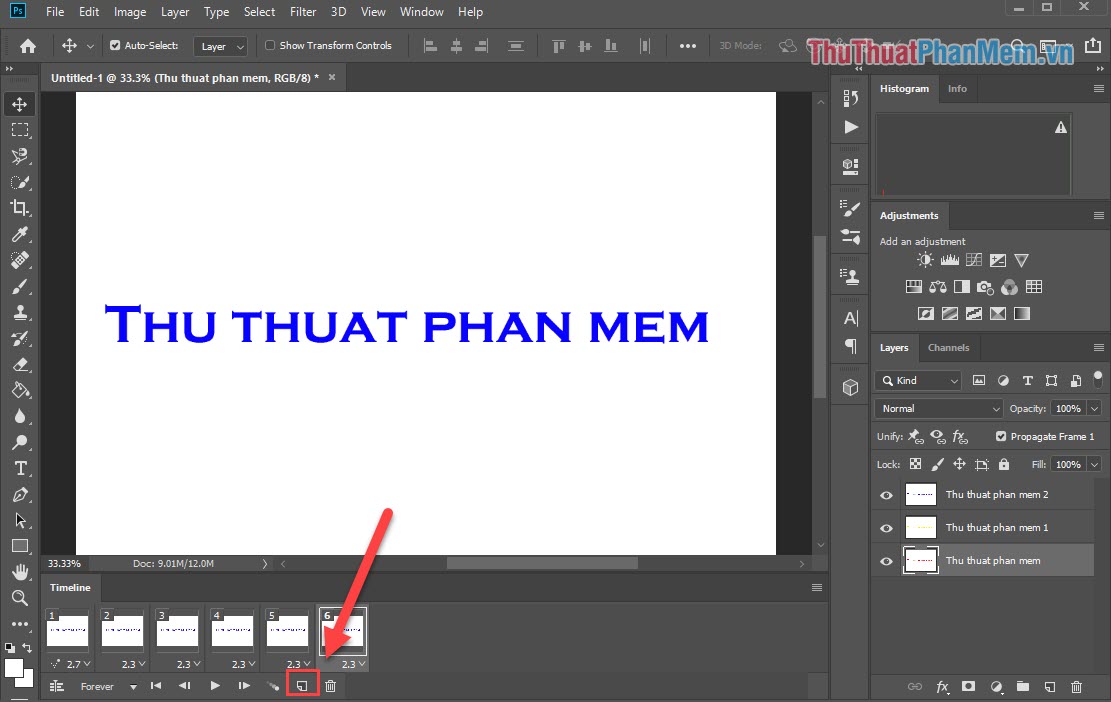
Step 5: Next we will proceed to link the frame with the prepared layers.
You select a frame we want to edit the content displayed. Then we turn on the " eyes " of the content we want to display on the Layer tab and turn off the " eyes " of the content that need not be displayed.
For example: With frame 1, the software trick wants to display red text, so it will turn on the red eyes and turn off the blue and yellow letters .
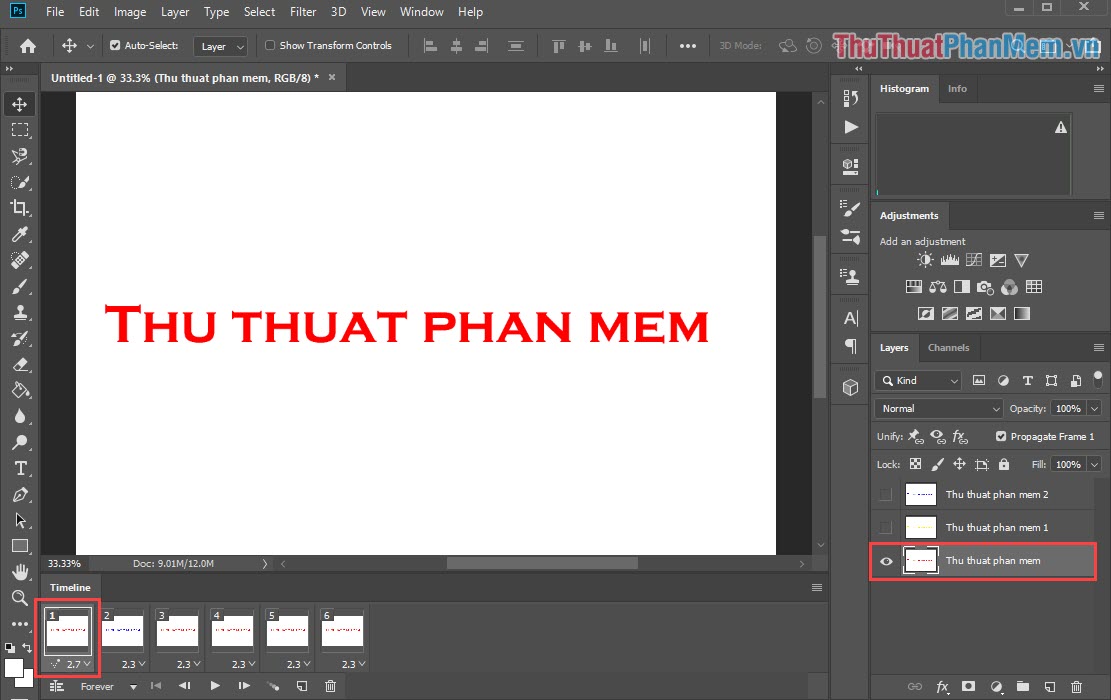
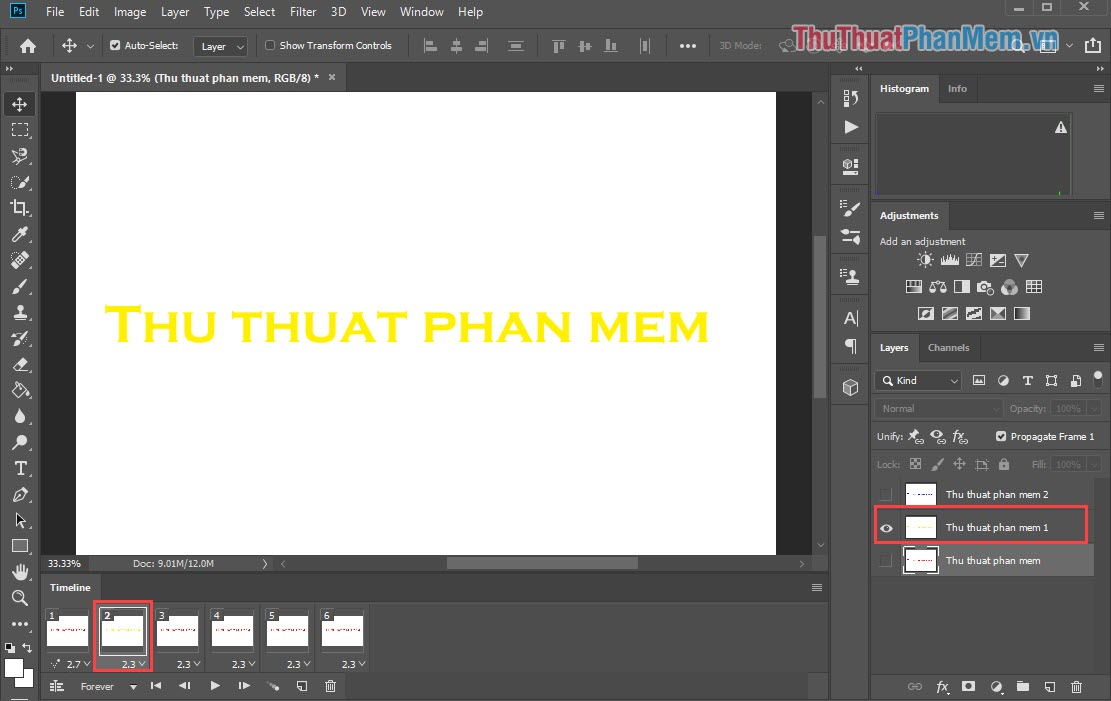
You do the same with the 2nd frame:
For this frame 2 the Software trick will turn yellow, the same way as above. Turn on the Yellow Layer eye and turn off the red, blue Layer eye .
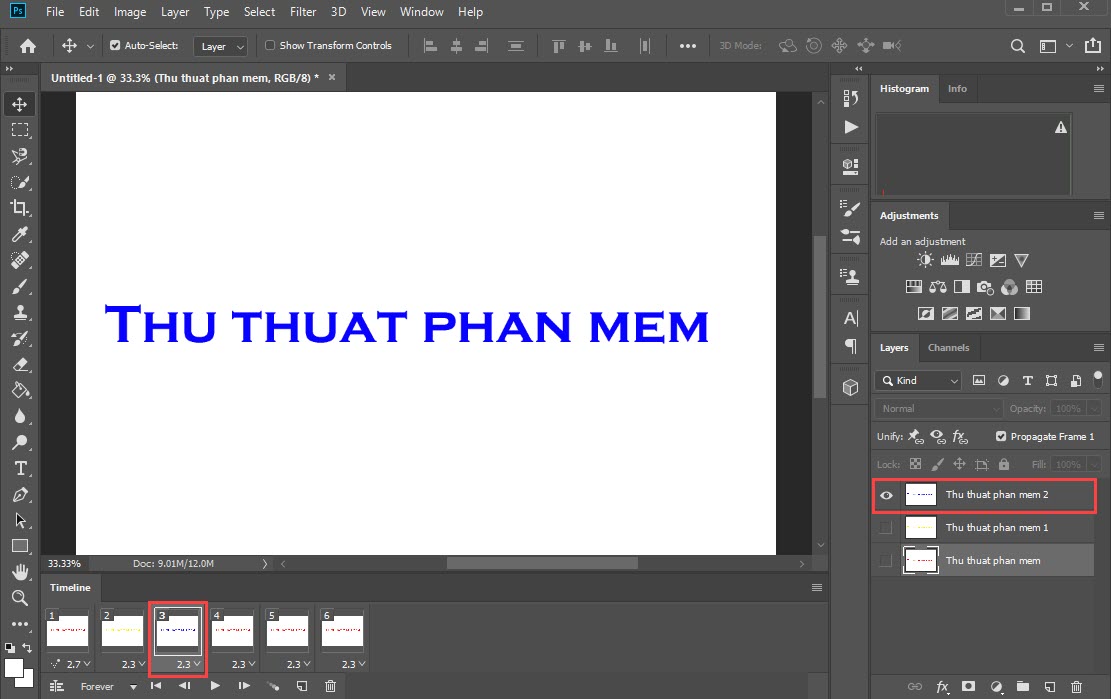
Continue to the 3rd frame and the remaining frames:
Step 6: After we're done editing the frames. You proceed to set the playback time for each frame. You select the Back arrow icon.
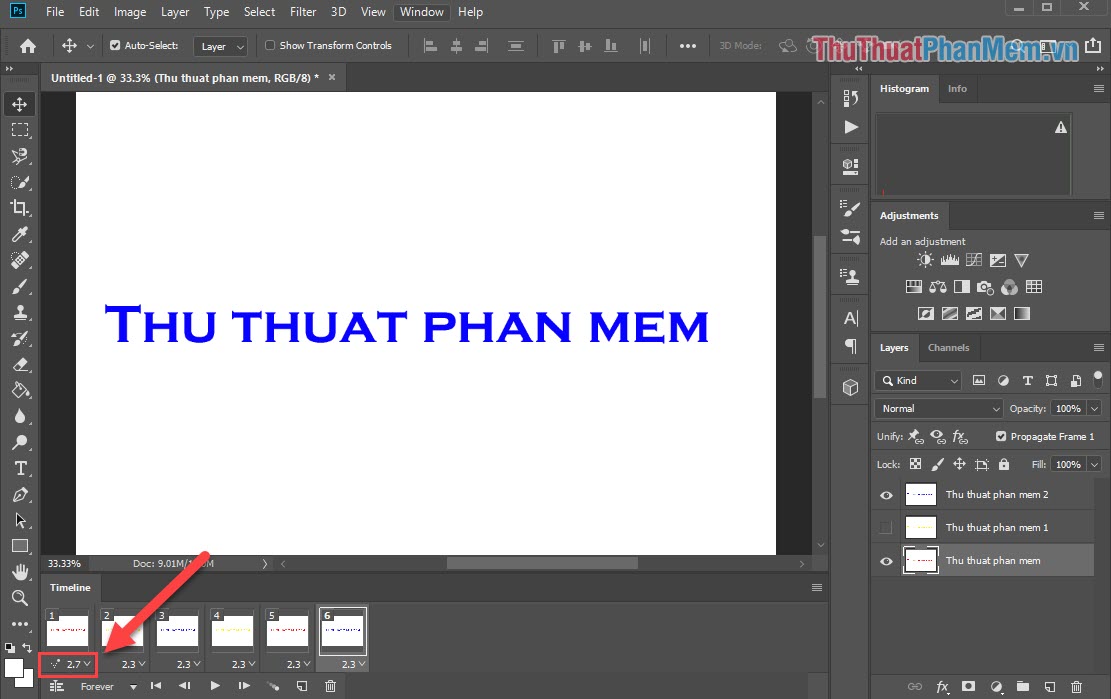
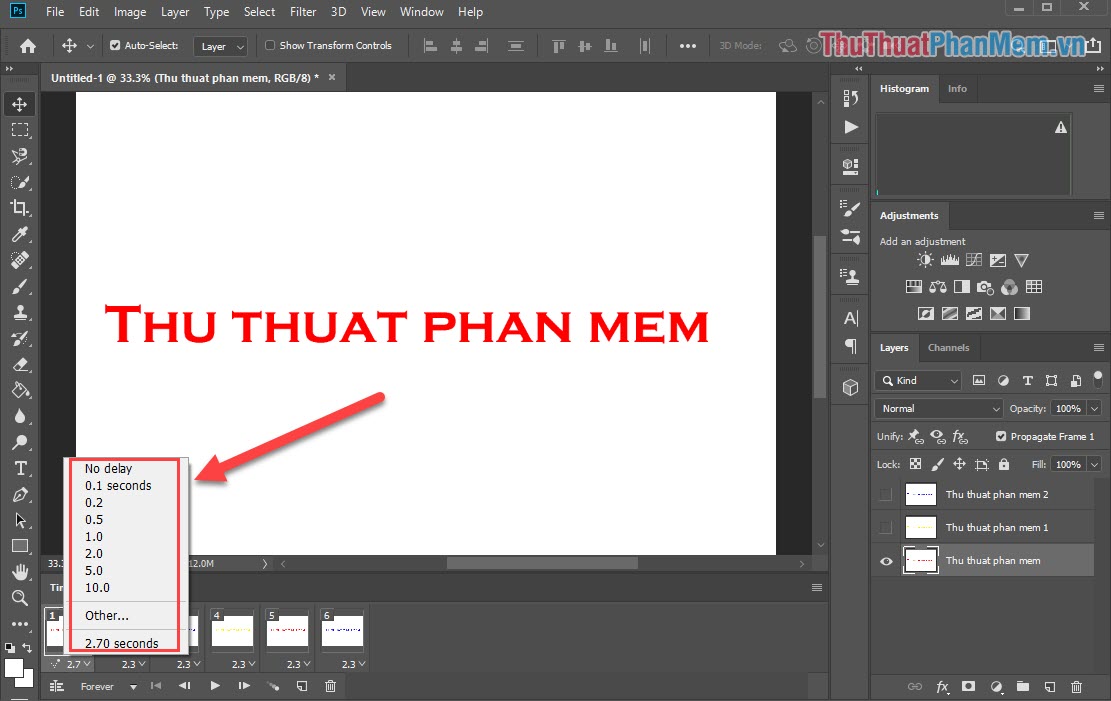
Step 7: Select the time you want to play each frame.
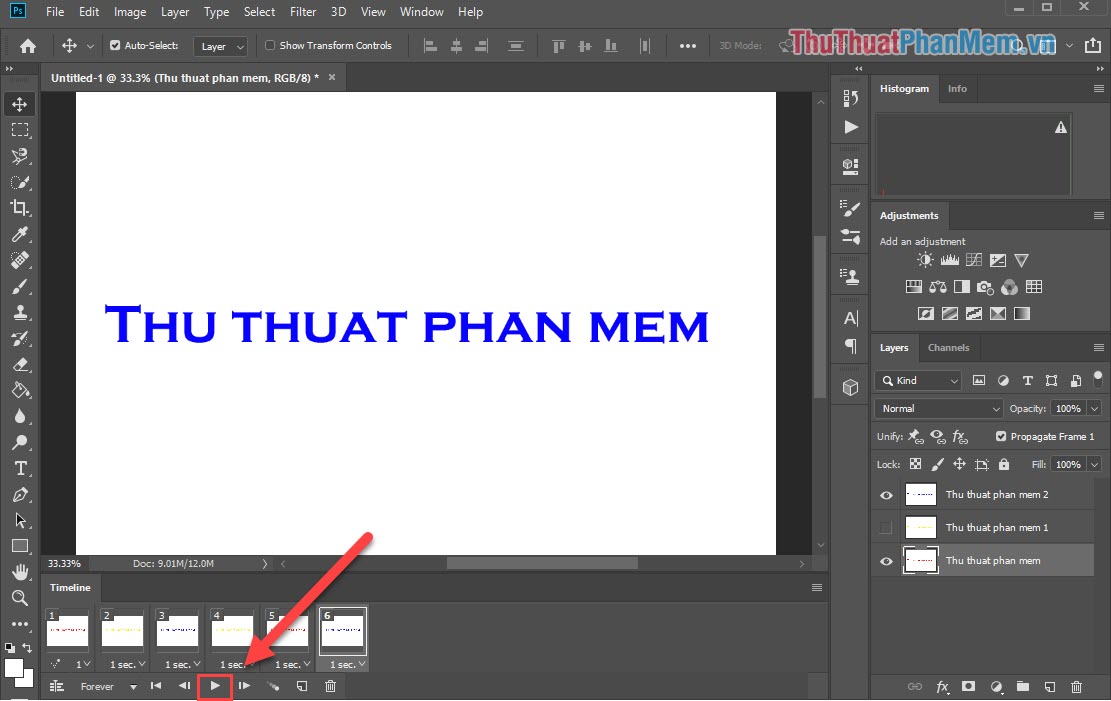
Step 8: After setting the time, click Play to see it.
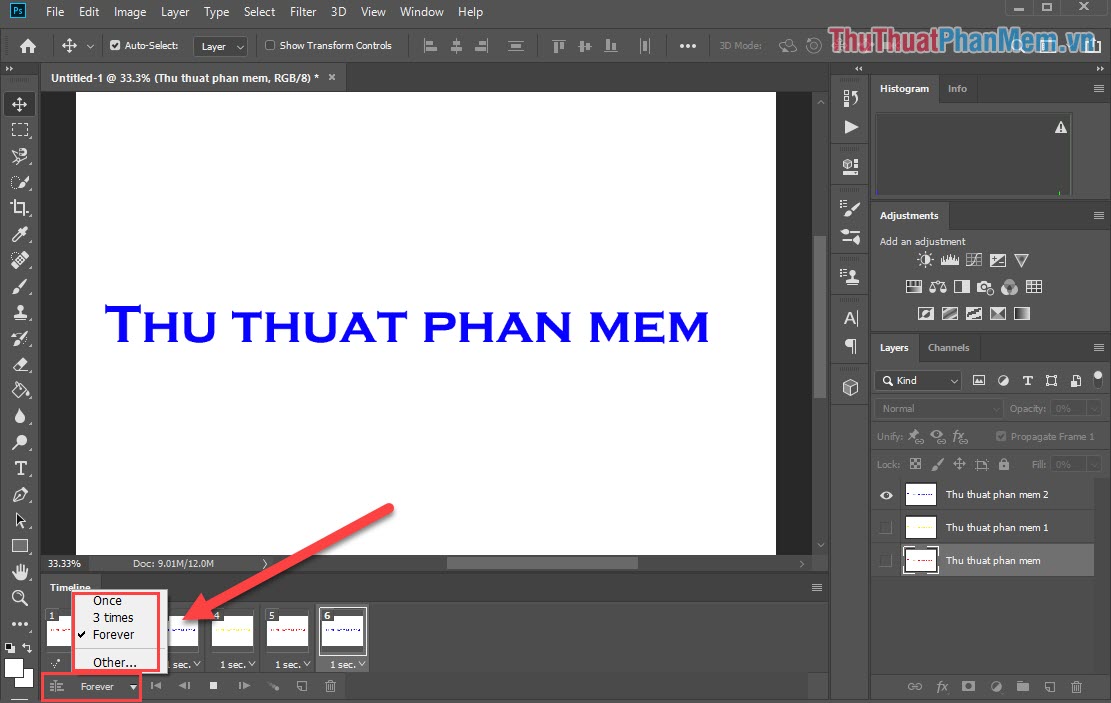
Step 9: Select the repeat mode of the GIF file. Available modes such as:
- Once: 1 time
- 3 times: 3 times
- Forever: Repeat forever
- Other.: Other
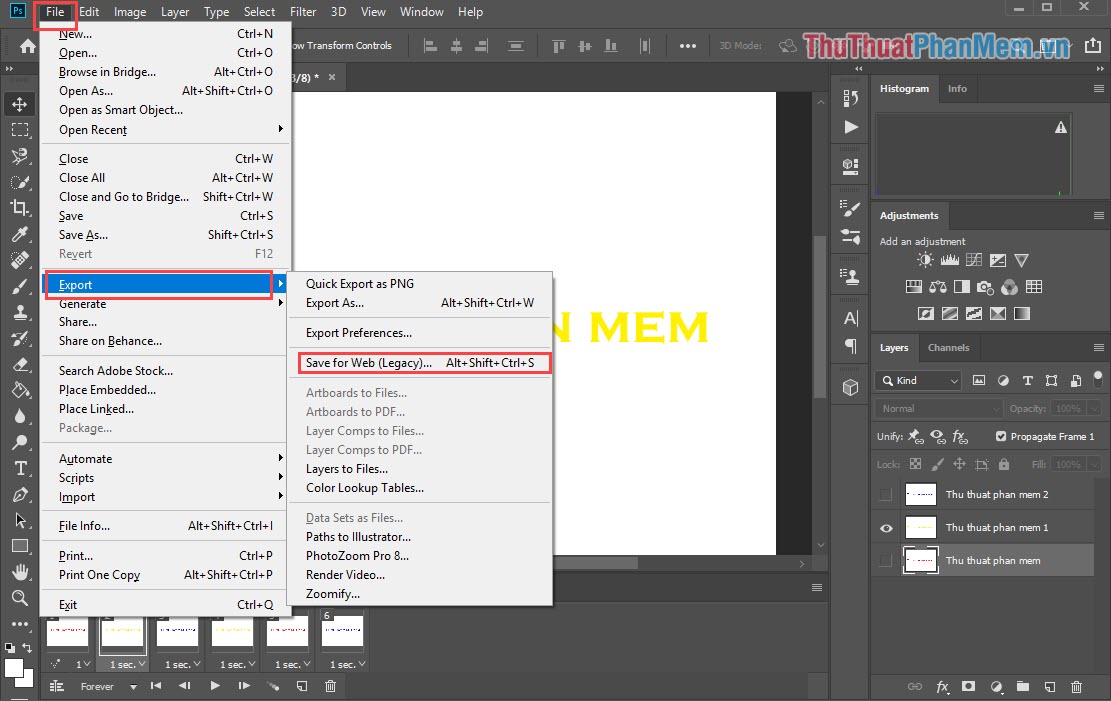
Step 10: Finally, we need to export the GIF file. You choose File -> Export -> Save for Web (Legacy). or you press Alt + Shift + Ctrl + S .
Step 11: Finally, click Save to finish.
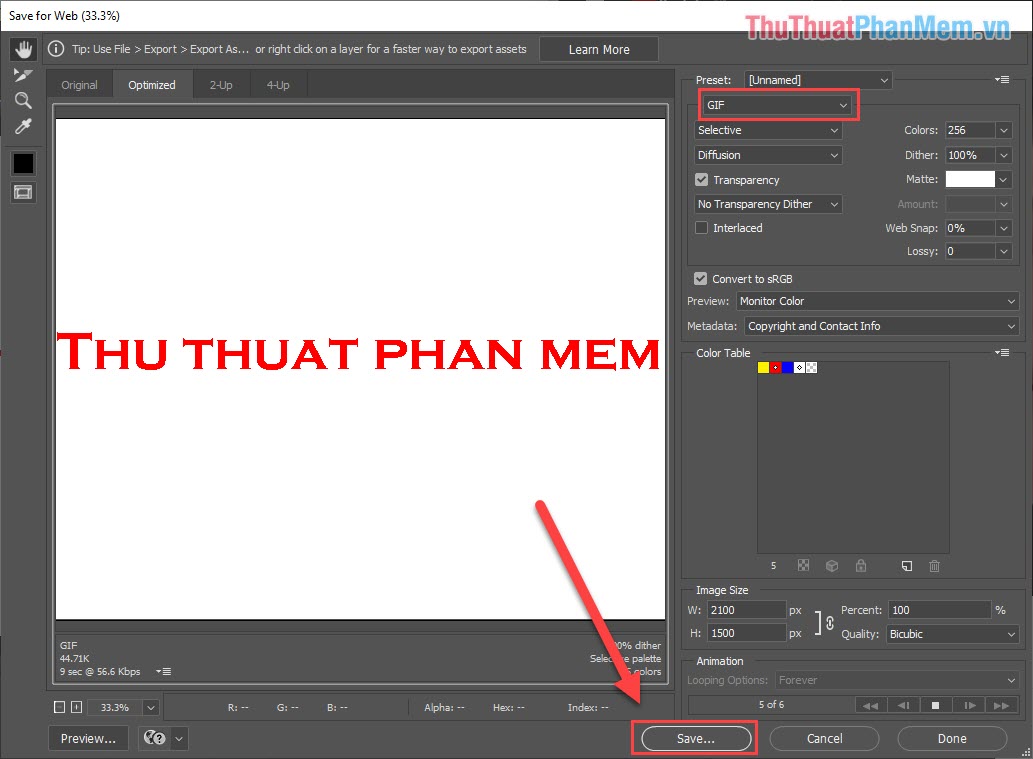
And here is our result:

In this article, Software Tips have shown you how to create GIF files in Photoshop quickly and simply. Good luck!
FAQ
What should I know about Create GIF Animations in Photoshop?
Focus on the key features, requirements, limitations, and practical use cases explained in this guide.
How do I get the best results with Create GIF Animations in Photoshop?
Follow the recommended steps, use current software or information, confirm compatibility, and review settings before major changes.
Are there any risks or limitations?
Potential limitations depend on compatibility, data quality, cost, privacy, support, and how the product or method is used.
Related Articles
 Instructions for Creating Animated GIF Images in Adobe Photoshop12 minutes read
 Instructions on How to Create 3D Effects and Objects in Photoshop10 minutes read
 Advanced User Interface for Applications with Animations6 minutes read
 Instructions for Creating Simple Infinite Animations with Cliplets5 minutes read
 How to Create a Snowman in Photoshop3 minutes read
 How to Create SVG from PNG or JPG in Photoshop4 minutes read
Reader Comments 0
Sign in with email or Google to join the discussion.