How to Create Annotated Screenshots Using Windows Paint
Frequently you need to create screenshots of your desktop for different usages as demonstration for your job or for educational utilisation. You need to annotate them and highlight the important parts to emphasise further and attract the...
Table of Contents
Method 1 of 2:
Make a Frame for Snapshots
-
 Use your artistic talent and practice to discover and improve the finished job. For example frame your snapshot to contrast it with the background.
 -
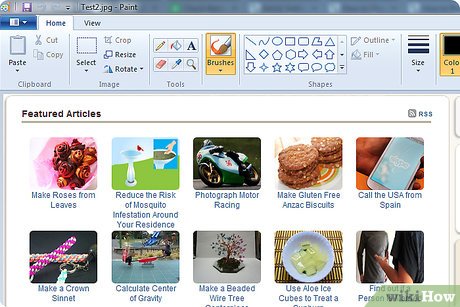 Open your Shot in the Windows Paint.
 -
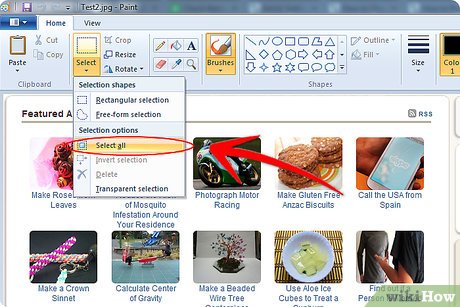 Select All from the drop-down menu.
 -
 Click on "Cut" from menu or "Ctrl + X" from your keyboard. Make the blank background larger using "Resize" arrow.
 -
 Select a colour of your choice (here red) and take the "bucket" from the menu and click it on the white are to be filled with red.
 -
 Click on Paste to put your snapshot back on the frame. Move the snapshot and resize the red frame for a desired frame size.
Method 2 of 2:
Use Rulers and Gridlines
-
 Use "View" menu to put rulers and gridlines on your work. If you like to meticulously position your annotation on the prepared screenshots you might be interested to add coordinates to facilitate and achieve that goal.
 -
 Click on "View" and check the required option boxes.
 -
 Draw polygons (here a regular octagon) and circles considering their geometric properties.
- To draw a circle put the curse in corner of one of the subdivisions. Read its coordinates from the horizontal and vertical rulers. Then move the cursor horizontally straight without changing its height, as much as you want its diameter. Next, move it vertically downwards equal to the value of the diameter. Then release the mouse cursor.

- To draw a circle put the curse in corner of one of the subdivisions. Read its coordinates from the horizontal and vertical rulers. Then move the cursor horizontally straight without changing its height, as much as you want its diameter. Next, move it vertically downwards equal to the value of the diameter. Then release the mouse cursor.
-
 Know that the free "Paint" application that comes with your Windows has versatile capabilities that with some patience and practice could be used as a professional tool.
4.5 ★ | 2 Vote
- How to edit and enhance screenshots with MS Paint
- 3 Quick Ways to Take Screenshots in Windows 8
- How to Create an Icon in Paint
- How to use Paint 3D on Windows 10 for beginners
- Replace the Paint 3D application with Paint Classic on Windows 10
- Paint on Windows 11 has new improvements, starting to roll out to the Dev channel
- Learn how to use Paint to edit photos on Windows
- Instructions on how to use Paint in Windows
- How to create a 3x4 photo in Paint
- Microsoft Copilot has a Copilot button and here's how to use it
MORE LIKE THIS
- How to Download Microsoft Word
- How to Insert Fillable Fields on Word on PC or Mac
- How to Copy and Paste in Microsoft Word
- How to Protect a PDF File from Copying
- How to Type in Korean on a Computer
- How to Recover Word Documents
- How to Reinstall Wireless Drivers
- How to Connect a Wireless Mouse
- How to Trim a Video on PC or Mac
- How to Watch Neverthink
-
 Quick tips to turn photos into frames in Canva
-
How to Make Your Phone's Ultra Wide Angle Camera Weirdly Awesome
-
Instructions for creating a Valentine double heart photo frame
-
How to draw a frame around text using the Snipping Tool
-
AMD just released a free tool that all PC gamers should try
-
How to Hang a Flat Screen TV
 Quick tips to turn photos into frames in Canva
 How to Make Your Phone's Ultra Wide Angle Camera Weirdly Awesome
 Instructions for creating a Valentine double heart photo frame
 How to draw a frame around text using the Snipping Tool
 AMD just released a free tool that all PC gamers should try
 How to Hang a Flat Screen TV
-
 Free Tools
-
Application
-
Web Email
-
Website - Blog
-
Web browser
-
Support Download - Upload
-
Software conversion
-
Social Network
-
Simulator software
-
Online payment
-
Office information
-
Music Software
-
Map and Positioning
-
Installation - Uninstall
-
Graphic design
-
Free - Discount
-
Email reader
-
Edit video
-
Edit photo
-
Compress and Decompress
-
Chat, Text, Call
-
Archive - Share
-
-
System
-
Mac OS X
-
Hardware
-
Game
-
Tech info
-
Technology
-
Science
-
Life
-
Electric
-
Program
-
Mobile