Table of Contents
This guide explains how to create a Timeline Chart in PowerPoint, with clear steps, practical tips, and important checks before you begin.
How to create Timeline charts in PowerPoint
Step 1:
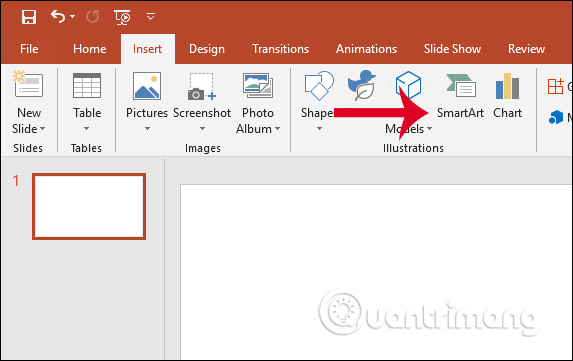
At the slide you want to create a chart, click Insert on the toolbar and then select SmartArt in the Illustrations group.
Step 2:
Displaying the new interface we navigate to the Process diagram group . Then look to the right for a variety of process graphs to choose from. If you want to get used to this type of chart, first choose a simple chart type , click Basic Timeline . Click Ok to select the chart type.

Step 3:
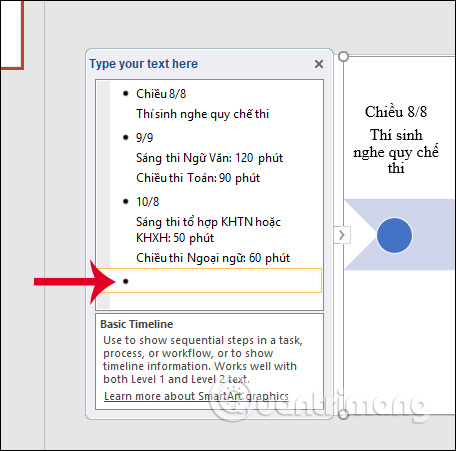
After the chart frame is inserted in the slide, you add data by clicking on [Text] and entering text . We can also adjust the font format in the chart.

To add other landmarks , you make in the box Type your text here right next. Clicking on the previous post before the position you want to insert and then Enter can create a new landmark.
To enter information, use the Ctrl + Enter key. Timelines can be adjusted by moving manually to fit.
Step 4:
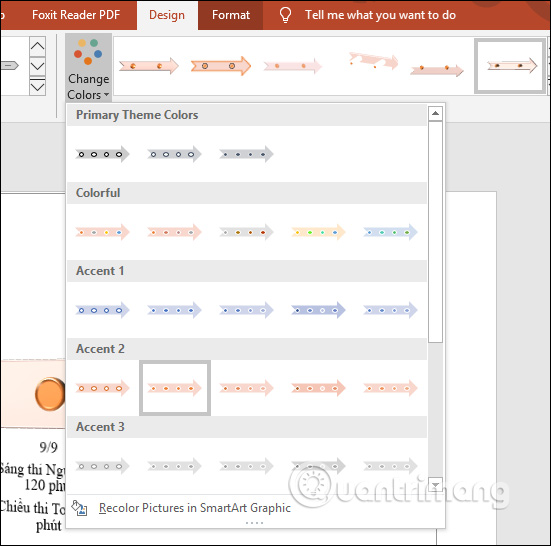
To redesign the timeline, click the Design tab, and then select the style in the SmartArt Styles section. Or you can click Change Colors to change the colors.
FAQ
What should I know about Create a Timeline Chart in PowerPoint?
Focus on the key features, requirements, limitations, and practical use cases explained in this guide.
How do I get the best results with Create a Timeline Chart in PowerPoint?
Follow the recommended steps, use current software or information, confirm compatibility, and review settings before major changes.
Are there any risks or limitations?
Potential limitations depend on compatibility, data quality, cost, privacy, support, and how the product or method is used.
Related Articles
 How to Make a Timeline in PowerPoint3 minutes read
 Instructions for Creating Charts on PowerPoint5 minutes read
 How to Create an Effect for an Excel Chart in PowerPoint9 minutes read
 Add Graphs to Slides in PowerPoint3 minutes read
 How to Displaying Charts in PowerPoint 20072 minutes read
 How to Draw a Gantt Chart in PowerPoint5 minutes read
Reader Comments 0
Sign in with email or Google to join the discussion.