Table of Contents
Understanding How to create a PowerPoint chart requires more than a headline. The overview below breaks down the key facts, changes, and user impact.
One of the basic and frequently used content in Word, Excel or PowerPoint is charts and graphs. We can represent the graph to clarify the presentation, especially in the case of presenting data types and statistics. Viewers can both quickly understand the content, but people do not need to present too much text content.
Similar to Word, Excel, PowerPoint also supports users to present content in the slide in graphic format. We can choose to display data, content in graphic formats such as column chart, LINE chart, pie chart, bar chart, area chart, scattering chart,. In The article below, Network Administrator will guide you how to create, insert charts, graphs in PowerPoint.
Video Tutorial on Inserting Charts on Slides
Instructions for Inserting Graphs in PowerPoint
Step 1:
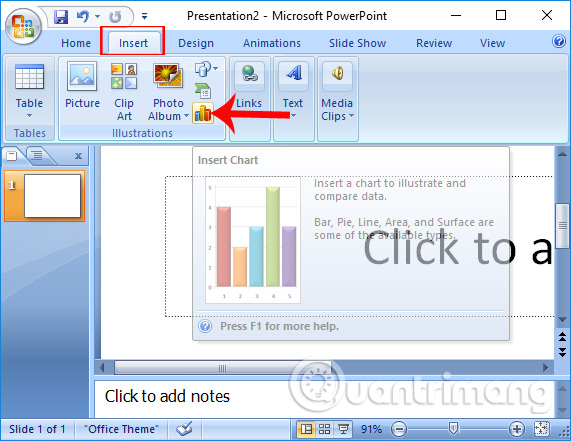
First open PowerPoint on your computer. In the main interface, click on the Insert tab and then select the Chart item.
Step 2:
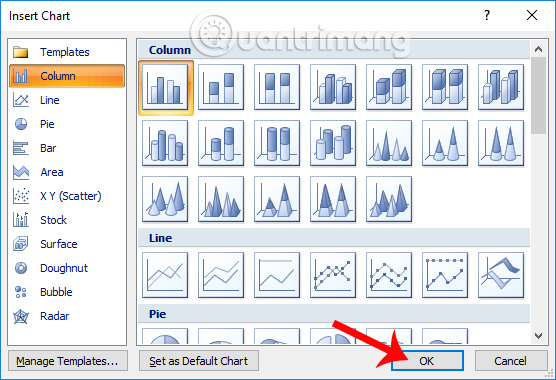
Soon the Insert Chart dialog box appears with chart types representing different content. We click on the type of chart we want to use, then click OK.
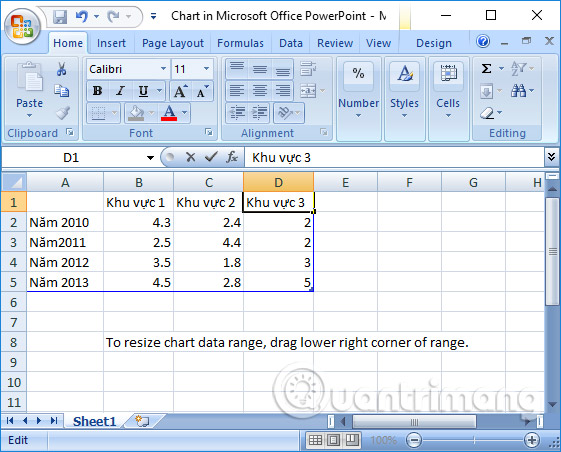
An Excel statistics table will appear. This statistics table allows users to enter data for PowerPoint.

Step 3:
Your job now is to enter the contents of the items into the Excel statistics table. The content we fill in Excel is automatically filled in PowerPoint. About the data section you can edit in the following steps.
Step 4:
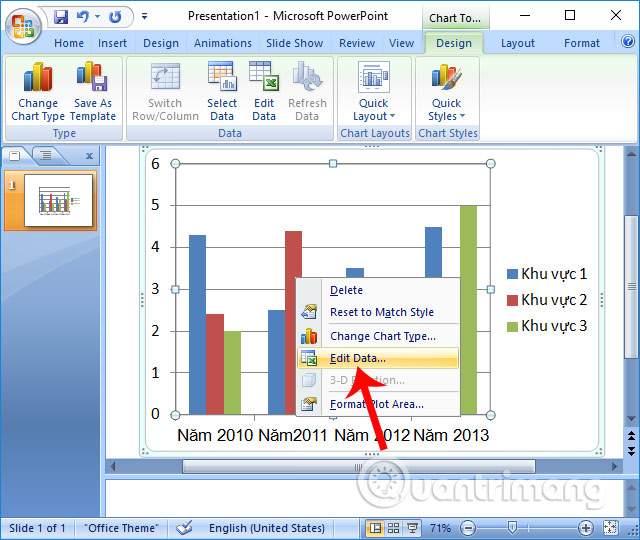
Next we will perform the data entry for each column in the map. You right-click on the table and select Edit Data.
Step 5:
Here the user will continue to work with Excel tables. If you want to delete a column of data, for example, delete column Area 3. You only need to highlight the column in Excel and then click Delete and Table Columns to delete the column.
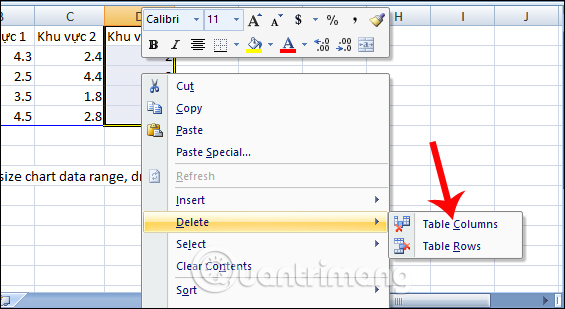
A message board appears, click OK to agree.

Step 6:
Next, the user will adjust the data in the table. When you adjust on Excel, that data will automatically enter on PowerPoint. When the message board appears, click OK to enter the data.

Step 7:
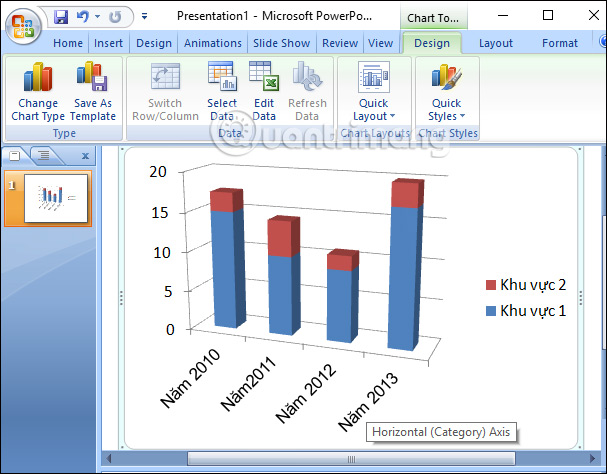
You fill in the next figures for the chart and can turn off the Excel table. So we have finished importing the complete data for the chart. In case if you want to change the chart type and still have the information filled, right-click on the chart and select Change Chart Type.

For example, I change it to a 3D model like the one below.
Step 8:
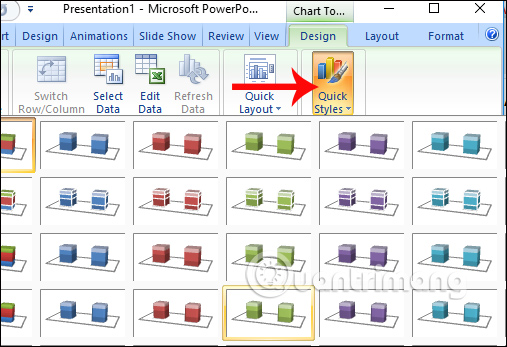
To change the color of each column in the chart, click on the chart and select Chart Styles, and then select the type of chart in the list.
Step 9:
To change the font, right-click the table and select Font. Then select the font type you want to use for the content in the graph.

Step 10:
If you want to insert a background image for the chart, right-click and choose Format Chart Area.
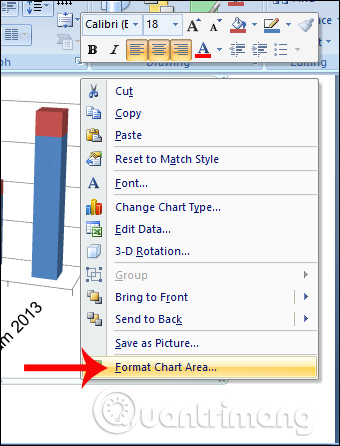
In the next dialog box, we select Fill or select Picture or texture fill. Under the Insert form section, click File to upload the computer image.

You select the image in the folder on your computer, then click Insert. Soon the chart has been inserted as the background image below.

Above is a basic tutorial on how to insert charts, as well as how to reformat a PowerPoint chart. After entering the content on the Excel table, you can customize the other item on PowerPoint from the font, color for the chart, chart type,.
I wish you all success!
FAQ
What does Instructions for Creating Charts on PowerPoint explain?
Understanding How to create a PowerPoint chart requires more than a headline.
Who is most affected by How to create a PowerPoint chart?
The overview below breaks down the key facts, changes, and user impact.
What are the key takeaways from this topic?
One of the basic and frequently used content in Word, Excel or PowerPoint is charts and graphs.






Reader Comments 0
Sign in with email or Google to join the discussion.