How to make a Timeline in PowerPoint
A timeline or timeline chart in PowerPoint is a slide format that depicts a time series journey. TipsMake.com will guide you to create timelines professionally on PowerPoint.
PowerPoint allows you to create a basic timeline and be free to manually adjust the arrangement to suit your users' data and needs. Its product is a simple graphic format suitable for presentations but not flexible enough if you want to show more accurate details and update the timeline more often.
Here i will show you how to create a simple manual timeline.
First, you need to create a new blank slide.

Click the Insert ribbon on the toolbar and click SmartArt, which belongs to the Illustrations group .

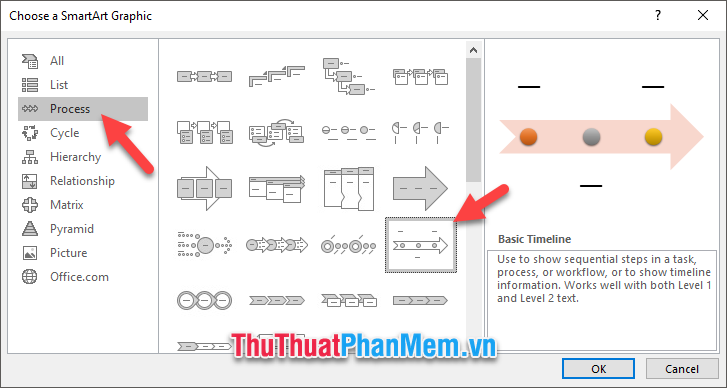
The Choose a SmartArt Graphic function window appears, click open the Process tab . Here you can optionally choose the PowerPoint timeline graphics you want. You should choose Basic Timeline to describe the time graph in the simplest way.
Click OK to confirm the insert.
After the Basic Timeline is inserted into your slide, you can add data to it by clicking [Text] and entering text.

To add other landmarks, you can do that in Type your text here . Clicking on the information line before the position you want to insert and then Enter can create a new landmark.
To write the information down the line (the way down the line date in the picture below), you use the key combination Ctrl + Enter .
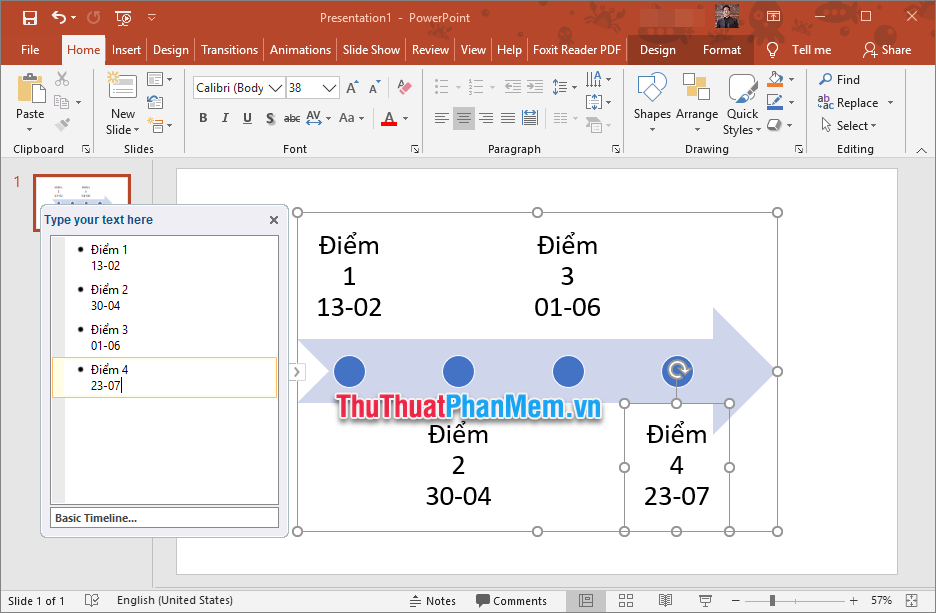
You can also customize the manual pull to move the milestones to suit the more time distance.

So you've completed the process of creating a timeline in PowerPoint already. Currently, the only remaining job is to make up a bit more for my timeline.
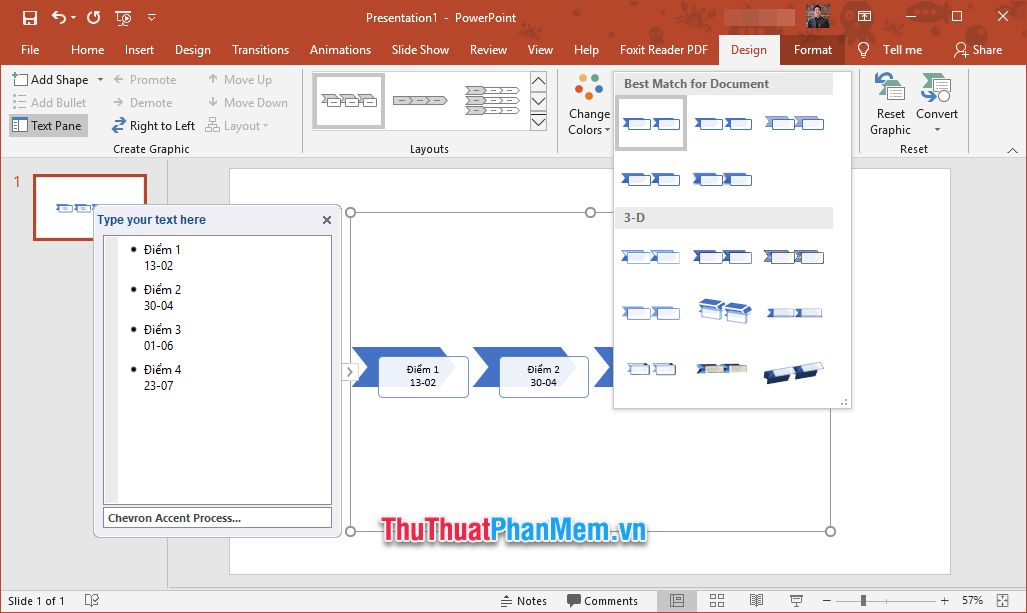
To customize the overall look of your timeline, you can change its style by clicking the timeline, then opening the Design ribbon in SMARTART TOOLS (which appears when you click the timeline).
You choose the styles in the Layouts and the colors that come with SmartArt Styles .
Or you can change the color tone at Change Colors .
If you do not want to choose the color combination available in the PowerPoint proposal, you can adjust the individual tones for each element of the timeline by clicking on each element of the timeline and changing the color of the timeline it.
Was this article helpful?
Your feedback helps us improve.
Related Articles
 How to create a Timeline chart in PowerPoint2 minutes read
 Instructions for managing Facebook Timeline7 minutes read
 Comprehensive guide for Facebook Timeline13 minutes read
 PowerPoint 2019 (Part 11): Presenting Slideshows7 minutes read
 Can try the Timeline feature on Windows 10 right now2 minutes read
 10 awesome PowerPoint templates make the presentation 'shine'8 minutes read
Reader Comments 0
Sign in with email or Google to join the discussion.