Table of Contents
This practical guide walks through how to draw a gantt chart in PowerPoint, explains the main requirements, and highlights common issues that may appear along the way.
Create a new Gantt chart in PowerPoint
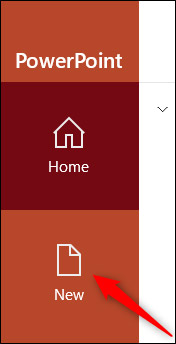
To get started, open the Microsoft PowerPoint app and select the ' New ' tab in the options pane on the left.
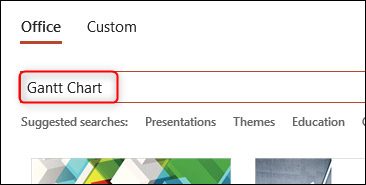
In the template search box, enter the keyword ' Gantt Chart ' and press ' Enter '.
There will be 5 Gantt chart templates appearing in search results. Choose the template best suited to your project by clicking on the chart. In this example, we will use a template named ' Blue Two Year Gantt Chart '.
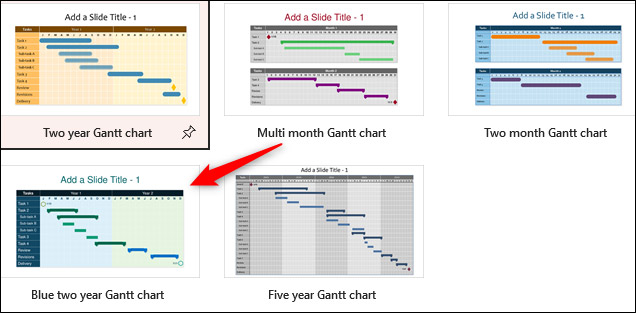 There are 5 Gantt chart patterns
After clicking to select the template, a window will immediately appear, showing you a preview of the selected template. Click ' Create '.

You can now begin to customize the Gantt chart that appears on the first slide in PowerPoint.
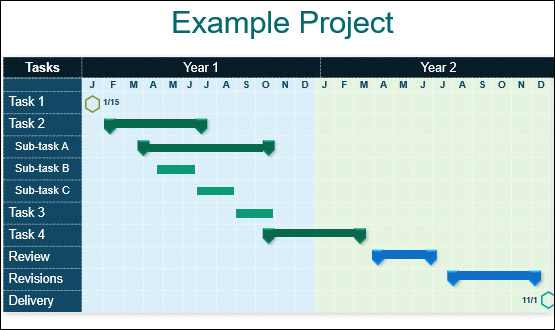 Customization start
First, edit the title areas to reflect your project's content, including the corresponding timelines (Year) and tasks (Tasks). To do this, just click in the text box and type in the text you want.
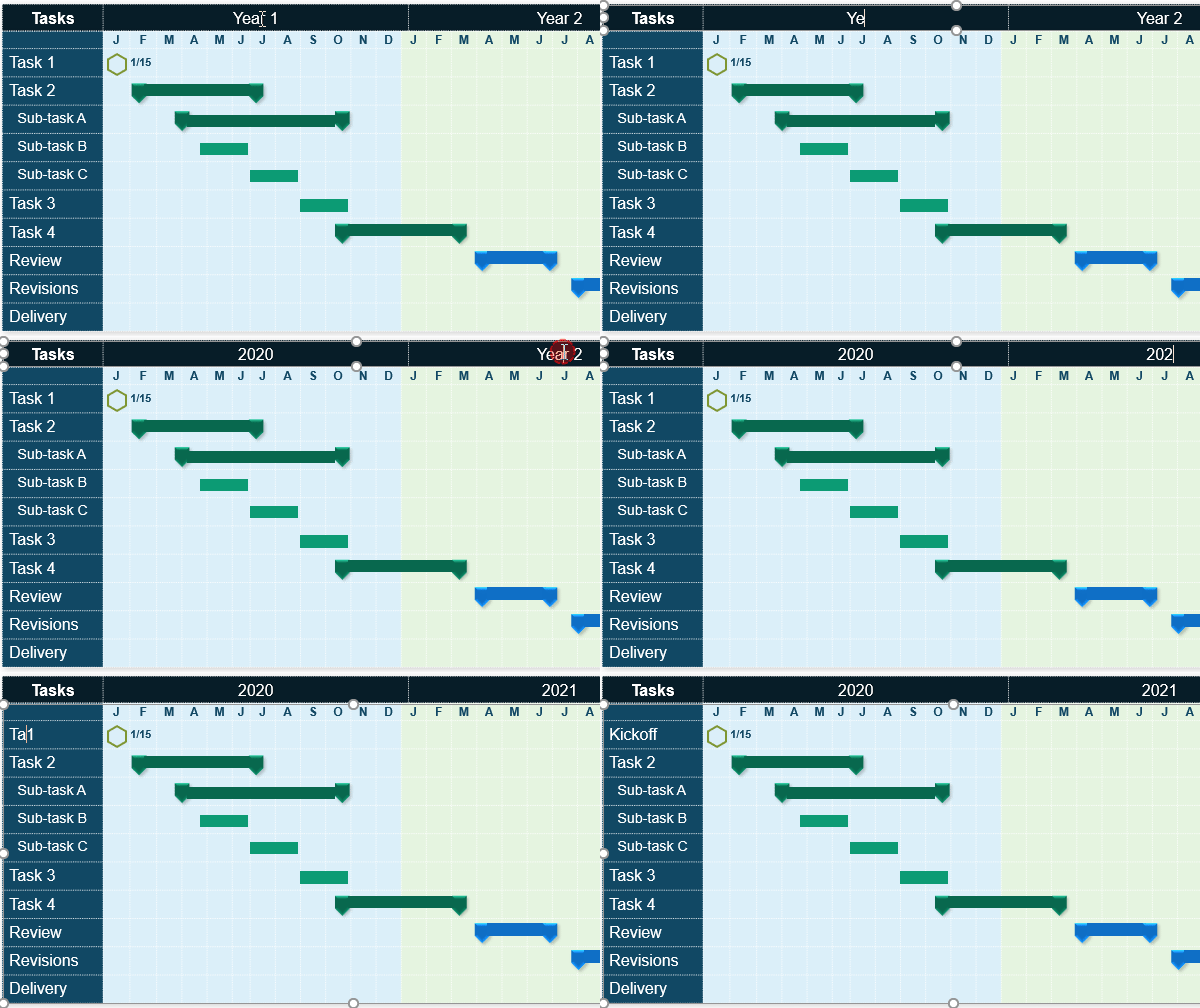 Edit column headers
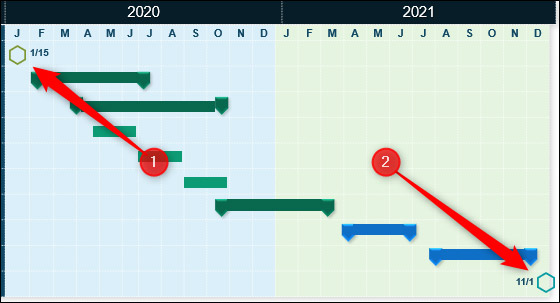
The icons in the top left and bottom right corner of the Gantt chart represent (1) the start date and (2) the release date of the project. You can edit timelines by clicking on the date, then entering the start date and release date of the project respectively.
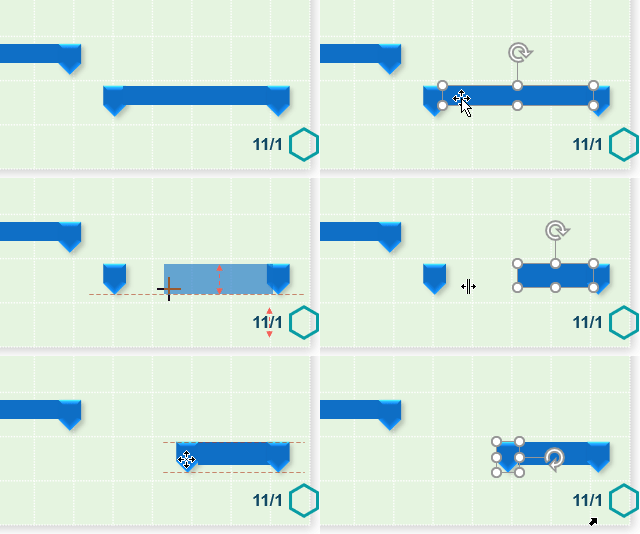
When you've finished editing the content, you can switch to adjusting the length (which represents the duration of the task / project) of the taskbars. To do this, click on the taskbar you want and drag to adjust the length accordingly. You can also adjust the start / stop markers by clicking and dragging them to their respective positions.
Change the Gantt chart colors
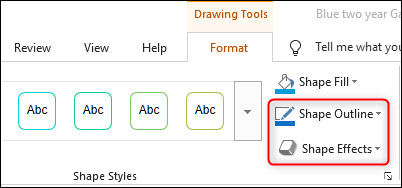
To change the colors to match the spirit of your project or company logo, click to select the item for which you want to correct the color. Then navigate to the ' Format ' tab , click on ' Shape Styles ' and choose ' Shape Fill '. From the drop-down menu that appears, choose the color you want to use.
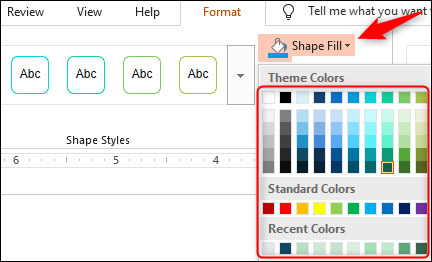
There are also other nice customization options, such as changing the color of the border by selecting a color in 'Shape Outline'. Or you can even add advanced effects, such as shadows, by selecting the desired effect under ' Shape Effect '.
That's all it takes to create a Gantt chart in PowerPoint. How to design the chart depends on what you want. But the general rule of thumb is to follow the spirit of the project, and keep the chart as intuitive as possible by adding only what's needed.
Key Takeaways
Use the information above as a practical reference for how to draw a gantt chart in PowerPoint. Review each step carefully, confirm any requirements, and choose the option that best fits your situation.
FAQ
What does this guide explain about Draw a Gantt Chart in PowerPoint?
It explains the main concepts, practical considerations, and useful steps related to draw a gantt chart in PowerPoint without requiring advanced knowledge.
Who can benefit from learning about Draw a Gantt Chart in PowerPoint?
This information is useful for readers who want a clear overview, practical guidance, and reliable steps related to draw a gantt chart in PowerPoint.
What should I check before applying this information?
Review the requirements, confirm that your device, software, or situation matches the instructions, and back up important data before making major changes.
Related Articles
 Gantt Chart in Excel, How to Create, How to Draw Gantt Chart in Excel7 minutes read
 Tasks: How to Create a Gantt Chart5 minutes read
 How to Create a Gantt Chart for Project Management in Excel7 minutes read
 How to Create a Timeline Chart in PowerPoint3 minutes read
 Instructions for Creating Charts on PowerPoint5 minutes read
 How to Displaying Charts in PowerPoint 20072 minutes read
Reader Comments 0
Sign in with email or Google to join the discussion.