How to Create a Timeline in Excel
Excel isn't heavy on the graphics, but there are still several ways to create a timeline. If you have Excel 2013 or later, you can even create it automatically from a pivot table. Earlier versions will have to rely on SmartArt, templates,....
Method 1 of 3:
Using SmartArt (Excel 2007 or Later)
-
 Create a new spreadsheet. SmartArt creates a new graphic layout for you to add data. It does not transform your existing data, so create a new blank spreadsheet for your timeline.
 -
 Open the SmartArt menu. Depending on your version of Excel, either click the SmartArt tab in the ribbon menu, or click the Insert tab, then the SmartArt button. This option is available in Excel 2007 or later.
 -
 Select the timeline from the Process submenu. Click Process in the SmartArt ribbon menu, in the Insert Smart Art Graphic group. In the drop-down menu that appears, select Basic Timeline (a right-facing arrow).
- You can adapt various other Process graphics to use as timeline. To see the name of each graphic, move your cursor over the icon and wait until the hover text appears.
-
 Add more events. By default you only start out with a few events. To add more, select the timeline. A Text Pane should appear to the left of the graphic. Click the + button at the top of the text pane to add a new timeline event.
- To enlarge the timeline without adding new events, click the timeline to show a box outline. Drag the right or left side of the box outward.
-
 Edit your timeline. Type in the Text Pane box to add entries. You can also copy-paste data into the timeline and have Excel guess at how to arrange it. Typically, you'll end up with each column of data as a single timeline entry.
Method 2 of 3:
Using Pivot Table Analysis (Excel 2013 or Later)
-
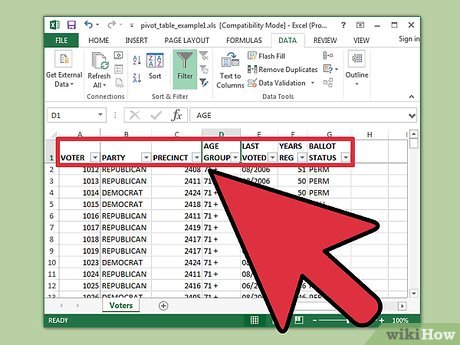 Open the spreadsheet that has a pivot table. In order to automatically generate a timeline, your data must be organized into a pivot table. You also need the pivot table analyze menu, which was introduced in Excel 2013.[1]
 -
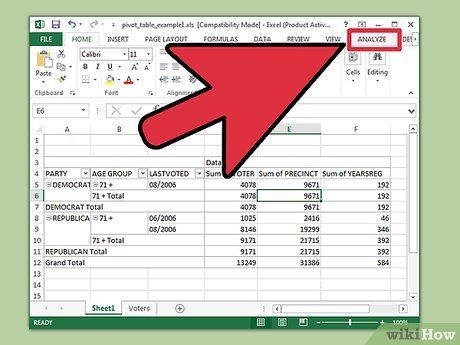 Click anywhere inside the pivot table. This will open the 'PIVOT TABLE TOOLS' in the top ribbon.
 -
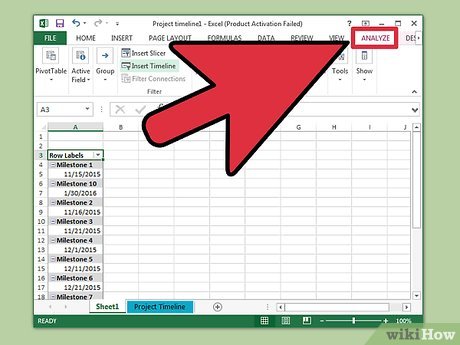 Click 'Analyze'. This will open a ribbon with options to manipulate the data in the table.
 -
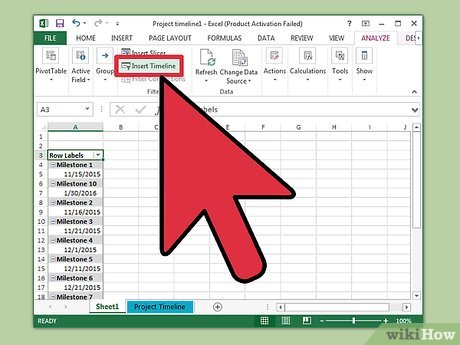 Click 'Insert Timeline'. A dialog box will pop up showing fields that correspond to a date format. Note that dates entered as text will not be recognized.
 -
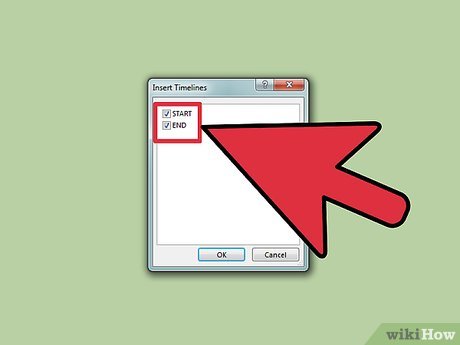 Select the Applicable field and click OK. A new box that allows you to navigate through your timeline will appear.
 -
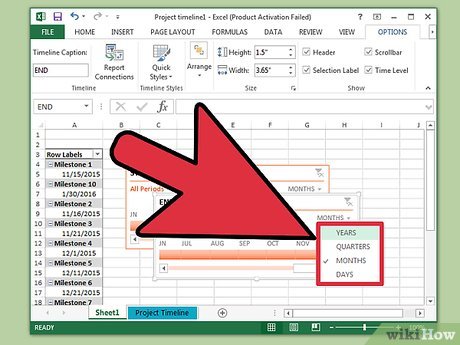 Select how the data will be filtered. Depending on the available information you can select how the data will be filtered. (Either by months, years or quarters).
 -
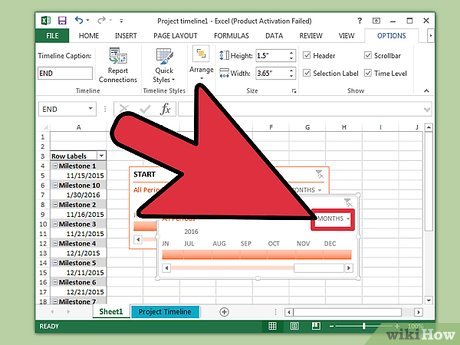 Examine monthly data. When you click on a month in the Timeline Control Box, the pivot table will show data that pertains to that particular month alone.
 -
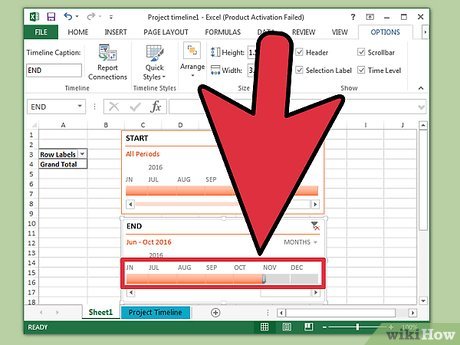 Broaden your selection. You may widen your selection by clicking and dragging the sides of the slider.
Method 3 of 3:
Using a Basic Spreadsheet (Any Version)
-
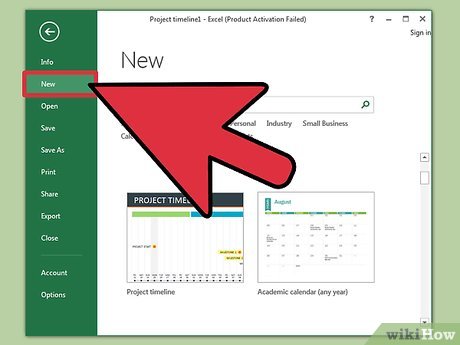 Consider downloading a template. While not necessary, a template will save you some work by setting up the timeline structure for you. You can check whether you already have a timeline template by browsing options in the File → New or File → New from Template commands. Otherwise, search online for user-created timeline templates. If you don't want to use a template, continue on to the next step.
- If your timeline tracks the progress of a multi-branched project, consider looking for "Gantt chart" templates instead.[2]
-
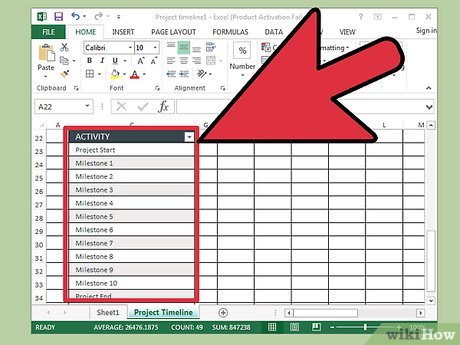 Start your own timeline from ordinary cells. You can set up a basic timeline with an ordinary blank spreadsheet. Type the dates of your timeline in one row, spacing them out with blank cells roughly in proportion to the time between them.
 -
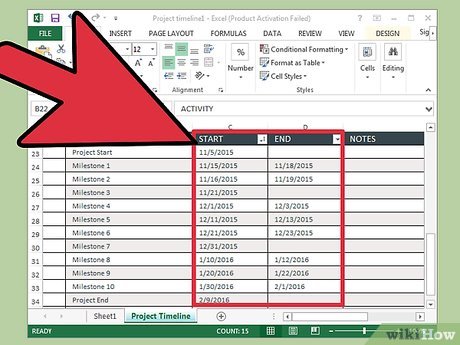 Write your timeline entries. In the cell directly above or below each date, write a description of the event that happened on that date. Don't worry if it looks sloppy.
- Alternating descriptions above and below the date tend to make the most readable timelines.
-
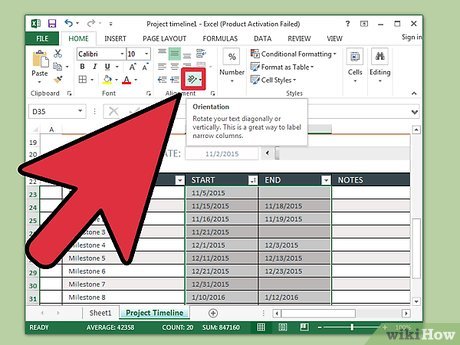 Angle the descriptions. Select the row containing your descriptions. Click the Home tab in the ribbon menu, then look for the Orientation button under the Alignment group. (In some versions, the Orientation button looks like the letters abc.) Click this button and select one of the angled text options. The rotated text should make your descriptions fit the timeline.
- If you are using Excel 2003 or earlier, instead right-click the selected cells. Select Format Cells, then the Alignment tab. Type in the number of degrees you'd like the text to rotate, then click OK.[3]