Comprehensive guide for Facebook Timeline
Recently, Facebook announced that using Timeline - the newly redesigned profile page of this social network - is a must for all users. If you don't switch to Timeline yourself, Facebook will do this in a short time.
Recently, Facebook announced that using Timeline - the newly redesigned profile page of this social network - is a must for all users. If you don't switch to Timeline yourself, Facebook will do this in a short time.
Facebook has been slowly deploying Timeline since December 2011, after introducing it for the first time at the Facebook developer conference F8 last September. This project is one of Facebook's ambitious and important redesign projects because this social network is looking to become a digital documentary 'with the ability to record users' life data. From birth to the present and access to the old post easier.
Although not everyone supports Timeline, it is imperative to switch to it. The following is a comprehensive guide to Timeline, from performing the transfer job to adjusting security settings to make transfer easier.
Get started: The basics of Facebook Timeline
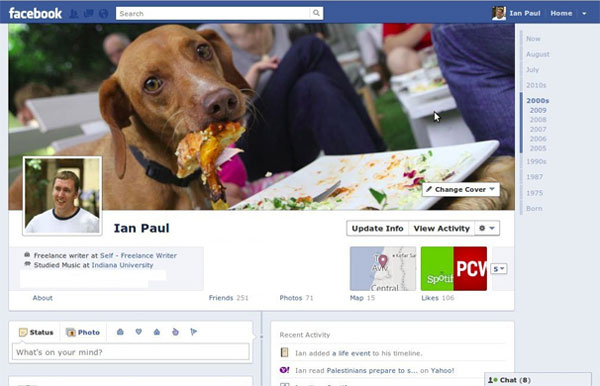
To manually switch the profile to Timeline, go to facebook.com/timeline and click the ' Get It Now ' button.
After making the transfer, Facebook will immediately lead you to your new Timeline page. At this point, only you can see this new Timeline - all your Facebook friends still only see the old profile design.
From the day the user chooses to update to Timeline (or from the day Facebook helps you), you will have a week to make the changes you want - including deleting old posts, adding events, . - before the profile goes live and friends can see it. Or, if you're ready to introduce Timeline before a 1 week period, you can click on the ' Publish Now ' button to get it to work.
Facebook's Timeline feature is a must for all users of this social networking service.
New features
There are many new features and components that users can see once they switch to using Timeline. Here are some important features:
Easy privacy management : When updating your status, you will see a drop-down menu displaying exactly who you want to share: Public , Friends , Only Me or Custom . When changing this setting, it will remain until the next upload when the user wants to change it again. You can also specify a status for a list.
Navigating Timeline : There are two very easy ways to access old posts. First, you can choose a year by clicking on the Timeline slider on the right side of the screen, which will show the months. Alternatively, users can start by clicking on the option below their name and next to ' Update Info ', named ' Activity Log '.
Inside Activity Log you can filter old posts with everything you remember, from just a posted item, posting by others, comments, notes, likes, updates, . This It is really useful when you are considering what to keep on the Timeline.
Add 'Life Events' : Right on your security managers is a new option - ' Life Event '. Not only can you share your status or photos with your friends, you can also add your Timeline by highlighting past events, such as your previous work, friends and family, moving places, travel,.
After selecting a category to update, you will see a form to fill in the details: the location, who you were with, the date, the old story, the photos and a security setting. For those who can see this event.
Highlight events : As part of the Timeline interface, users can specify which posts are worthy of prominence and which are less important. This will affect the size of the posting.
For example, if you want to highlight a new photo album of a new travel tour, move the mouse pointer to this item and click the star icon. It will transfer this post to ' featured post ', meaning it is worth posting.
Similarly, if you want to hide a post on your Timeline but not delete it completely, move your mouse over the posting and click on the pencil icon.
How to adjust security settings
When you (or Facebook) switch your account to the new Timeline, there will be a week to make adjustments to the old postings and security settings before Timline goes live and everyone can see it. Users can post Timeline anytime they want during the 7-day waiting period.
One important thing to remember is that Facebook does not change the privacy settings of older posts; it preserves the security settings exactly the same time you post them. This means that although you can now limit the posting on the wall to the ' Limited Profile ' list, the previous yearly posts are only set to ' Friends only ' or even Public by selection. Choose Limited Profile at that time has not yet appeared.
Users have several options when filtering out old posts:
For all postings in friends-only mode: One thing that can definitely happen is that your old posts have a lot of different security settings depending on when they're posted. One way - simplest of all - is to use one of the blank security settings: ' Limit the Audience for past Posts '. You will see this option near the bottom of the Privacy Settings page.
If you decide to use this option, the content on the Timeline you just shared with everyone - such as public posts - will automatically switch to Friends only mode. With this setting, people who have been tagged and their friends can still view that post.
Limit others to upload to your Timeline : Another way to hide older posts is to restrict some people or lists of people who can't see others posted on your wall. To do this, go to the Privacy Settings page, select ' Edit Settings ' next to ' How You Connect '. Select the dropdown menu next to the last item - ' Who can see posts by others on your timeline? 'and select' Custom . '
In the dialog box under the ' Hide this from ' section, enter the name of the person or the list of people you want to exclude from viewing other people's posts on your wall - for example, those on the Limited Profile list. Then, click Save Changes .
Use 'Activity Log' to manually edit posts : On your Timeline, clicking on the ' Activity Log ' button appears under Cover Photo (the largest photo). Here, users can use the menu in the top right corner named ' All ' to pull out all kinds of posts or events that have ever appeared on your wall.
Here, users can see who can currently view certain items by clicking on the gear icon next to the posting. You can also click on the circle icon next to it to star it on the Timeline, hide it from the Timeline, delete all posts or change dates.
Be careful with scams
If you're not a fan of Facebook's new Timeline interface, you're not alone. According to a poll organized by the CIO, in about 800 people, 88% responded that they did not like the new profile design. However, there is no way or button to return to the old profile interface.
These pages (users can find them easily by searching on Facebook with the Timeline keyword), have attracted thousands of people. They all post the ' Deactivate Facebook Timeline on your Profile ' or ' Deactivate Your FB Timeline ' lines (temporarily stop using the Timeline interface on the Profile page). Besides, these lines also appear under applications, websites, organizations, .
They also have a lot in common: Most requests that you like their pages before they reveal how to get the old profile design, then there will be instructions on how to click a set of Like buttons and buttons. Share , select city or country; and select friends to invite them to use the app or to join the group.
Security experts suggest that you make sure about these sites. Normally, the Facebook home page and its official security page are the two best sources to check every time you are unsure about a certain page or its legitimacy. On these pages, Facebook will post information about new features and tips.
Facebook Timeline and new applications
Along with Facebook's announcement of Timeline last September, the company also introduced a new set of applications that will go with the Timeline. Recently, Facebook has officially launched more than 60 new applications.
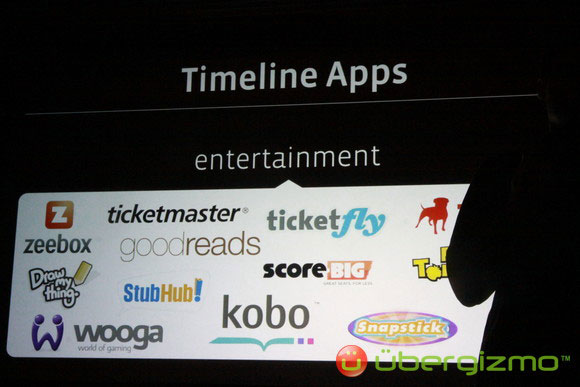
While Facebook hopes that these new apps will 'hook' users to stay longer, you may see new changes: Ticker and News Feed , which will be more messy, as well. To avoid this, here are a few things you can do:
Select pre-download settings : Below the app summary information when you choose to download for the first time, an application always has an option: ' Who can see activity from this app on Facebook '. The default security setting that you have previously set - public, friends or custom - will determine the automatic settings for all applications, unless you change it.
If you feel like using some app but don't like your activities uploading your friends' News Feeds and Tickers, choose ' Only Me '. While the activities will still appear on Timline, no one will be able to view them.
Adjust settings after downloading : If you don't know the properties of certain applications or want to edit them, you can review them in the Privacy Setting page.
From the drop-down menu in the top right corner of the screen select ' Privacy Settings ' then select ' Edit Settings ' → ' Apps and Websites '. On the application security page, click ' Edit Settings ' next to 'Apps you use' - it will show you all downloaded applications with related permissions and security.
Here, you can remove the application if you no longer want it to connect to your account. Users also see what permissions the application has and remove some if necessary (some permissions are required, you cannot remove them). The last option, ' App activity privacy ' indicates who can see the postings and activities from this app. If you don't want Facebook to share your activity, change this option to ' Only Me '.
Knowing how your friends share your activity: Friends and others you share information with are also able to share your activity with the application they're using.
To prevent friends from sharing activities on their apps with others on Facebook, visit the ' Privacy Settings ' page, select' Edit Settings ' next to ' Apps and Websites ' then select' How people bring cần thiết Info của bạn cần dùng '. Besides, remember to check the box next to ' My app activity '.
So we've provided a comprehensive guide to Facebook's new interface - Timeline. After going through the steps, it's time for us to enjoy our achievements. I wish you all success.
- Things to do when switching to Facebook's Timeline interface
- Find anything on Facebook Timeline with the following 5 tools
- How to lock Wall Facebook, prevent others from posting on Facebook wall
- How to hide Facebook posts is extremely simple
- How to hide all old posts on Timeline Facebook
- How to make a Timeline in PowerPoint
- What exactly is Facebook doing with AI?
- Facebook cover photo Cuong Tieu Ngu
- How to find users on Tik Tok by ID
- How to post multiple photos on Tweet on Twitter
- How to login to Facebook computer with QR code
- How to add multiple photos to Facebook and Messenger Story
- How to check who tracks you on Facebook using InitialChatFriendsList is it correct?
- How to make money by Kwai
- Instructions to download music on Tik Tok to your phone as a ringtone
- Best Facebook name, meaning, unique, funny, mood
- Basic carl bot setup
- Instructions on how to remove less interactive friends on Facebook


-
 Instructions on creating an automatically updating timeline in Google Sheets
-
How to Backup Your Google Maps Timeline
-
Mapping Cyber Incidents with Windows Timeline: The What and When of Digital Forensics
-
How to create an interactive timeline using CSS and JavaScript
-
Instructions for drawing Timeline diagrams on Google Slides
-
How to create a Timeline chart in PowerPoint
 Instructions on creating an automatically updating timeline in Google Sheets
 How to Backup Your Google Maps Timeline
 Mapping Cyber Incidents with Windows Timeline: The What and When of Digital Forensics
 How to create an interactive timeline using CSS and JavaScript
 Instructions for drawing Timeline diagrams on Google Slides
 How to create a Timeline chart in PowerPoint
-
Application
-
Web Email
-
Website - Blog
-
Web browser
-
Support Download - Upload
-
Software conversion
-
Social Network
-
Simulator software
-
Online payment
-
Office information
-
Music Software
-
Map and Positioning
-
Installation - Uninstall
-
Graphic design
-
Free - Discount
-
Email reader
-
Edit video
-
Edit photo
-
Compress and Decompress
-
Chat, Text, Call
-
Archive - Share
-
-
System
-
Mac OS X
-
Hardware
-
Game
-
Tech info
-
Technology
-
Science
-
Life
-
Electric
-
Program
-
Mobile