How to schedule automatic light/dark mode switching in Windows 11
Just like Windows 10, Windows 11 includes light and dark modes to suit each person's preferences. When it gets dark, the platform's windows will be black. Selecting a light background will turn the window color white.
However, Windows 11 does not include any additional options that allow you to schedule it to automatically switch dark and light modes. However, you can still configure the dark/light mode to change automatically using the Auto Dark Mode app.
Set up automatic dark/light mode switching with Auto Dark Mode
Auto Dark Mode is a nifty freeware that allows you to schedule dark and light mode transitions. For example, you can use Auto Dark Mode to switch to light mode at 9am and back to dark mode at 6pm. The app gives you full control over the time, so you can set it to your liking.
Here's how you can set up automatic dark and light mode switching with Auto Dark Mode:
1. Open the Auto Dark Mode GitHub download page in the browser.
2. Click AutoDarkModeX_10.1.10.exe to download the installer of Auto Dark Mode.
3. Open a File Explorer window (you can press the Win + E hotkey to open it).
4. Open the folder where you saved the installer.
5. Double-click AutoDarkModeX_10.1.0.10.exe to open the installation wizard and install the software.
6. Auto Dark Mode will launch automatically after installation. However, if this doesn't happen for some reason, type Auto Dark Mode in the Windows 11 search box to find and open the app.
7. Select the Time tab of Auto Dark Mode shown directly below.
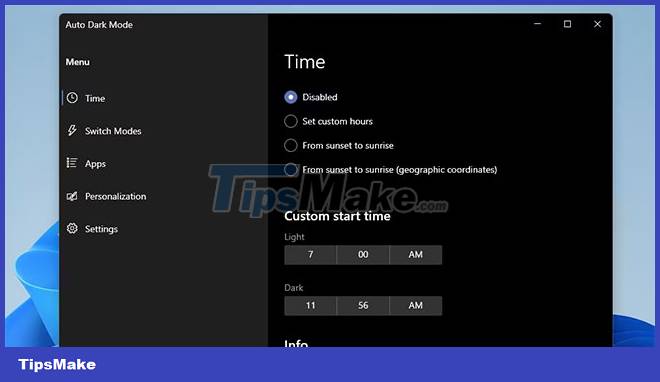
8. Then click the Set custom hours button .
9. Click the Light clock setting to select the mode switching time. You will need to click the up/down arrows on the time picker and tick button to select and apply the time.
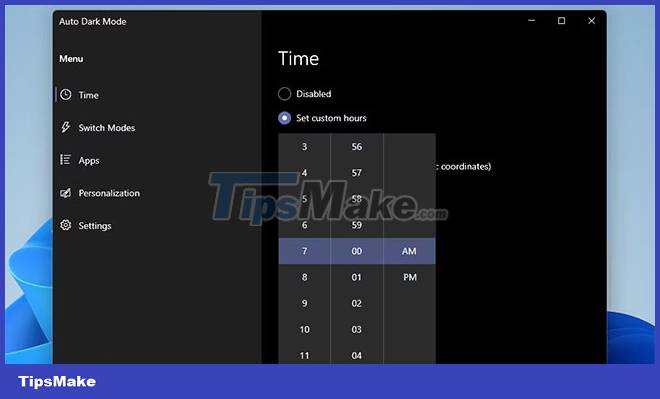
10. To set how long dark mode turns on, click Dark clock setting . Then choose the time for that mode to start and click the tick button.
11. Then wait for the time you selected to start the light and dark mode.
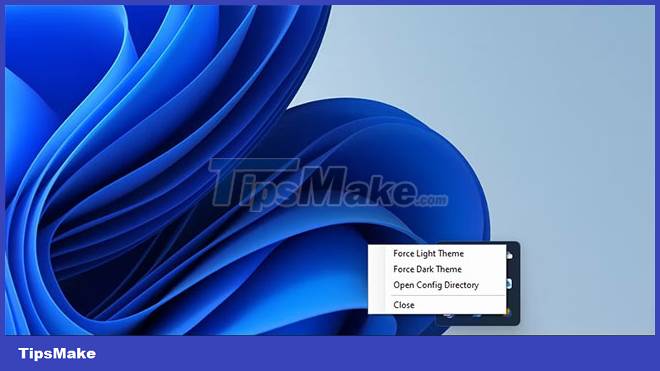
The program will still run after you close the window, so you don't need to minimize it. To close Auto Dark Mode, right-click the application's system tray icon and select Close.
Other Auto Dark Mode settings
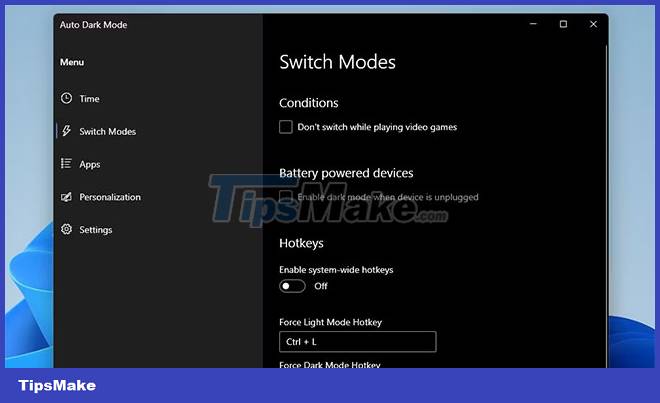
Auto Dark Mode has quite a few settings on different tabs. For example, you can set up hotkeys for dark and light modes. To do so, click the Force Light Mode Hotkey or Force Dark Mode Hotkey box on the Switch Modes tab . Then press a hotkey like Ctrl + L or Ctrl + D for the mode you selected. To apply hotkeys, enable the Enable system-wide hotkeys option .
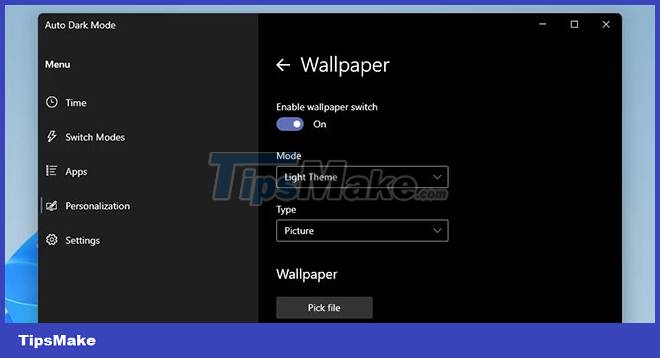
You can choose different desktop wallpapers for light and dark modes. To do that, click the Pick a wallpaper option on the Personalization tab .
Enable the Enable wallpaper switch setting and select a mode in the Mode drop-down menu. Select the Picture option on the Type drop-down menu and select Pick a file to select the background image. The desktop wallpaper will then change to the wallpaper you selected when light or dark mode is on.
You should read it
- ★ How to change the background light and dark Windows with 1 mouse click
- ★ How to automatically switch dark backgrounds on Windows 10
- ★ How to use Mojave's Dark Mode on Mac right now?
- ★ What is the dark mode (dark mode)? Benefits and harms that dark background mode brings?
- ★ Why doesn't Dark Mode help improve battery life on your laptop?